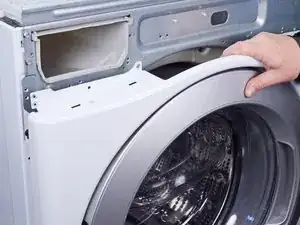
Introduction

Use this guide to remove the temperature sensor or thermistor in your LG front load washing machine.

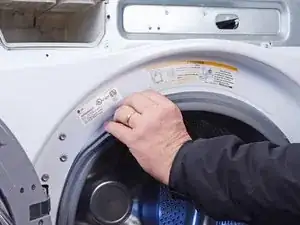
The temperature sensor tells the washer what the water temperature is at. If your washer throws a "TE error", replacing this sensor may fix the issue. The temperature sensor is mounted near the bottom of the drum.

This guide will work for most LG front load washing machines. This guide is written with a model WM3050CW washer. If you have a different model, you may encounter some minor disassembly differences, but the overall repair process will be the same.

The metal ring holding the rubber boot can be difficult to reinstall. You can buy this tool to make the reinstallation easier, or ask additional people to help.

  1. IWjgsUtZOIuShVqa
    IWjgsUtZOIuShVqa
    cmisDLhhQ1ZspJJT
    • Before you begin your repair, perform the following:

    • Turn off the main water supply
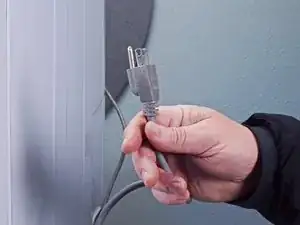
    • Unplug your washer

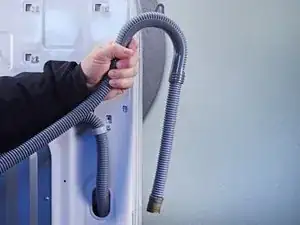
    • Disconnect all water connections at the rear of your washer

  2. a1CEVEuZVuhsJs3v
    a1CEVEuZVuhsJs3v
    s1Dx6pURHR66tbUG
    WMesicEUoODuO1DI
    • Remove the screw(s) securing the top panel brackets to the back panel.

    • You don't need to remove the screws securing the brackets to the top panel.

  3. MXS5aiRAHxRbjTgD
    MXS5aiRAHxRbjTgD
    BqIF6FiMQVaOIZZQ
    • Slide the top panel towards the rear of the device to disconnect its clips.

  4. vk2XTwmpQAn5SSnW
    vk2XTwmpQAn5SSnW
    mKqTwIkkot2M6aDA
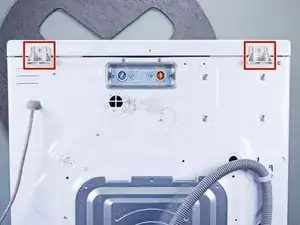
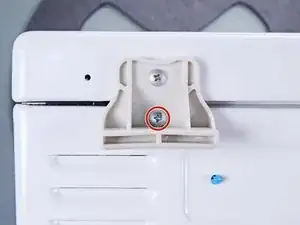
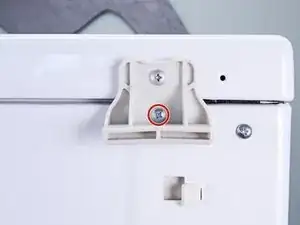
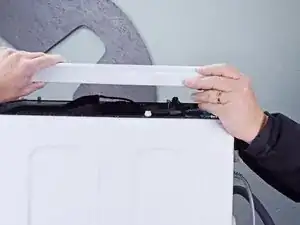
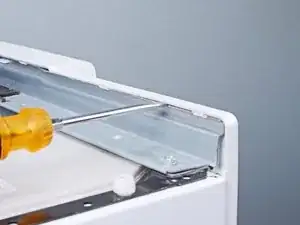
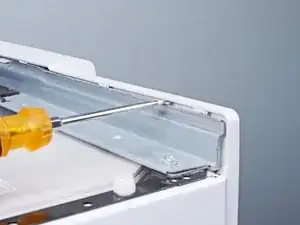
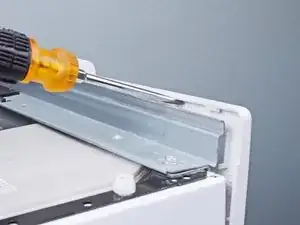
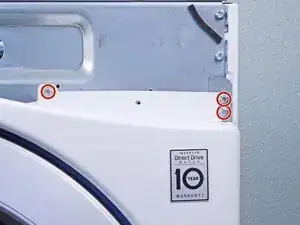
    • Tilt the top panel upward to completely disconnect it from the chassis.

    • Remove the top panel.

  5. 4sgimkxaXD3ejSwK
    4sgimkxaXD3ejSwK
    bkCBDPSK6YgGYTcr
    • Pull the detergent drawer away from the chassis as far as it will go.

  6. P6jShSDIRVTufbKa
    P6jShSDIRVTufbKa
    XRPBgqFyjRWpSKkn
    oCBTknIPcxBXF3VM
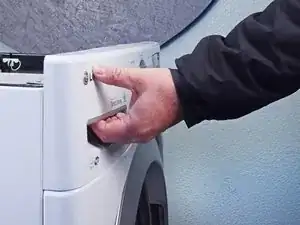
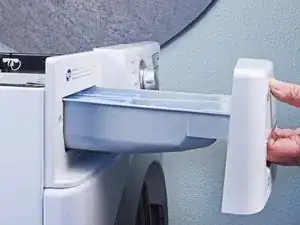
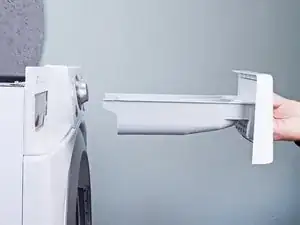
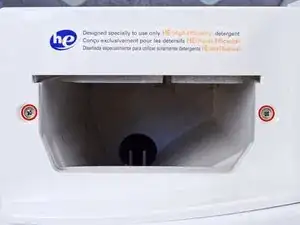
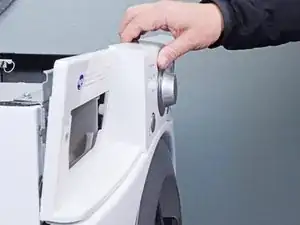
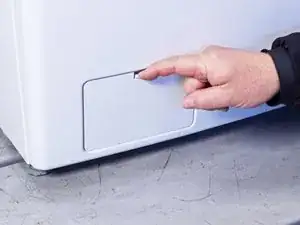
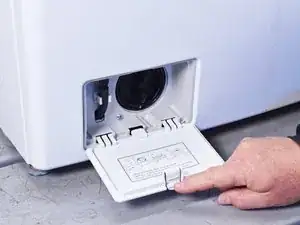
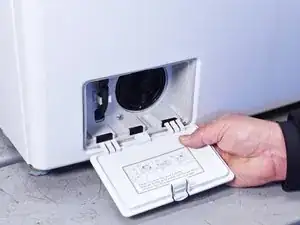
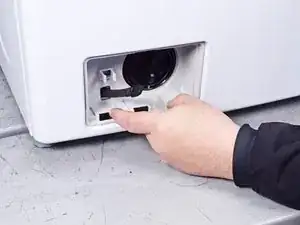
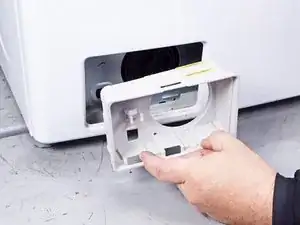
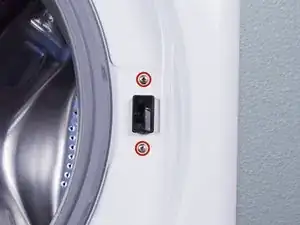
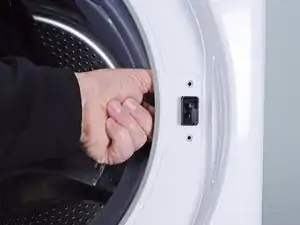
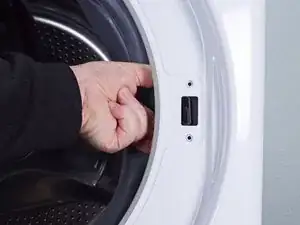
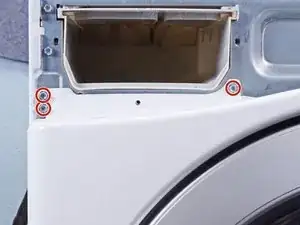
    • Press down on the "Push" button to disengage the clips securing the detergent drawer.

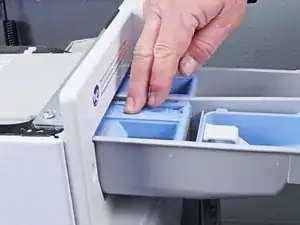
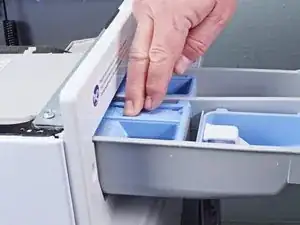
    • Pull the drawer out of its slot on the chassis and remove it.

  7. ZggChMox2CHdQQKT
    ZggChMox2CHdQQKT
    WevyfGPPM3VaJVqy
    6etGaxcS1KQCdwr1
    • Disconnect the connectors attached to the control panel.

    • Always grip cables by their connectors and not the wires themselves.

  8. wyfktcrXysd6MEbF
    wyfktcrXysd6MEbF
    xVcjUMUvZQ1KywIX
    • Remove the screw(s) securing the control panel to the top edge of the chassis.

  9. HtPUiKkN5cVYWnLd
    • Remove the screw(s) securing the detergent dispenser.

  10. NjYZQqTADGvZuhyI
    NjYZQqTADGvZuhyI
    JIrrrvJmMJUppOF5
    GQ3x4wTaWu3iwVOS
    • Use a flathead screwdriver, or a pry tool, to unclip the control panel from the chassis.

  11. sOFWfj6q1QcVriGT
    sOFWfj6q1QcVriGT
    jASuxq6RmJTE5JZB
    Do5pLK3NYMAwl1sB
    • Remove the control panel, making sure to thread any cables through the chassis.

  12. lERChQsMqtoA14FN
    lERChQsMqtoA14FN
    XoNrIhjubHRStWk2
    • Open the front door completely.

  13. fRwoHnNHWQyyOE5N
    fRwoHnNHWQyyOE5N
    FWtBKXZjEQHtEcPl
    vMNOnuBCb6NBJCOO
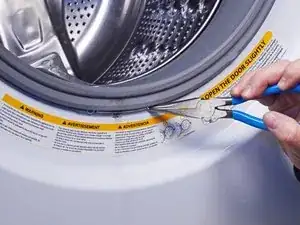
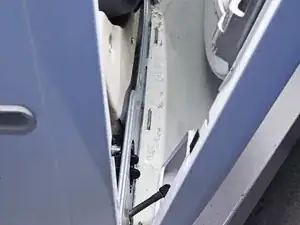
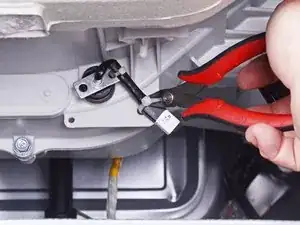
    • Use needle nose pliers to grip the spring end of the metal ring at the bottom of the rubber boot.

    • Pull the ring away from the chassis to separate it from the boot.

  14. 5BScRDtL1GYXba64
    5BScRDtL1GYXba64
    WguErBUMUrceSaCc
    CvlKmPosHWtNmyIP
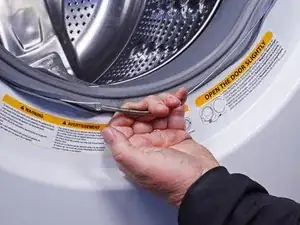
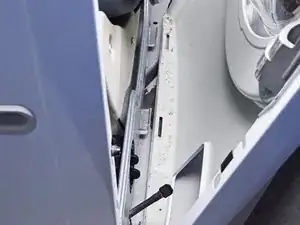
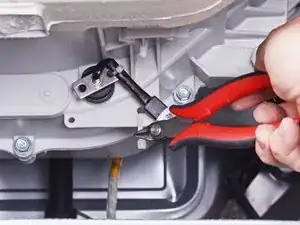
    • Use your hand to completely pull the ring off the boot.

    • During reassembly, perform the following:

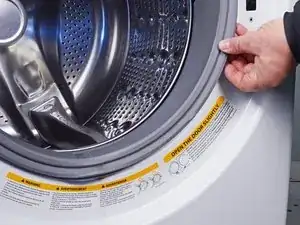
    • Insert one end of the ring into its groove along the boot's perimeter.

    • Use pliers to slowly stretch the ring around the boot's perimeter until it's completely nested in its groove.

    • Be sure the spring is centered at the bottom of the boot when you reinstall it.

    • This procedure will take significant force.

  15. 3C1YfXNMPqbrF3Za
    3C1YfXNMPqbrF3Za
    VhKafCDRNSuXRCfO
    aadpLTLdZlHyEYn1
    • Use your fingers to pull the boot off its lip on the front panel.

  16. yRvZiSWkyppoXJJh
    yRvZiSWkyppoXJJh
    c2IlueHVDKoKCiqH
    njFkud1IM6aRsbZW
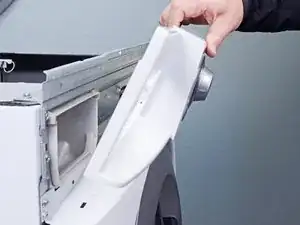
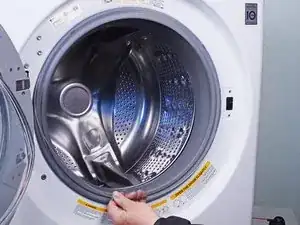
    • Slide your fingers around the lip of the boot until it's completely separated from the panel.

  17. IhXGsYDnOVcBfPwO
    IhXGsYDnOVcBfPwO
    pJjGVKZSbGtlDcbV
    Nosqldhf3NGeMTOv
    • Open the filter panel at the bottom of the front panel.

    • Unclip the filter panel.

  18. nMseX3ElIXa2X3dx
    nMseX3ElIXa2X3dx
    2yBNEEe4YLbdkaOu
    GPuN2oTW1UGFrjh5
    • Generally, you should drain your machine when you are repairing the pumps or any hoses leading to or from them.

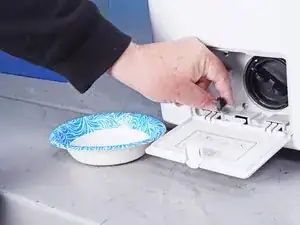
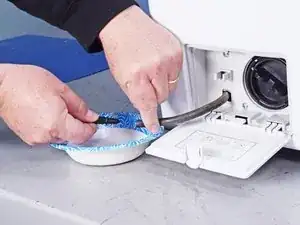
    • Place a bowl next to the machine.

    • Pull the drain filter hose out of its slot in the chassis enough to lay over the bowl.

    • Remove the plug at the end of the drain filter hose to release excess water into the bowl.

    • During reassembly, re-plug the drain filter hose and thread it back through its slot in the chassis.

  19. Z3gnFZGyUKXW4cNg
    • Remove the screw(s) securing the filter trim.

  20. MsJuQjkvmCSZLrFY
    MsJuQjkvmCSZLrFY
    ex66LGcxBSPwZxPw
    • Pull the filter trim straight off the front panel to remove it.

  21. t31K6Rxlj1ELdbGu
    • Remove the screw(s) securing the lower front panel.

  22. ovqBAeTamd26hQv1
    • Remove the screw(s) securing the door latch.

  23. adxbwLXHpvrid1Cm
    adxbwLXHpvrid1Cm
    wHD5ZEaaBJSKJCbl
    jAuwv2BDCGncbXhX
    • Pull the door latch through its slot in the chassis and let it hang on its wire.

  24. HVmAbgsV1ruZIkcv
    HVmAbgsV1ruZIkcv
    VLRVHhubqtPfheIF
    LwxKPngk2Oxw11bK
    • Hold the front panel against the chassis while performing this step to prevent it from falling.

    • Remove the screw(s) securing the front panel.

  25. gRTGq5lKBOOcJSjr
    gRTGq5lKBOOcJSjr
    UyVeQ5dWIdmG16XI
    yMCE61kYFRAfNyiK
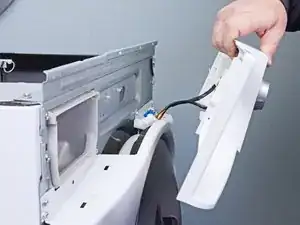
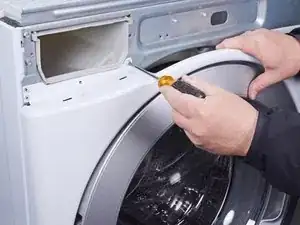
    • Lift the front panel upward to separate it from its clips on the bottom of the chassis.

    • Pull the front panel away from the chassis to completely separate the front panel.

  26. deURxTIjy323qoKV
    • Remove the front panel.

  27. EMRsUBkkcqEGT2XS
    EMRsUBkkcqEGT2XS
    EIZrbMBpJCBZQNhD
    • Disconnect the temperature sensor attached to the chassis.

    Can I buy the blue and white wires

    kyle foss -

    You would likely have to buy the whole wiring harness. You would be better off just splicing those wires if needed.

    Bill Gilbert -

  28. aQFEYWKPSZSSuIaj
    aQFEYWKPSZSSuIaj
    2fnVI6LtfMHDQUbj
    • If your device doesn't use cable ties to secure its thermistor, skip this step.

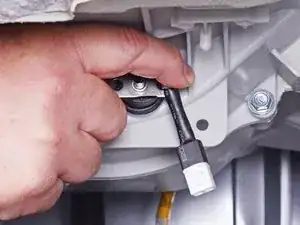
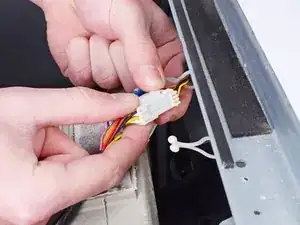
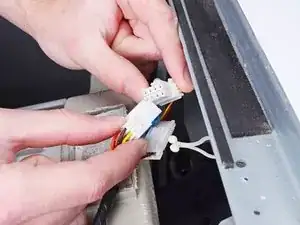
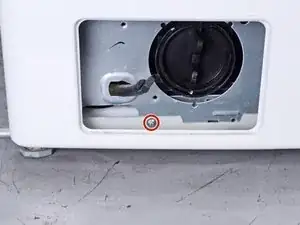
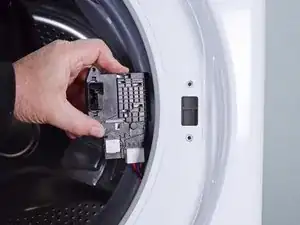
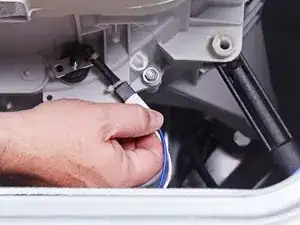
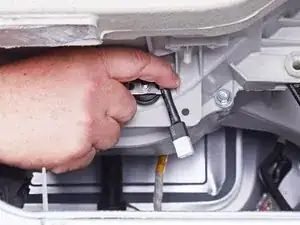
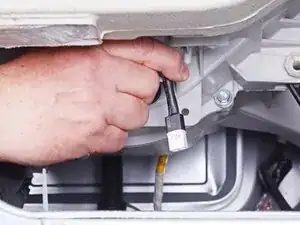
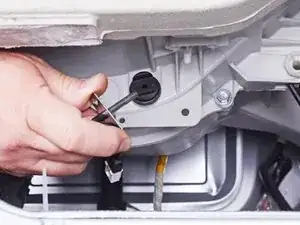
    • Use angle cutters, or scissors, to cut any cable ties securing the temperature sensor to the chassis.

  29. HoQO42mrkXkOQiUU
    HoQO42mrkXkOQiUU
    DghIXtnGcHHhDuhk
    jhwZ2DsNZKV2LDVD
    • Pull the temperature sensor straight out of its slot in the chassis to remove it.

Conclusion

To reassemble your device, follow these instructions in reverse order.

Take your e-waste to an R2 or e-Stewards certified recycler.

Repair didn’t go as planned? Ask our Answers community for help.

Bill Gilbert

Member since: 30/06/22

35117 Reputation

7 comments

Awesome thank you

kell kg -

Thank you. the WM2240CW model lower panel screw is a tough fit for a screw driver. I had to tilt the front panel to access the lower panel screw.

Nathan Lee -

Or you could just flip unit on it's side and access it underneath in about 15 minutes....

Kale Martin -

While this is a speedy way to gain access, it is not what LG recommends. (Not that every manufacturer's recommendation is the only way to go, but in this case...) Front-load units have shipping bolts that are supposed to be installed so they can be shipped or moved to a new location. They hold the tub in place so the suspension can't shift in ways it isn't designed to accommodate (on its side is one of those directions). Several potential issues can arise if they aren't in place. Suspension springs can come loose if the spring retainer isn't fully in place. You might also have a hose pull loose from the tub. The suspension dampers aren't meant to bear the load of the tub and drum laterally. The front tub boot may be pulled loose. So, if you choose this access route, strongly consider installing the shipping bolts, tipping the unit to the rear, and securely supporting it from underneath in that position. Since the temperature sensor is on the bottom of the tub, it can be reached this way.

Bill Gilbert -

Nice to see all the steps to pen the front of the machine but it would have been worth mentioning: if you can tip the machine back and secure it at an angle you can access these parts through the open bottom. Without removing a single screw.

Aingle112 -

WM2140C: The instructions were excellent - even though tipping is an option that as noted by Kale comes also with some caveats... Trouble is, I replaced the thermistor and ran five cycles only to have the error return... what are the odds the replacement thermistor was also bad OR could there be something in that circuit causing it to go bad?

Timothy Nieves -

Your best bet is to carefully check the wiring harness. You should be able to determine which connector on the main control board comes from the temperature sensing thermistor, and then you can check all the wire by making your test at the control board harness. You should get the room temperature thermistor resistance reading at that point. Then you may be able to jump the thermistor connection at the thermistor end and use a continuity beeper while you manually move the harness around to see if you have an intermittent failure. Not likely that the control board is frying the thermistor. They usually only apply a potential of a few volts and then monitor the voltage drop. You can try to check this voltage but I think the wiring harness will be more fruitful. Look especially near clamps that hold the harness where the wire can flex because of drum movement.

Bill Gilbert -