Introduction

Use this guide to replace the rotor position sensor in your LG front load washing machine.

The rotor position sensor is a Hall effect sensor that detects the primary motor's position, direction, and speed.

This guide will work for most LG front load washing machines. This guide is written with a model WM3050CW washer. If you have a different model, you may encounter some minor disassembly differences, but the overall repair process will be the same.

  1. IWjgsUtZOIuShVqa
    IWjgsUtZOIuShVqa
    cmisDLhhQ1ZspJJT
    • Before you begin your repair, perform the following:

    • Turn off the main water supply
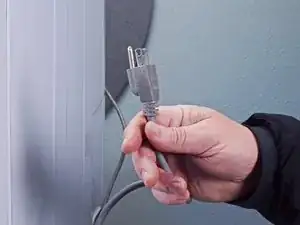
    • Unplug your washer

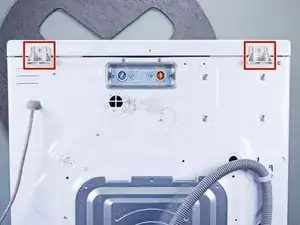
    • Disconnect all water connections at the rear of your washer

  2. a1CEVEuZVuhsJs3v
    a1CEVEuZVuhsJs3v
    s1Dx6pURHR66tbUG
    WMesicEUoODuO1DI
    • Remove the screw(s) securing the top panel brackets to the back panel.

    • You don't need to remove the screws securing the brackets to the top panel.

  3. MXS5aiRAHxRbjTgD
    MXS5aiRAHxRbjTgD
    BqIF6FiMQVaOIZZQ
    • Slide the top panel towards the rear of the device to disconnect its clips.

  4. vk2XTwmpQAn5SSnW
    vk2XTwmpQAn5SSnW
    mKqTwIkkot2M6aDA
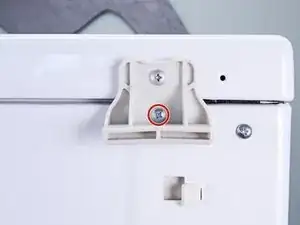
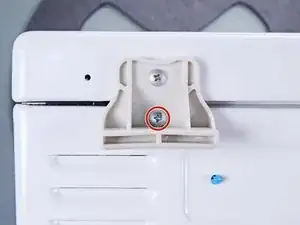
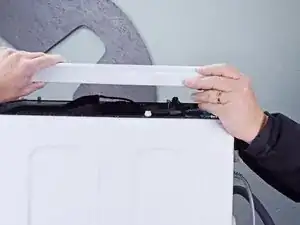
    • Tilt the top panel upward to completely disconnect it from the chassis.

    • Remove the top panel.

  5. UbPISVaNbMZCSqrJ
    UbPISVaNbMZCSqrJ
    rIhahTuBa2tFG6Ud
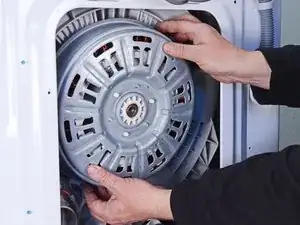
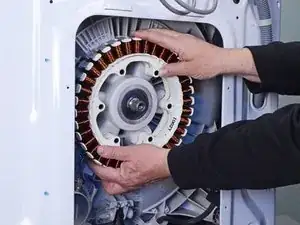
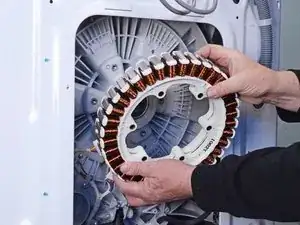
    • Use an impact driver to remove the 17 mm nut securing the rotor.

    • Alternatively, you can use a wrench and a hammer to loosen the nut.

    • To secure the rotor, you can insert a screwdriver, or a similar tool, between the rotor and the stator. Make sure to brace the tool against one of the screw bosses on the stator.

  6. Xu4qysZjHOMpmEyC
    Xu4qysZjHOMpmEyC
    II5u5VTQ1Wi56w2V
    • The rotor is magnetically attracted to the stator.

    • Pull the rotor straight off the stator and drive shaft splines to remove it.

    • Wiggle the rotor as you pull to help disconnect it.

    • This may require significant force.

    • During reassembly, watch your fingers when aligning the rotor over the stator, as the rotor gets sucked in easily.

    The wd14071sd6 model includes a white plastic guard at the top of the rotor that appears to be a failsafe to keep the rotor inplace. Remove the two phillips head screws and this guard BEFORE you attempt to pull the rotor off.

    Phill Birtles -

    Thank you for your contribution! Having information about machines that are similar but found in a different part of the world is a plus!

    Bill Gilbert -

  7. 22JcVTLtF5WEjc62
    • Remove the screw(s) securing the motor harness clamps.

  8. mMdGZi2SYCHnZ2id
    mMdGZi2SYCHnZ2id
    hh1AUNHuVNqRYROs
    • Hold the stator up as you unfasten the last few bolts, as it can fall over unexpectedly.

    • Remove the bolt(s) securing the stator.

    • During reassembly, refasten the screws in a "star" pattern.

  9. srsQ1jEspNEVEUCD
    srsQ1jEspNEVEUCD
    MhPqemWPVZhEUe5s
    V2vkxaT6ACwSIZuU
    • Don't pull the stator too far away from the device, as it's still connected by wires.

    • Pull the stator off of the drum and flip it so its rear is facing upward.

    • Note the position of the stator before continuing, as you will need it face the proper direction during reassembly.

  10. OR2Z1PnkOIHsFhoY
    OR2Z1PnkOIHsFhoY
    sPnKKvv5KCJgwBjJ
    • Pull the rotor position sensor connector straight out of its socket to disconnect it.

  11. DFG1HejLTHnoM1kc
    DFG1HejLTHnoM1kc
    DrCioQwJOPb4KefM
    G2NeeoFIvkbRQCP2
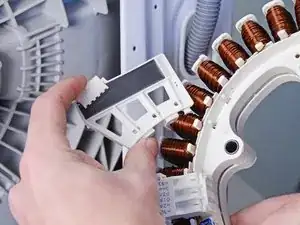
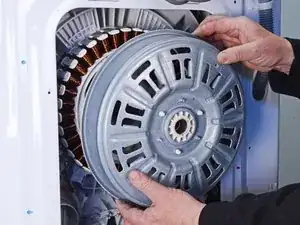
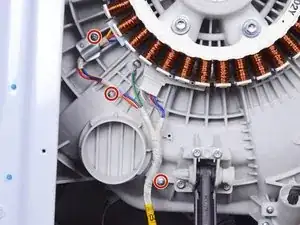
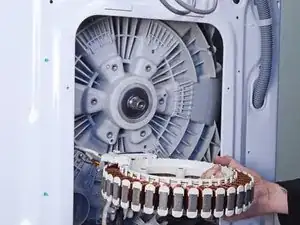
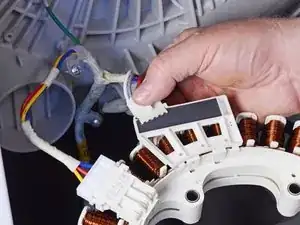
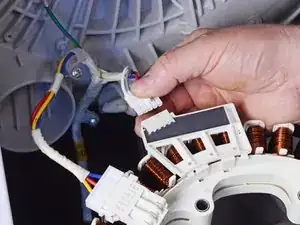
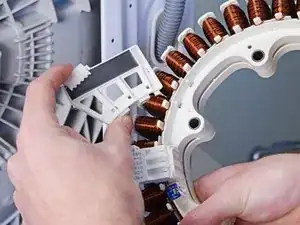
    • Use your fingers to unclip the rotor position sensor from the stator.

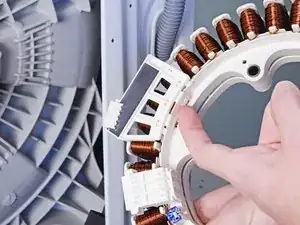
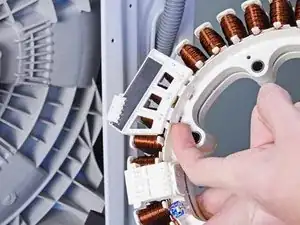
    • Pull the sensor away from the stator to completely unclip it.

    • Remove the rotor position sensor.

Conclusion

To reassemble your device, follow these instructions in reverse order.

Take your e-waste to an R2 or e-Stewards certified recycler.

Repair didn’t go as planned? Ask our Answers community for help.

Bill Gilbert

Member since: 30/06/22

35117 Reputation

2 comments

Thank you and your video, I was able to replace my motor rotor position sensor easily and avoided throwing away a good washer (8 years old), $700 for a new one, not to mention the damage to the environment. Need sockets, 17mm and 10mm. I recommend to test the resistance of the part(see Felix Techno Aid video), before installation to make sure the part is good. I want to acknowledge other good videos on this subject, Felix Techno Aid, Appliance Parts Pros.com, Repair Clinic.com and IFixit by Bill Gilbert. Thank you all for your videos.

Prasad Gogineni -

I did not have to disconnect the water hoses or remove the top cover as shown in this video. I had lot of room in the laundry to move it around. This video is missing the step to show removal of the back panel to get access to the motor (before step 5).

Prasad Gogineni -