Introduction

Follow this guide to replace the drain pump motor in your LG front load washing machine.

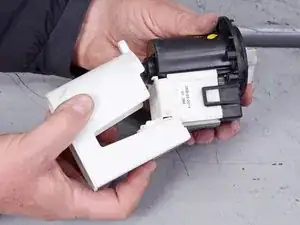
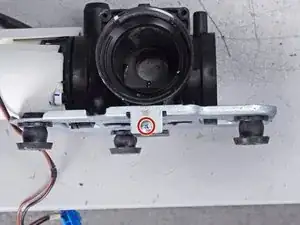
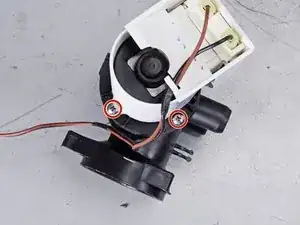
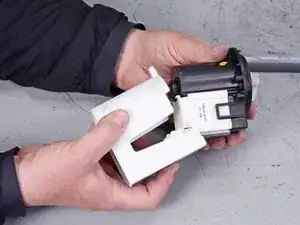
The drain pump motor is part of the pump assembly. It drains the tub and expels the wastewater out of the washer. If your washer isn't draining, you may need to replace this motor.

This guide will work for most LG front load washing machines. This guide is written with a model WM3050CW washer. If you have a different model, you may encounter some minor disassembly differences, but the overall repair process will be the same.

The metal ring holding the rubber boot can be difficult to reinstall. You can buy this tool to make the reinstallation easier, or ask additional people to help.

  1. IWjgsUtZOIuShVqa
    IWjgsUtZOIuShVqa
    cmisDLhhQ1ZspJJT
    • Before you begin your repair, perform the following:

    • Turn off the main water supply
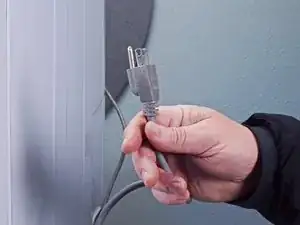
    • Unplug your washer

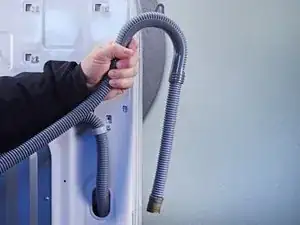
    • Disconnect all water connections at the rear of your washer

  2. a1CEVEuZVuhsJs3v
    a1CEVEuZVuhsJs3v
    s1Dx6pURHR66tbUG
    WMesicEUoODuO1DI
    • Remove the screw(s) securing the top panel brackets to the back panel.

    • You don't need to remove the screws securing the brackets to the top panel.

  3. MXS5aiRAHxRbjTgD
    MXS5aiRAHxRbjTgD
    BqIF6FiMQVaOIZZQ
    • Slide the top panel towards the rear of the device to disconnect its clips.

  4. vk2XTwmpQAn5SSnW
    vk2XTwmpQAn5SSnW
    mKqTwIkkot2M6aDA
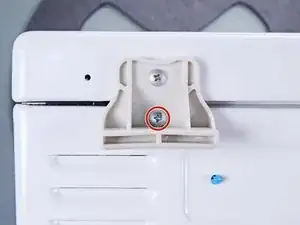
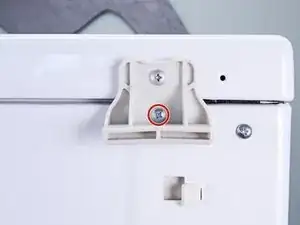
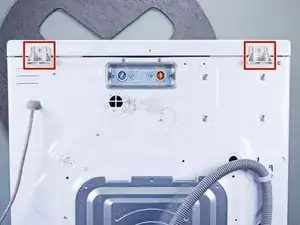
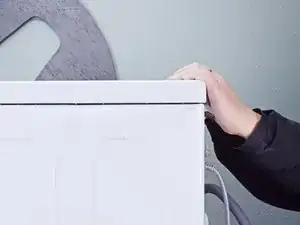
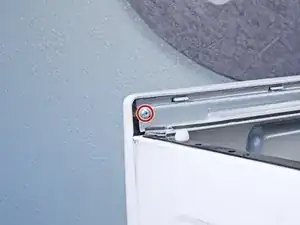
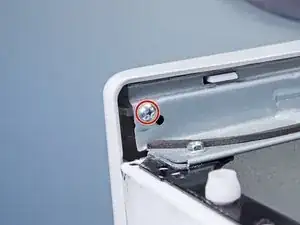
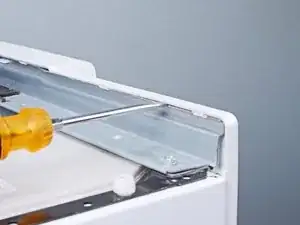
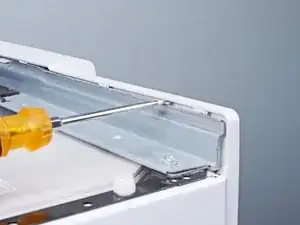
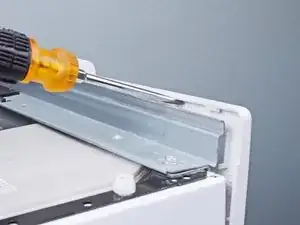
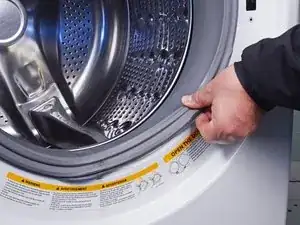
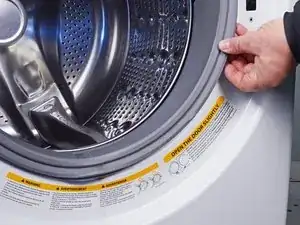
    • Tilt the top panel upward to completely disconnect it from the chassis.

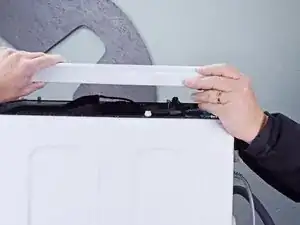
    • Remove the top panel.

  5. 4sgimkxaXD3ejSwK
    4sgimkxaXD3ejSwK
    bkCBDPSK6YgGYTcr
    • Pull the detergent drawer away from the chassis as far as it will go.

  6. P6jShSDIRVTufbKa
    P6jShSDIRVTufbKa
    XRPBgqFyjRWpSKkn
    oCBTknIPcxBXF3VM
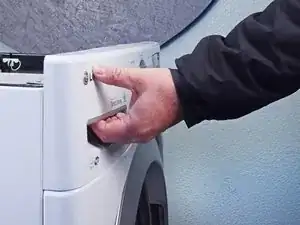
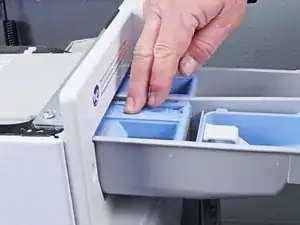
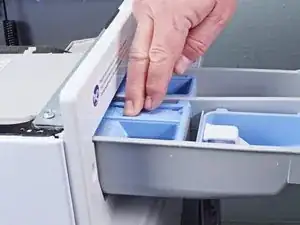
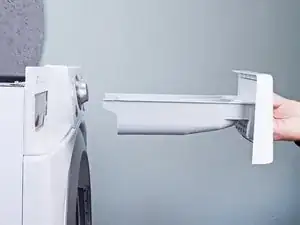
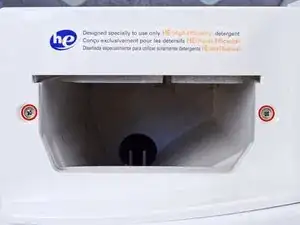
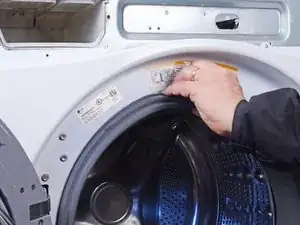
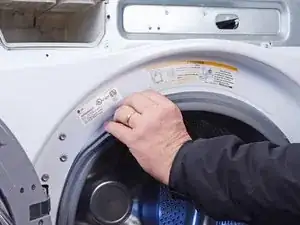
    • Press down on the "Push" button to disengage the clips securing the detergent drawer.

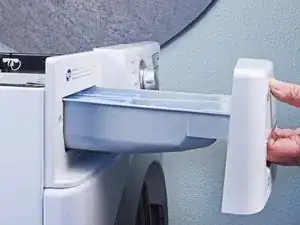
    • Pull the drawer out of its slot on the chassis and remove it.

  7. ZggChMox2CHdQQKT
    ZggChMox2CHdQQKT
    WevyfGPPM3VaJVqy
    6etGaxcS1KQCdwr1
    • Disconnect the connectors attached to the control panel.

    • Always grip cables by their connectors and not the wires themselves.

  8. wyfktcrXysd6MEbF
    wyfktcrXysd6MEbF
    xVcjUMUvZQ1KywIX
    • Remove the screw(s) securing the control panel to the top edge of the chassis.

  9. HtPUiKkN5cVYWnLd
    • Remove the screw(s) securing the detergent dispenser.

  10. NjYZQqTADGvZuhyI
    NjYZQqTADGvZuhyI
    JIrrrvJmMJUppOF5
    GQ3x4wTaWu3iwVOS
    • Use a flathead screwdriver, or a pry tool, to unclip the control panel from the chassis.

  11. sOFWfj6q1QcVriGT
    sOFWfj6q1QcVriGT
    jASuxq6RmJTE5JZB
    Do5pLK3NYMAwl1sB
    • Remove the control panel, making sure to thread any cables through the chassis.

  12. lERChQsMqtoA14FN
    lERChQsMqtoA14FN
    XoNrIhjubHRStWk2
    • Open the front door completely.

  13. fRwoHnNHWQyyOE5N
    fRwoHnNHWQyyOE5N
    FWtBKXZjEQHtEcPl
    vMNOnuBCb6NBJCOO
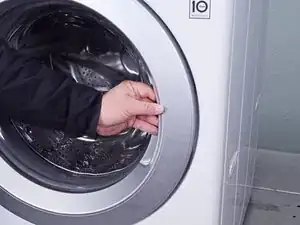
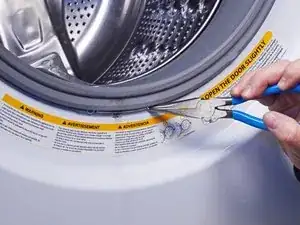
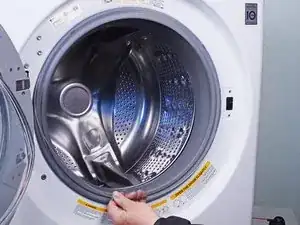
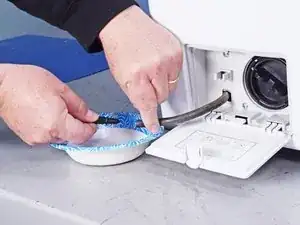
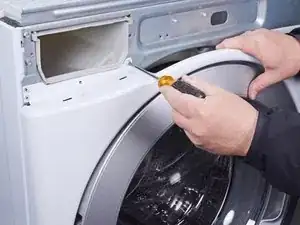
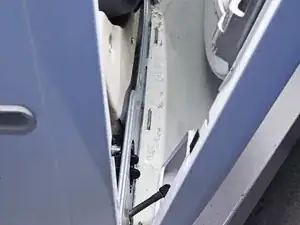
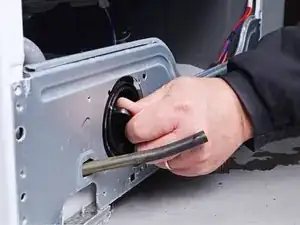
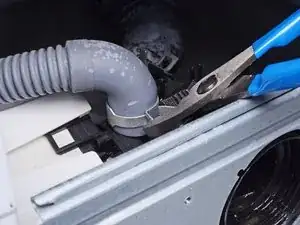
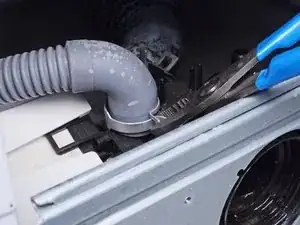
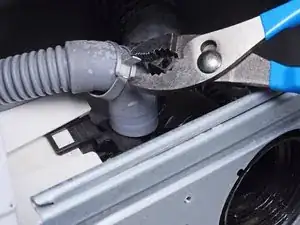
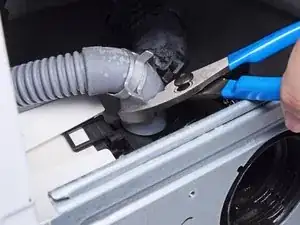
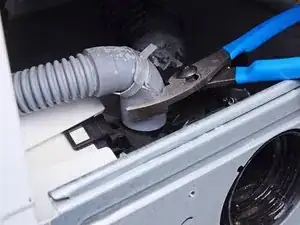
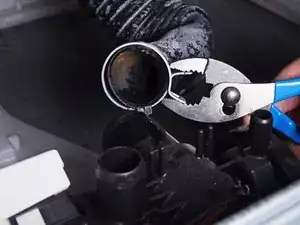
    • Use needle nose pliers to grip the spring end of the metal ring at the bottom of the rubber boot.

    • Pull the ring away from the chassis to separate it from the boot.

  14. 5BScRDtL1GYXba64
    5BScRDtL1GYXba64
    WguErBUMUrceSaCc
    CvlKmPosHWtNmyIP
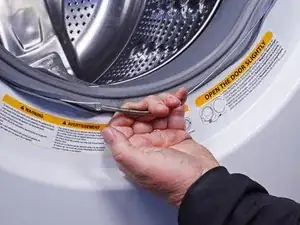
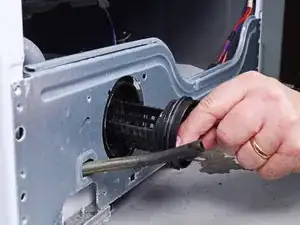
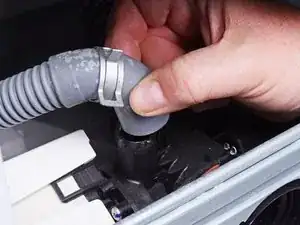
    • Use your hand to completely pull the ring off the boot.

    • During reassembly, perform the following:

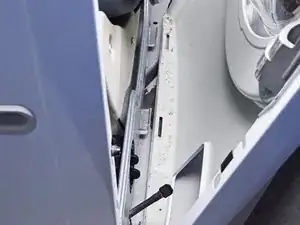
    • Insert one end of the ring into its groove along the boot's perimeter.

    • Use pliers to slowly stretch the ring around the boot's perimeter until it's completely nested in its groove.

    • Be sure the spring is centered at the bottom of the boot when you reinstall it.

    • This procedure will take significant force.

  15. 3C1YfXNMPqbrF3Za
    3C1YfXNMPqbrF3Za
    VhKafCDRNSuXRCfO
    aadpLTLdZlHyEYn1
    • Use your fingers to pull the boot off its lip on the front panel.

  16. yRvZiSWkyppoXJJh
    yRvZiSWkyppoXJJh
    c2IlueHVDKoKCiqH
    njFkud1IM6aRsbZW
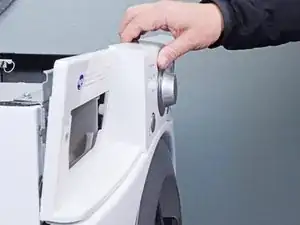
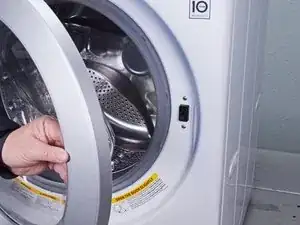
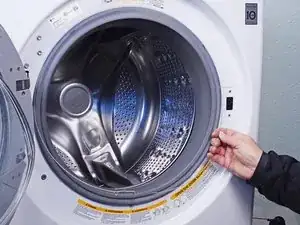
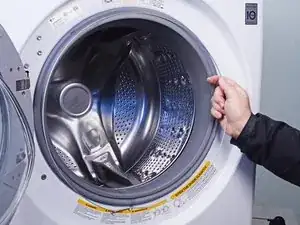
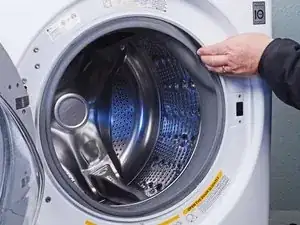
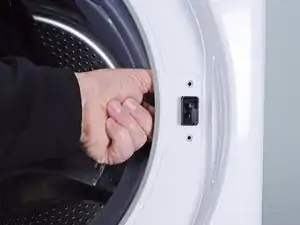
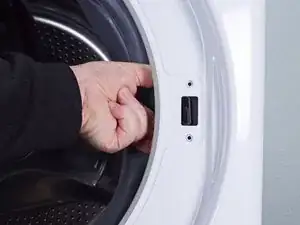
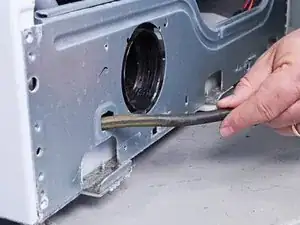
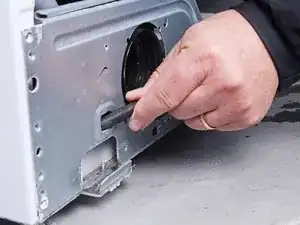
    • Slide your fingers around the lip of the boot until it's completely separated from the panel.

  17. IhXGsYDnOVcBfPwO
    IhXGsYDnOVcBfPwO
    pJjGVKZSbGtlDcbV
    Nosqldhf3NGeMTOv
    • Open the filter panel at the bottom of the front panel.

    • Unclip the filter panel.

  18. nMseX3ElIXa2X3dx
    nMseX3ElIXa2X3dx
    2yBNEEe4YLbdkaOu
    GPuN2oTW1UGFrjh5
    • Generally, you should drain your machine when you are repairing the pumps or any hoses leading to or from them.

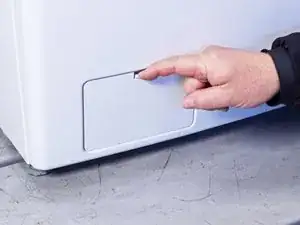
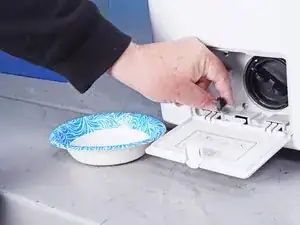
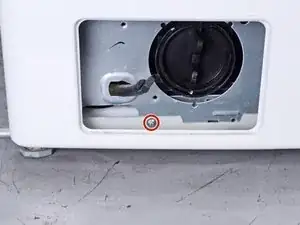
    • Place a bowl next to the machine.

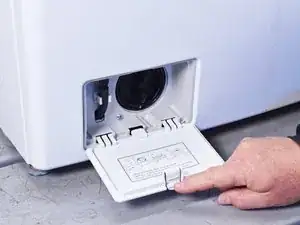
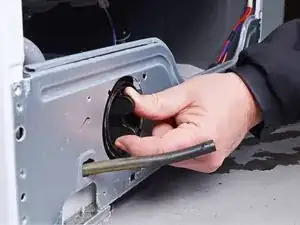
    • Pull the drain filter hose out of its slot in the chassis enough to lay over the bowl.

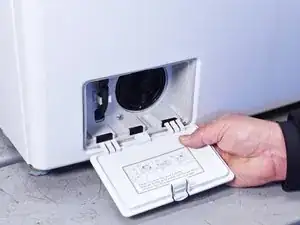
    • Remove the plug at the end of the drain filter hose to release excess water into the bowl.

    • During reassembly, re-plug the drain filter hose and thread it back through its slot in the chassis.

  19. Z3gnFZGyUKXW4cNg
    • Remove the screw(s) securing the filter trim.

  20. MsJuQjkvmCSZLrFY
    MsJuQjkvmCSZLrFY
    ex66LGcxBSPwZxPw
    • Pull the filter trim straight off the front panel to remove it.

  21. t31K6Rxlj1ELdbGu
    • Remove the screw(s) securing the lower front panel.

  22. ovqBAeTamd26hQv1
    • Remove the screw(s) securing the door latch.

  23. adxbwLXHpvrid1Cm
    adxbwLXHpvrid1Cm
    wHD5ZEaaBJSKJCbl
    jAuwv2BDCGncbXhX
    • Pull the door latch through its slot in the chassis and let it hang on its wire.

  24. HVmAbgsV1ruZIkcv
    HVmAbgsV1ruZIkcv
    VLRVHhubqtPfheIF
    LwxKPngk2Oxw11bK
    • Hold the front panel against the chassis while performing this step to prevent it from falling.

    • Remove the screw(s) securing the front panel.

  25. gRTGq5lKBOOcJSjr
    gRTGq5lKBOOcJSjr
    UyVeQ5dWIdmG16XI
    yMCE61kYFRAfNyiK
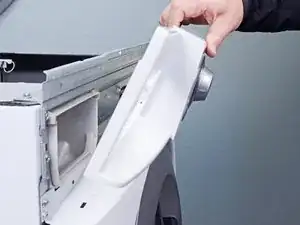
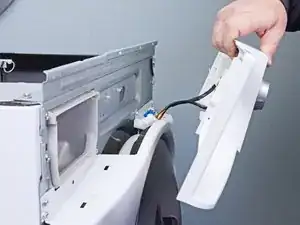
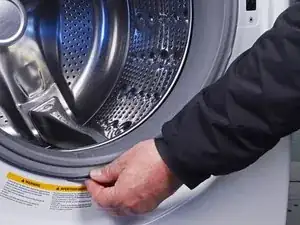
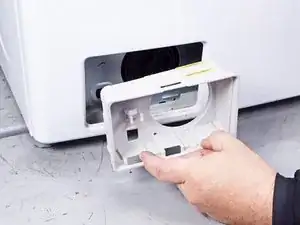
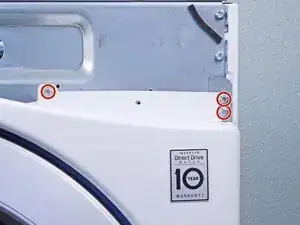
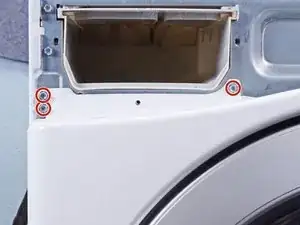
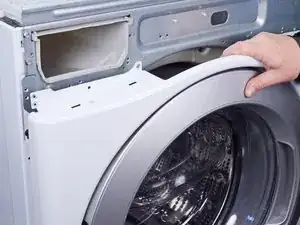
    • Lift the front panel upward to separate it from its clips on the bottom of the chassis.

    • Pull the front panel away from the chassis to completely separate the front panel.

  26. deURxTIjy323qoKV
    • Remove the front panel.

  27. Knf1iPXurXSrcNQk
    Knf1iPXurXSrcNQk
    GvJjp5fmbtBXQVH1
    YTjWCcNZFEWUHZ2J
    • Twist and remove the pump filter.

  28. IvmbeXs4IvMocwpM
    IvmbeXs4IvMocwpM
    nvBs6cqnuUPHCZkE
    XsX1QiDwak4QEFRe
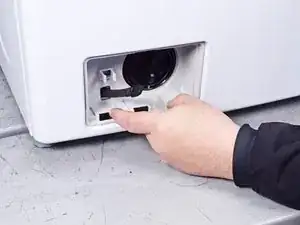
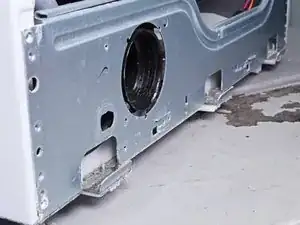
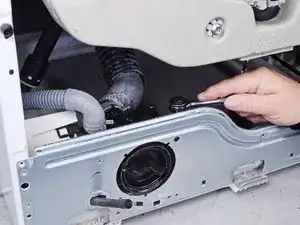
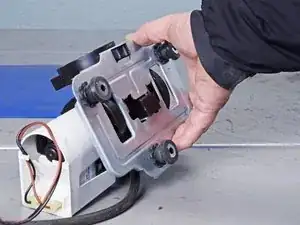
    • Push the drain hose through its hole in the chassis until it's completely inside the device.

  29. wEUPErucYEU4JoCN
    wEUPErucYEU4JoCN
    ltloElRrZpcvcOGP
    rCixJOZtPMSvdwJm
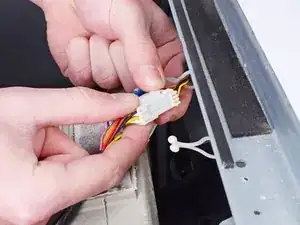
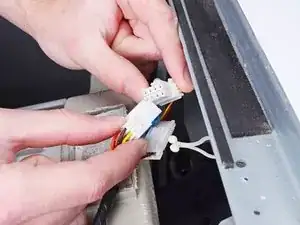
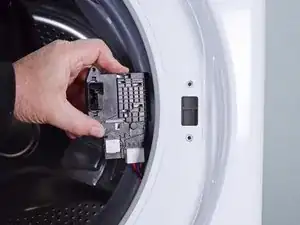
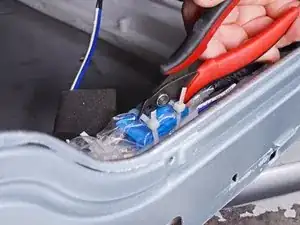
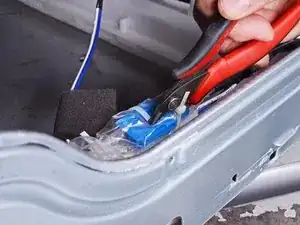
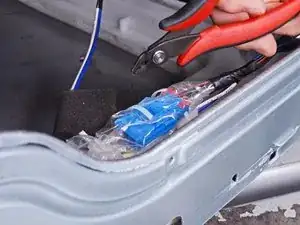
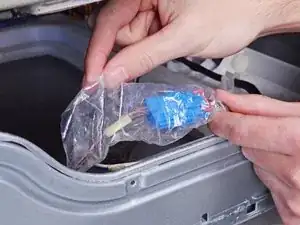
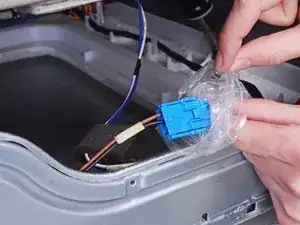
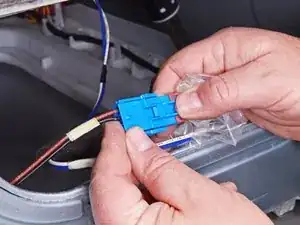
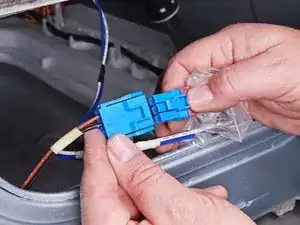
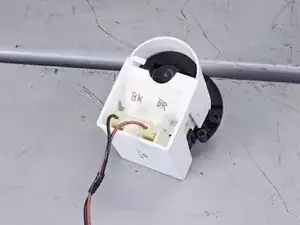
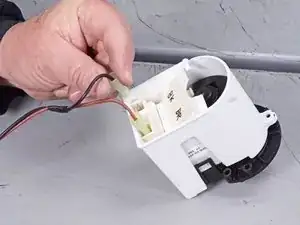
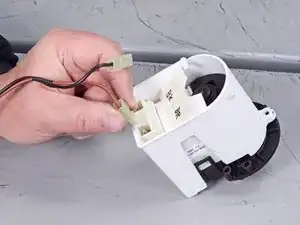
    • Use diagonal cutters, or scissors, to remove any cable ties securing the plastic wrap on the pump assembly cable connector(s).

  30. hYQRo642UDQP1NbD
    hYQRo642UDQP1NbD
    VS6ntKo1YHVijYnd
    • Fold the plastic wrap away from the cables, enough to expose the connector(s).

    • During reassembly, replace the cable ties to ensure a water-tight fit for the plastic wrap.

  31. JfZuqaEobYp1PHW6
    JfZuqaEobYp1PHW6
    IvkqNMeZbo1OJ4iW
    • Disconnect the connector(s) attached to the pump cable.

    • Always grip cables by their connectors and not the wires themselves.

  32. XlcFwTS36dKf53Gh
    XlcFwTS36dKf53Gh
    EmxntvljDW5MJrfh
    tedf2PGe6J1reWTD
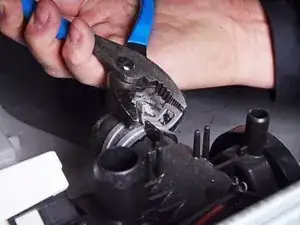
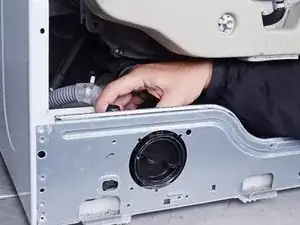
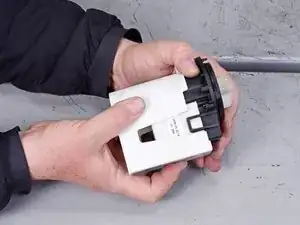
    • Use slip joint pliers to pinch the drain hose clamp and slide it up the hose away from the pump assembly.

  33. h6TuqTmPZSDPVXRI
    h6TuqTmPZSDPVXRI
    DvA455QCGIaEUBMp
    XCGri3LbXcfLOmSK
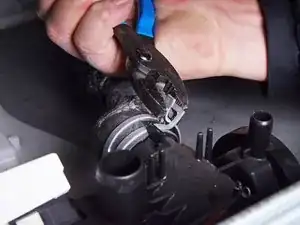
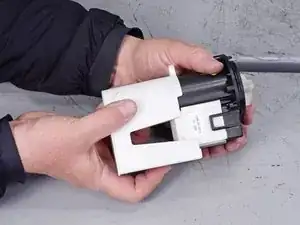
    • Use slip joint pliers to rotate the drain hose back and forth around its connection and loosen it.

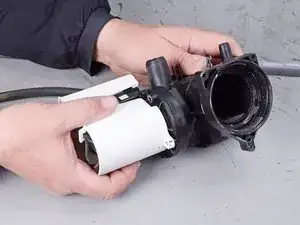
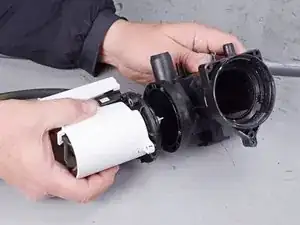
    • Pull the drain hose straight off its connection on the assembly.

  34. VIwugYLPTIcjiNTL
    VIwugYLPTIcjiNTL
    UZureow2H4DB4MjD
    vnUGZBNOgDNLwArX
    • Repeat the last two steps for the pump hose.

  35. WEgnf4IILGvIsYwU
    WEgnf4IILGvIsYwU
    MMt2ZvZTN4WI5nKE
    • Remove the screw(s) securing the pump assembly to the bottom lip of the washer.

  36. GfgQlWKvoGXrZEgo
    GfgQlWKvoGXrZEgo
    vYDoxqrLAny4dk5b
    Es5GCQrnbJfYC2Ye
    • Lift the pump assembly out of its location in the frame to remove it.

  37. QMbvPJusC65mIjnt
    QMbvPJusC65mIjnt
    p2pa6AQjNKctPNYq
    • Remove the screw(s) securing the pump bracket.

  38. gPqOe4sIGv5MxmP1
    gPqOe4sIGv5MxmP1
    ufY5eHdHxAFxXNHy
    • Pull the pump bracket straight off the pump body to remove it.

  39. JtOylH3lkLbE5XHy
    JtOylH3lkLbE5XHy
    3hASjYpeIWeT3uIE
    • To avoid confusion, note the locations of the motor screws.

    • Remove the screw(s) securing the pump motor.

  40. DjD4oKcHqywYWHES
    DjD4oKcHqywYWHES
    ZCLZfAO6wY3yWPGT
    • Pull the pump motor straight off the pump to remove it.

  41. lNU6hJntoJvH53sY
    lNU6hJntoJvH53sY
    OZc1ZAR5mKoFHRgN
    idPwOOjPSOtwp2AY
    • To prevent confusion, label each connector with its corresponding cable color.

    • Disconnect the connector(s) attached to the pump motor.

    • Always grip cables by their connectors and not the wires themselves.

  42. 6HrFFVAnoF4RZwd3
    6HrFFVAnoF4RZwd3
    lYq2abGsXc14e13U
    sYNUR4GUQVOlGCtI
    • Pull the plastic pump housing off of the motor and remove it.

    • Set this housing aside, as you will need to reinstall it on the new pump motor.

Conclusion

To reassemble your device, follow these instructions in reverse order.

Take your e-waste to an R2 or e-Stewards certified recycler.

Repair didn’t go as planned? Ask our Answers community for help.

Bill Gilbert

Member since: 30/06/22

35117 Reputation

11 comments

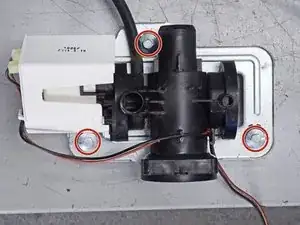
Way to complicated. Unplug the machine. Tilt it back 45 degrees. The whole bottom of the machine is wide open. Unplug the blue and black wires. Loosen the three screws that hold the motor. Remove the motor and put in the new one. Tighten the three screws. Attach the two wires. Put the washing machine back on 4 legs. Plug in the machine.

Time to replace is about 15 minutes. I'm 74 so it takes that long.

Ronald Thompson -

Hi Ronald! I'm glad that worked out for you! Speedy too!

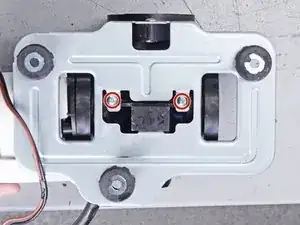
On the machine that we are showing (and many LG machines) the drain pump is hard to remove in the way that you describe because it is located with the end of the motor facing toward the outside of the machine. Access to the three screws holding the pump motor to the pump body is difficult because of this. Tilting the machine as described (45° to the rear) also subjects a number of components of the machine connected to the tub to forces in a direction that they don't normally encounter. That's why LG washers have shipping bolts that are removed (and saved) before placing the machine in service.

Bill Gilbert -

How do I remove the small, black, filter pump hose? I already have everything else apart.

TJT -

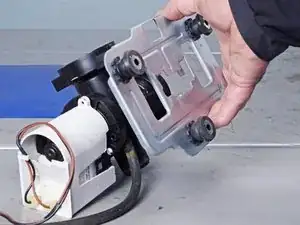
When you remove the pump body, the hose (I assume you are talking about the little drain hose) will go through the hole in the washing machine's frame. Remove the little end cap/plug and pull it through. Just remember to put it back when you replace everything. If you are talking about small black hoses connected to the circulating pump (our machine in the guide didn't have those). they are just secured with clamps.

Bill Gilbert -

To be more clear, you don't have to disconnect the small drain hose; it will come out with the pump body.

Bill Gilbert -

I extracted my pump! Thanks. But seems there are 2 pumps. Is one for recirculating? Should I replace both??? Machine had worked, just noisy. Appreciatively, Jim

James Tucker -

Very thorough! Thanks for this!! I successfully replaced the pump in my machine following these directions (for the most part). The tool list isn't quite right/complete, and there are a few unnecessary steps (like disconnecting the wires wrapped in plastic), but this will definitely get the job done.

Jenn Parker -

I replaced my drain pump, which seemed to work perfectly and solved my 0E error code. Unfortunately after only one full load, the (new) drain pump was broken, and in the same way: loose impeller (motor still spins when active). Do you have any idea why this would happen?

As far as I can tell the drain hose is completely clear, and it’s installed at about 40” above the bottom of the unit, well below the 96” max LG requires.

Perhaps the replacement unit I bought was bad, or I installed it incorrectly somehow, but these explanations seem unlikely to me.

I’m starting to even consider electrical quality as a possible cause. We’ve had our distribution transformer repaired recently by the power company, so significant and sustained over voltage on our mains is not unprecedented. I wonder if that could cause the drain motor to work far too hard, causing it to break.

I’ve ordered a second replacement, but I’m nervous I’ll just destroy a it if I install it without knowing what happened to the first unit.

Any ideas?

aaaidan -

I see a bunch of folk on another forum are complaining about this issue: that impellers on LG drain pumps come loose after only a short. Some people have replaced their pumps half a dozen times, or more. Wild.

forum.appliancepartspros.com/posts/t576500-lg-washer-eats-drain-pumps

However it seems that the issue normally happens only after at least a few months of use. For me, the impeller broke after only one load. Not sure what that means.

aaaidan -

Thanks for your questions! Please don't be insulted-you did install the new pump, right? Next thought is a returned unit that nobody checked, which might have been a broken one that was returned. That said, the thing I'd look for is something that is wedged in the throat of the pump body. The impeller fits around this item but won't move it when it tries to run. I have visions of a short pencil, a pen cap, a piece of wood. Remove the coin basket to check. There could be an item which is sucked into the pump with water flow, then falls back when the pump shuts off. When you replace the pump, it comes in again and breaks things. Also make sure that the impeller turns freely when the pump is installed. Make sure the machine is unplugged. You should be able to reach it by removing the coin basket/filter (the big cap that you can see when you open the little door on the front of your machine) and sticking your finger in and checking to see if you can spin it. Clean this filter while you're at it.

Bill Gilbert -

Amazing response, thanks Bill. Not offended! Worth checking, haha. But I am certain I installed the new pump because it looks completely different to the old one.

LG seems to have updated the design since my washer was manufactured. I checked the pump part number (4681EA2001T) matched in the repair manual for this washer (WM2016CW). Can’t post images here but fascinating to see how different they look. I thought I ordered the wrong part initially (but it fits perfectly).

Thanks for the help, I’ll check for a pencil or something like that in the body. It would certainly explain it.

aaaidan -