Introduction

Use this guide to replace the power button board in your Kobo Clara Colour eReader.

If your power button isn't working, but all other functions are working properly, you may need to replace the power button board.

Following this guide will remove your eReader's IP (Ingress Protection) rating, making it susceptible to water damage.

If your battery is swollen, take appropriate precautions.

Kobo supports their eReaders with a warranty. If your device is still under warranty, Kobo may be able to help. Before starting a repair, review your warranty information or check support documentation.

  1. QCU1Kr4aURSIRW56
    QCU1Kr4aURSIRW56
    CwU6cApjRL1XcweD
    CM2XMiXawgMjBIyr
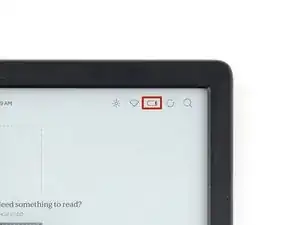
    • Drain your eReader's battery as much as possible before starting your repair. Ideally, it should be fully discharged.

    • Optionally, to drain the battery faster, navigate to MoreSettingsEnergy saving and privacy and set Automatically go to sleep after and Automatically power off after to Never.

    • When working on or near the battery, don't use sharp metal tools to avoid puncturing and shorting the battery.

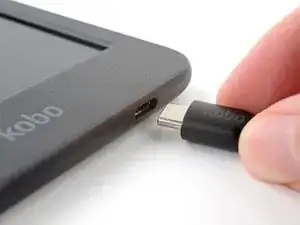
    • Unplug all cables and fully shut down your eReader.

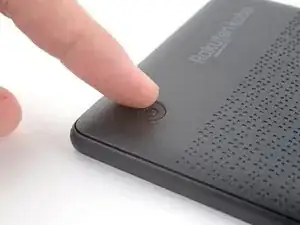
    • Your screen should be black and say Powered off.

  2. awqP2GDCEv2q1Gip
    awqP2GDCEv2q1Gip
    PTsQGRWD4CALYKq6
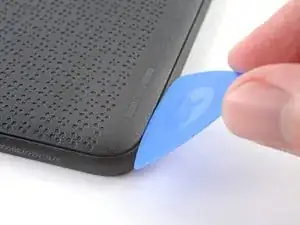
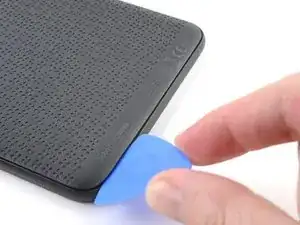
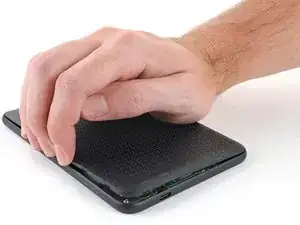
    • Lay your eReader down so the back cover is facing up.

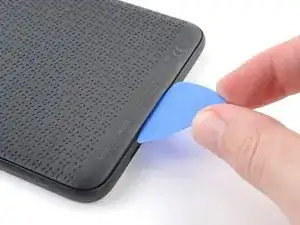
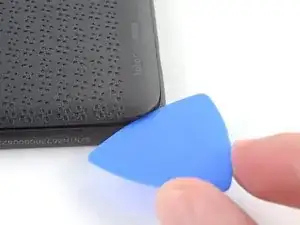
    • Insert the flat edge of an opening pick between the frame and the bottom left corner of the back cover.

    • Push the pick downwards at a slight angle until it slides under the back cover.

  3. JHSCBsdfXdXyrBlj
    JHSCBsdfXdXyrBlj
    NMWvYdZIyobdYRUu
    Kgrh2Udq6BqY2PMM
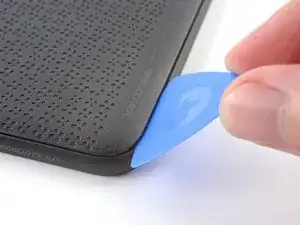
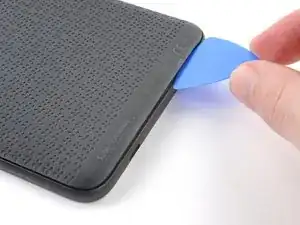
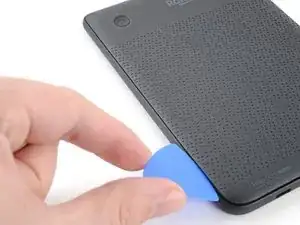
    • Slide the pick toward the bottom right corner to release the clips along the bottom edge.

  4. xrRL4gFPnCQVD66u
    xrRL4gFPnCQVD66u
    FPdLgXMeEQ16L4OR
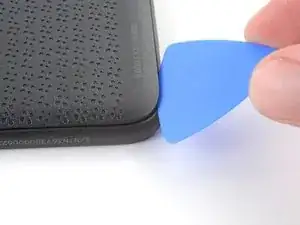
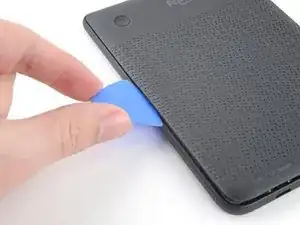
    • Remove the pick and reinsert it under the bottom left corner.

    • Angle the pick flat under the back cover and rotate it around the bottom left corner to release its clips.

    • If you're having trouble, try twisting the pick to lift the corner clips out of their slots.

  5. gZwNcpcZAwbgURWY
    gZwNcpcZAwbgURWY
    QuTZWngGpbicuBsP
    G3GCGn1XgJQMuGXB
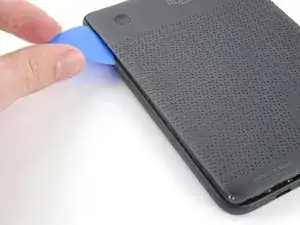
    • Slide the pick toward the top left corner to release the clips along the left edge.

  6. XrwhQFfhdAXAZZw5
    XrwhQFfhdAXAZZw5
    hZDct5xsqUpwWyWk
    6C5PIUKvA1UIgxS6
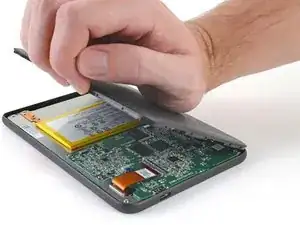
    • At this point, you should be able to grip the back cover and release its remaining clips. If not, slide a pick under the perimeter of the back cover until you can grip an edge.

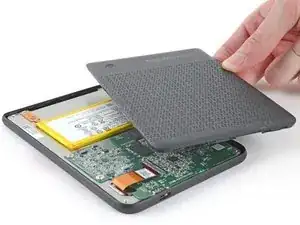
    • Grip the left edge of the back cover and lift it away from the eReader to release the remaining clips.

    • Remove the back cover.

    • During reassembly, align the back cover over the eReader and press along the perimeter until all its clips snap back into place.

  7. 5Op5nKNOKRHmvLhu
    5Op5nKNOKRHmvLhu
    2RXqqpcHEGSGBYdn
    PPFxlIJZNRXgQtHv
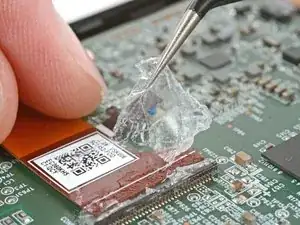
    • The entire surface of the eReader's internals is covered in a thin, plastic-like waterproof coating. Keep the following in mind as you continue disassembly:

    • While this won't hurt your device, removing the coating compromises the device to potential water damage.

    • The coating is brittle and can flake into many small pieces. Heating the coating helps, but working with it is still a time-consuming process.

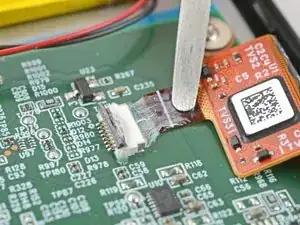
    • The ZIF connector locking tabs are coated in a gel that can jam the hinge and keep the locking tab from completely unlocking. Make sure the tabs are completely upright before disconnecting any cables.

    • Depending on your repair, you might have to remove the coating from ZIF connectors and their cables.

  8. RhSMVrLfQiuVxDOc
    RhSMVrLfQiuVxDOc
    bRkRlNyTtkvCYSAT
  9. VotvcSi6DFOQEStv
    VotvcSi6DFOQEStv
    Ej14VZTksIBBKa1O
    6DvHB4biGQGMNhGE
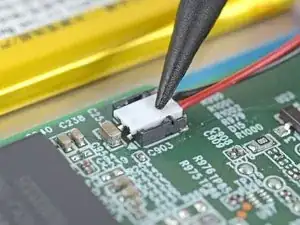
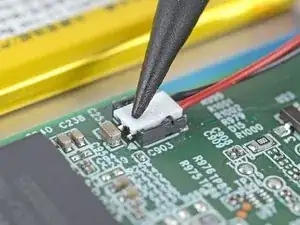
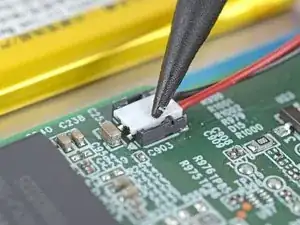
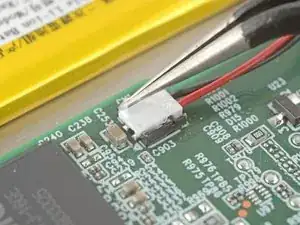
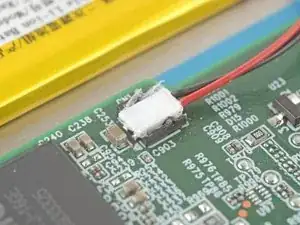
    • Use the tip of a spudger to scrape up the coating along the white battery connector head—enough so you can grab clumps of it with pointed tweezers.

  10. Pgesi1UA2YXxxVUv
    Pgesi1UA2YXxxVUv
    MlDFMYdui6cTRaSc
    IhEFGuknY4Q1cxVt
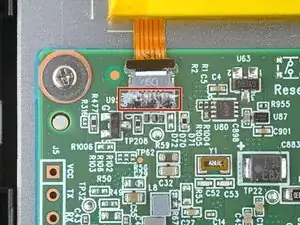
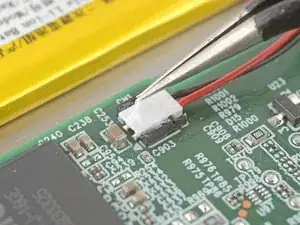
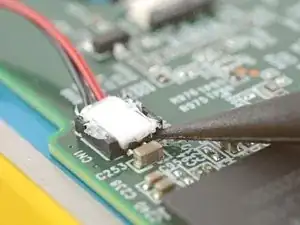
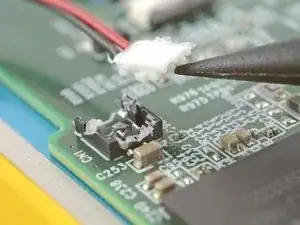
    • Use pointed tweezers to peel off all of the coating around the battery connector head and its socket.

    • If the coating becomes too brittle and hard to peel off, reheat the connector and try again.

    • This is a meticulous process! Failure to remove enough of the coating could damage the plastic head during disconnection, so take your time!

  11. ehxACBuQuiKKYF4Q
    ehxACBuQuiKKYF4Q
    qPZRmnRBnWMMhojE
    • Insert the point of a spudger under the edge of the battery connector head opposite of the cable.

    • There's a surface-mounted component close to the connector. Be careful not to touch it with your spudger!

    • Lift up the connector with the spudger to separate the rest of the coating and disconnect the battery.

    • During reassembly:

    • Inspect the connector head and its socket for any remaining coating that could prevent a good connection.

    • Peel off the coating, heating the area when the coating becomes too brittle.

    • It doesn't have to look pretty! You just need to remove enough coating so the connector head sits properly in its socket.

  12. sp43EH4RbveXqmKk
    • When working on or near the battery, don't use sharp metal tools to avoid puncturing and shorting the battery! A punctured battery can leak dangerous chemicals and catch fire.

    • If your battery comes with stretch release adhesive, follow the next two steps to remove them.

    • Otherwise, skip ahead three steps to remove the normal adhesive.

  13. F6EA4xcpTrF3ClLM
    F6EA4xcpTrF3ClLM
    rQKfsa2STEfhHYYc
    GgHYLfKa3jjGZgYu
    • The next two steps show how to remove a battery that's secured by stretch release adhesive.

    • Use tweezers to pull on the battery adhesive strip's pull tab until you can grip it with your fingers.

    • While holding the battery in place, pull the strip out slowly and steadily at a low angle. Give it plenty of time to stretch and un-stick from under the battery.

    • You can also wrap the adhesive strip around a spudger and "roll" it for a more consistent pull.

    • If the adhesive strip breaks off, try to retrieve it using your fingers and continue pulling—but don’t pry under the battery.

    • If you can't retrieve a strip, don't worry! Remove as much adhesive as possible and skip down two steps for an alternate method.

  14. mtL1RYDctuZ55BPb
    mtL1RYDctuZ55BPb
    bq2FJdrpmJi2cW6r
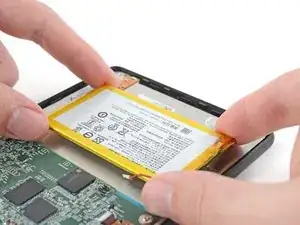
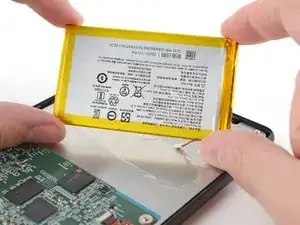
    • Lift the battery out of the frame and remove it.

    • If you're transferring the battery to a new screen, inspect the battery for any dents or deformations.

    • Never reuse a damaged battery! If your battery shows any signs of damage, replace it with a new one.

    • During reassembly, follow this guide to install a new battery or to transfer an old battery to a new screen.

  15. ySKdpWNKNvKyneaA
    ySKdpWNKNvKyneaA
    SllCLwXMkWIDNQfL
    MwaBQKtqKV6LPXOR
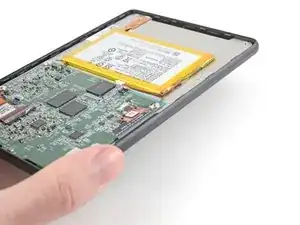
    • The next four steps show how to remove a battery that's secured by regular adhesive.

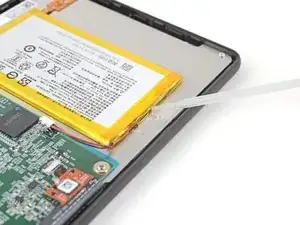
    • Apply a few drops of isopropyl alcohol under the right edge of the battery.

    • Tilt the eReader up to let the isopropyl alcohol flow under the battery and wait one minute for it to soften the adhesive.

  16. WZMeVPBbyrWnrACd
    WZMeVPBbyrWnrACd
    OtT6LLcIqYCLOfJV
    xDeNJXkmbBrgyvFA
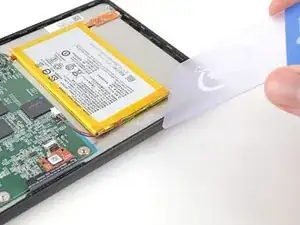
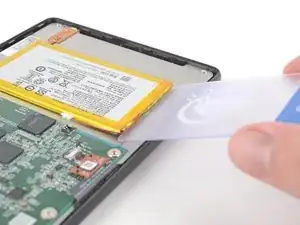
    • Slide a plastic card a half an inch (~13 mm) under the top right corner of the battery.

    • Rotate the plastic card so its short edge sits under the right edge of the battery.

  17. ts22EyJvog1G5qJN
    ts22EyJvog1G5qJN
    PHR5gIEDWMZWKOJw
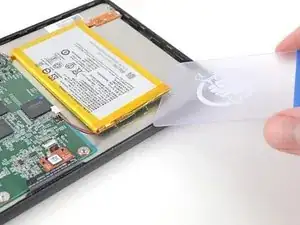
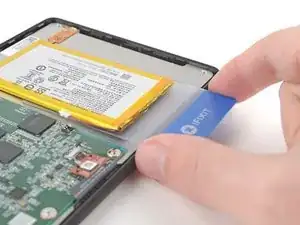
    • Slide the plastic card under the battery to separate the adhesive and the thin layer of coating.

    • Don't bend or crease the battery! Avoid prying or lifting up with the plastic card.

    • If you're having trouble, apply a few more drops of isopropyl alcohol and try again.

  18. JoOGNj2OYZLAnOoh
    JoOGNj2OYZLAnOoh
    X3eC5LNUciLdriXK
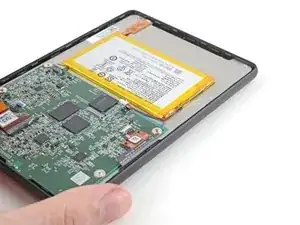
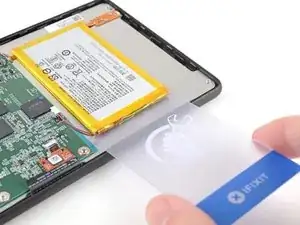
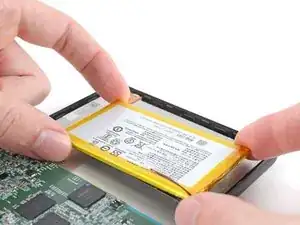
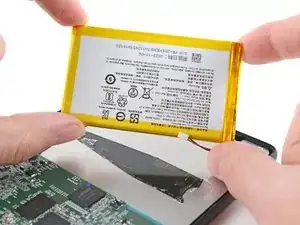
    • Lift the battery off the frame and remove it.

    • If you're transferring the battery to a new screen, inspect the battery for any dents or deformations.

    • Never reuse a damaged battery! If your battery shows any signs of damage, replace it with a new one.

    • During reassembly, follow this guide to install a new battery or to transfer an old battery to a new screen.

  19. Ja1LQvcoS2TLwBs1
    Ja1LQvcoS2TLwBs1
    UJiXVTe5prO6YBSu
    sYFjYcyqI4WX3oEI
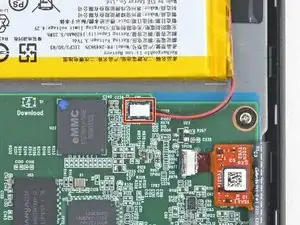
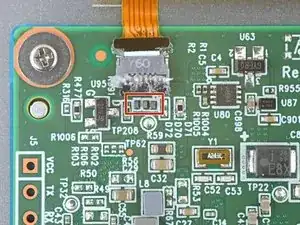
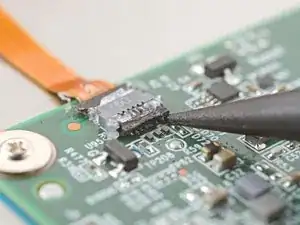
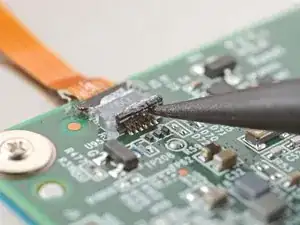
    • There are surface-mounted components next to the power button ZIF connector. Follow the instructions carefully to avoid dislodging them.

    • Insert the tip of a spudger under the right side of the power button ZIF connector's black locking tab.

    • Lift up the locking tab with the spudger to unlock it.

    • The locking tab should be nearly vertical when unlocked. If not, gently push the tab forward to compress the gel and completely unlock the tab.

  20. MnVYOY4KDYYTSVTv
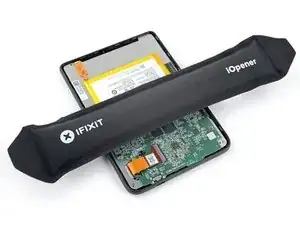
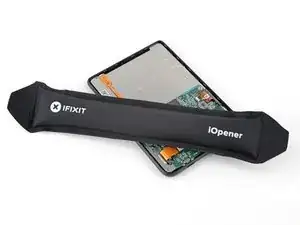
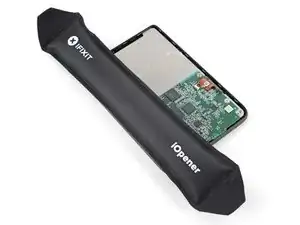
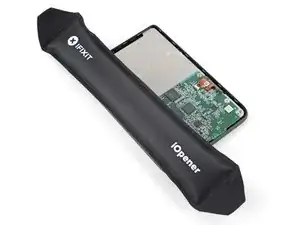
    • Heat an iOpener and lay it on the power button connector for 90 seconds to soften the coating.

    • Alternatively, you can use a hair dryer or a heat gun.

  21. ChynPwMlJdTFHIDl
    ChynPwMlJdTFHIDl
    WRKgerSCHMBBlbAd
    eK2DbFI4D3hiwjR6
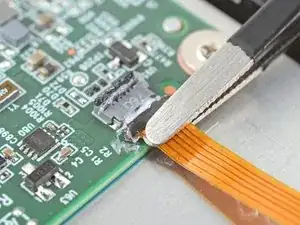
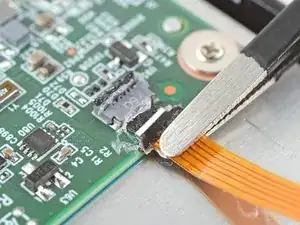
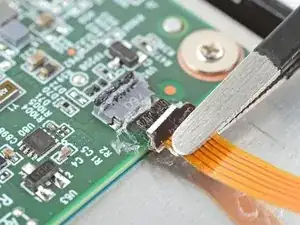
    • Use blunt nose tweezers to grip the cable close to the head and pull it away from its ZIF connector slowly and steadily to separate the coating.

    • If the coating feels stubborn, reheat the connector and try again.

    • Gripping the tweezers closer to the tip can help you get a tighter hold on the cable.

    • Keep pulling on the cable until the cable comes completely out of its socket.

    • During reassembly:

    • Inspect the head of the cable and the ZIF connector for any remaining coating that could prevent a good connection.

    • Peel off the coating—heating the cable and the ZIF connector when the coating becomes too brittle.

    • It doesn't have to look pretty! You just need to remove enough coating to have the cable sit properly in its connector.

  22. DfIoqLnyQ55HkhXD
    • Heat an iOpener and lay it on the power button board for 90 seconds to soften the coating.

    • Alternatively, you can use a hair dryer or a heat gun.

  23. OHIm4wJsNn3HgWHV
    OHIm4wJsNn3HgWHV
    j5stJrCFOLWFa1eH
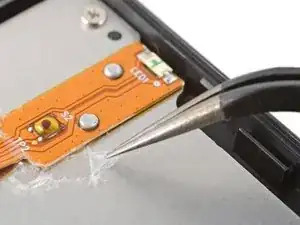
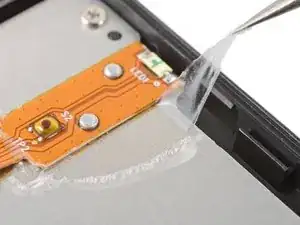
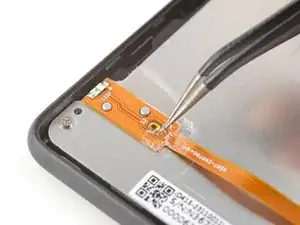
    • Peel off the coating along one of the long edges of the power button board.

    • The side doesn't matter! Choose whichever side has the easiest-to-remove coating.

  24. PplwYBGSVeNJFrUK
    PplwYBGSVeNJFrUK
    sJ2jtCPcHEQNdXQB
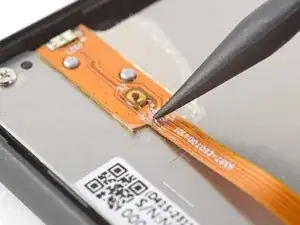
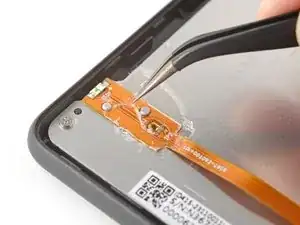
    • Use the tip of a spudger to scrape the coating along the base of the power button board—enough so you can grab clumps of it with tweezers.

    • Don't use tweezers to scrape the coating, as you could accidentally puncture the board.

  25. V2qPwTEK6A4ZgCTA
    V2qPwTEK6A4ZgCTA
    AEmschO1TjwTaEUp
    D2Vxafi2CP3rM1HB
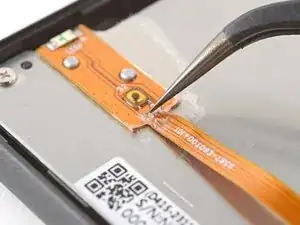
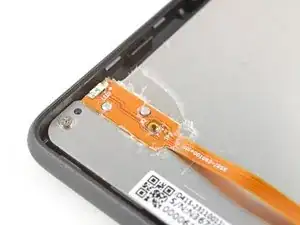
    • Use tweezers to peel off the coating on the power button board.

    • If the coating becomes too brittle and hard to peel off, reheat the board and try again.

    • It doesn't have to look pretty! You just need to remove enough coating so the board can move freely during the next four steps.

  26. X6TDeOmRKx2sFRSL
    • The adhesive securing the power button board is strong and requires time and patience to separate properly. Follow the next four steps closely to avoid damaging the power button board.

    • Heat an iOpener and lay it on the power button board for 90 seconds to soften the adhesive.

    • Alternatively, you can use a hair dryer or a heat gun.

  27. LvXehljeqlFUZhQg
    LvXehljeqlFUZhQg
    jrGTvTWaXvuMQlqR
    KxIATe1NpJCHqFH2
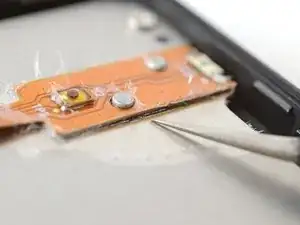
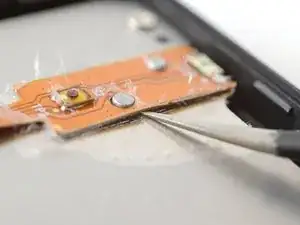
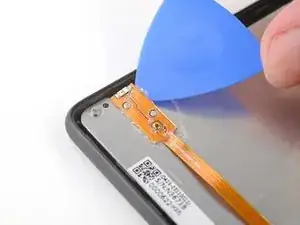
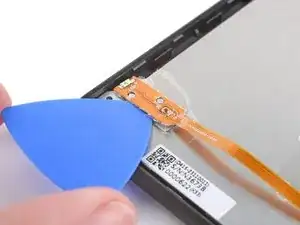
    • Insert an arm of pointed tweezers under the edge of the power button board that you separated the coating from.

    • If you're having trouble, reheat the board and try again.

    • Slide the arm along the edge of the board to separate enough adhesive to fit an opening pick under the board.

    • Keep the arm as flat to the frame as possible to avoid scratching the metal.

  28. L6MTDb16pGH4uRNB
    L6MTDb16pGH4uRNB
    HhVB2GGy3w46L3hO
    cPk3EWR2EbO4Ki2w
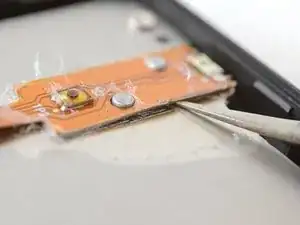
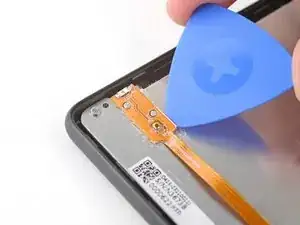
    • Remove the tweezers and immediately replace it with the tip of an opening pick to prevent the adhesive from resealing.

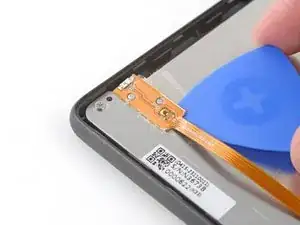
    • Slide the pick along the edge of the power button board to separate the adhesive.

  29. komtN5TY4PyU1xei
    komtN5TY4PyU1xei
    Xn51StrMnNaA4oKF
    4QYnNKQwxNSxRdyg
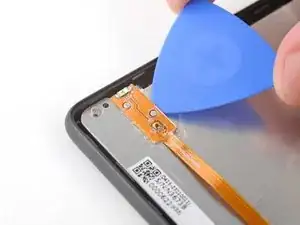
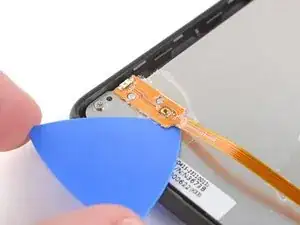
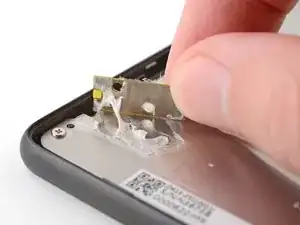
    • Rotate the opening pick under the bottom of the power button board and under its cable.

    • Slide the opening pick along the other edge of the board to separate the remaining adhesive.

  30. MNvhGuSkuHr12jQT
    MNvhGuSkuHr12jQT
    WNuPthfPd5G6iahd
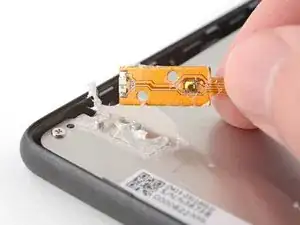
    • Pull the power button board off the frame and remove it.

    • During reassembly, follow this guide to transfer your power button board to a new screen or to install a new one.

Conclusion

To reassemble your device, follow these instructions in reverse order.

Remember: after repairs, your eReader is no longer IPX8 waterproof.

Compare your new replacement part to the original part—you may need to transfer remaining components or remove adhesive backings from the new part before you install it.

Make sure each of your device's main functions still work, e.g., LED backlight, touch, Wi-Fi, etc.

Take your e-waste to an R2 or e-Stewards certified recycler.

Repair didn’t go as planned? Try some basic troubleshooting, or ask our Answers Community for help.
Alex Diaz-Kokaisl

Member since: 16/01/22

151892 Reputation

0 comments