Introduction
Amazon’s Kindle Paperwhite 3rd Generation possesses a six inch, 300 PPI display. This guide requires that the Kindle is turned off, and that a plastic opening tool, angled precision tweezers, and a PH000 screwdriver are used.
-
-
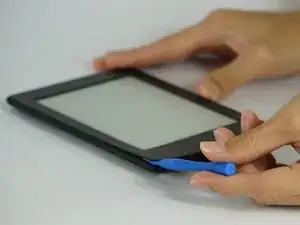
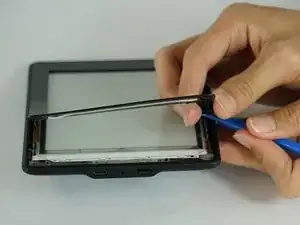
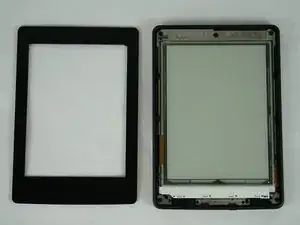
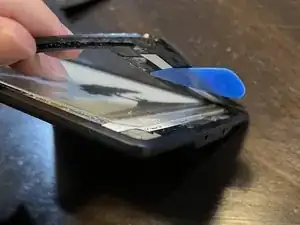
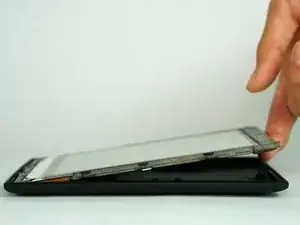
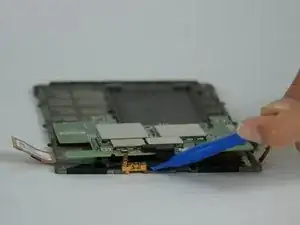
Gently pry the bezel off the screen using a plastic opening tool. Start at the corners and slide around the edges until you return to your starting point.
-
-
-
Use extreme caution when prying up the bezel. Be careful not to allow your pry tool to fall underneath the display. Look under the cover as you work, separating the display from the adhesive of the bezel.
-
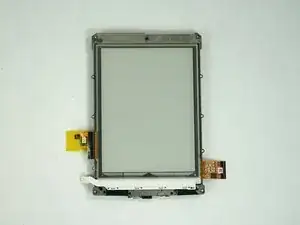
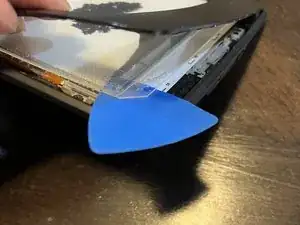
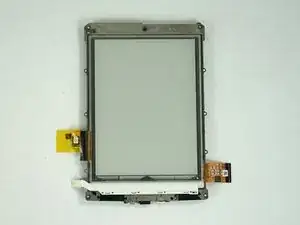
You want to make sure your separator goes through both sides of the bezel over top of the display.
-
The second photo is the layer you want your tool to pass through safely.
-
The third photo is an example of what can go wrong. If this happens your digitizer layer will misread touches and the display is permanently damaged.
-
-
-
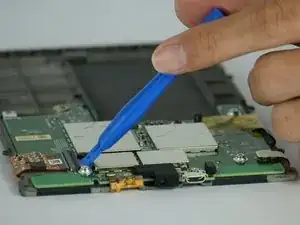
Flip the black latch with a plastic opening tool, and then gently pull back the orange ribbon cable.
-
-
-
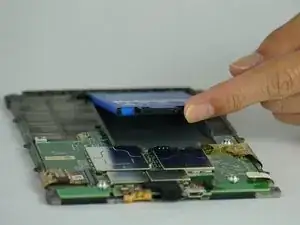
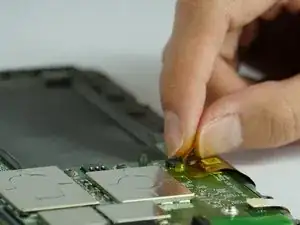
Peel back the orange ribbon cable near the battery.
-
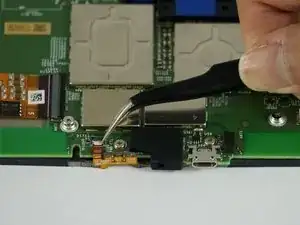
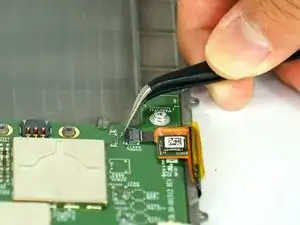
Flip the tiny black latch with angled precision tweezers toward the closest edge of the device.
-
-
-
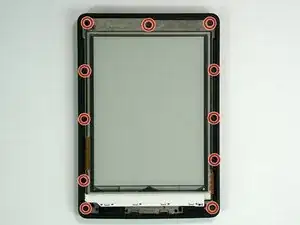
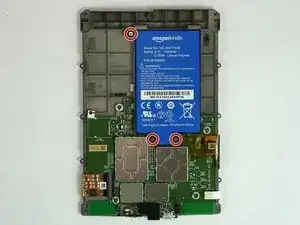
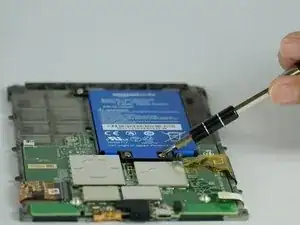
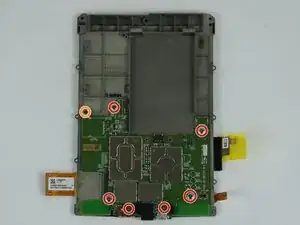
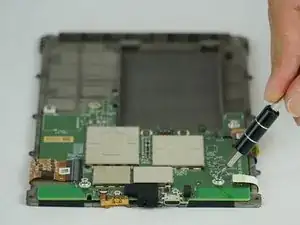
Unscrew the six 3.0 mm Phillips #000 screws surrounding the motherboard.
-
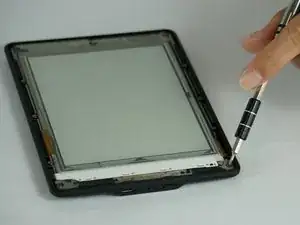
Unscrew the one 2.5 mm Phillips #000 screw.
-


To reassemble your device, follow these instructions in reverse order.

15 comments
hi there thank youfor your helping tutorial.
i just bought some used Kindle in order to buy at my shop. but i have a problem with some Kindle that i disassembled in order to have some spare parts and especially with the screen.
even after removing the screen it will stay frozen, even if i change the motherboard with a new one it will stay on the last screen shown.
Might you give me any explanation about the issue? and is that a way to reset the screen in order to use it as spare parts for other kindles?
charbel -
Thank you so much for this tutorial! Thanks to it I was able to replace a (physically) broken display. I un-assembled the entire device, let it rest until the shipment from China arrived and re-assembled it. It works flawlessly again and looks like new. One word of caution, though: The new display came without frame and removing the old display from the frame (both are pretty tightly glued together) resulted in quite some patient work and many pieces of broken glass (even with having it all heated). Anyway it worked out like a charm at the end!
Hello, where I can but a replacement screen for Kindle Paperwhite 300 ppi?? Thanks!!
Be very careful along the lower left side, where the cable to the touchscreen can be easily cut with a plastic spudger.
John Kenny -
Be careful at the top of the 3G version. The wifi and cell antennas are located along here.
James Sullivan -
I can’t get my spudger in to start lifting. Any advice?
Davey -
it takes a bit of force to first insert the spudger into the crack
jookieapc -
Be careful inserting the spudger too quickly. The glue holding the screen pulled loose in two spots along the side before the bezel did and there are lines along the border of my screen now.
Nick -
I made my own version of Nick’s error: I inserted a pick too far under the bezel, and very slightly separated the screen, leaving a small shadow in a corner. Easy does it!
Other than that, battery replacement was super-easy and successful.
Brad Compton -
I couldn't get a purchase from the outside, so started from the inside of the bezel. It was secured with double sided tape. Might have been better to apply some heat before prying.
David Glover -
Used the guide to replace the battery. Could not get enough separation using the blue spudger. Used the metal spidger to get things started then switched to the blue picks. Afterthought, Warming the bezel would have helped.
Jeffry Long -