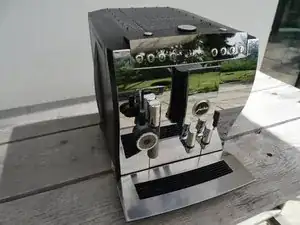
Introduction

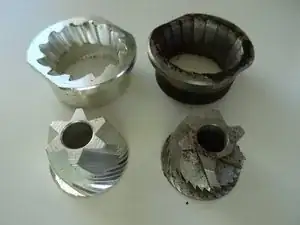
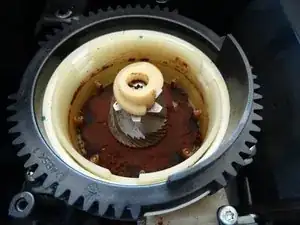
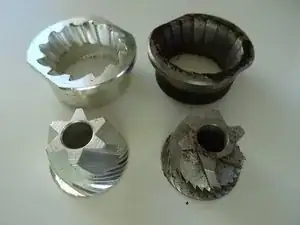
Good grindstones are essential for good aroma. If they are no longer sharp, then the coffee will be crushed instead of cut. Grindstones should be replaced from time to time.

Note: an HS-Aroma+ grinder is installed in the newer models of this series. For this model, the grindstones cannot (yet) be changed; only the complete grinding mechanism can be replaced.

  1. FwKlEAJaADuD2aA6
    • Unplug the machine from the power outlet

    • Remove all attachments: water tank, drip tray, aroma lid

  2. rGN5SMg2lk1bSrhW
    rGN5SMg2lk1bSrhW
    rdSSeyYnbtYKIEF1
    2JNPDZiJwGfnwZoP
    • Turn the machine so the back is facing toward the front.

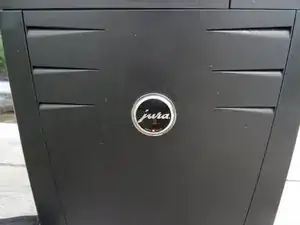
    • The Jura sign must be removed. Turn it a few millimeters counterclickwise.

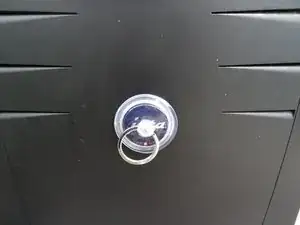
    • If this becomes difficult use a suction cup to assist.

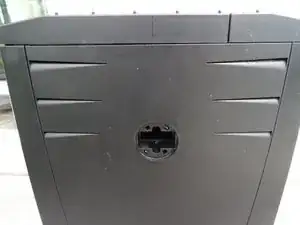
    • Remove the Jura sign.

    Ich musste bei einer Impressa Z9 das Emblem gegen den Uhrzeigersinn drehen um es zu lösen.

    Arne Staats -

  3. cCce1bEjrGlXCZy3
    cCce1bEjrGlXCZy3
    GroKyfWXVgZAfFmW
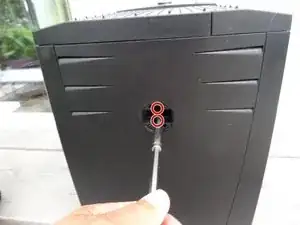
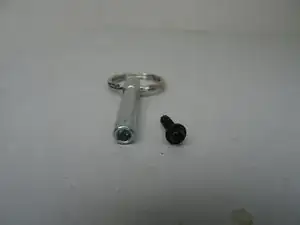
    • Behind the Jura sign are two screws with an oval head. They have to be removed.

    • These screws have an oval head that makes them look like rivets (picture 2). You need to use a special bit for their removal. If the right bit is not available, it could be done with a pair of needle nose pliers. Jura wants to keep us out of our own machines!!!!

    Hi there - really trying to find the tool to use for this. Please advise. Is there a link to it that I can buy?

    Deborah Lack -

  4. PpEOmOOCDrItpmqR
    PpEOmOOCDrItpmqR
    LxaeHweHjBMwJ3Rp
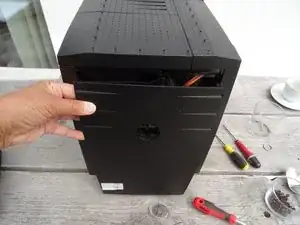
    • Push the back down a bit and then remove it.

  5. 6THnSSBH4uwKdDMs
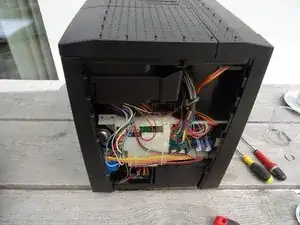
    • Pull the right side panel- as seen looking to the frontpanel - backwards and take it off.

    • Sometimes it gets a bit stuck and may require a bit more of a pull.

    In Schritt „5“ fehlt der Hinweis auf die noch zu entfernende Schraube unten am vorderen Teil der Seitenwand.

    graefinvveldenz -

  6. uUQvhULQYKBJWAGa
    uUQvhULQYKBJWAGa
    MTJrPqLUwTkSJwrm
    SpMB3PfDnkQiFKSP
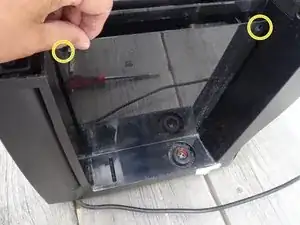
    • In this step, you should remove the screws of the left side panel. The side panel can only be removed after removing the top cover.

    • Remove the Torx T15 screw on the front wall of the side panel.

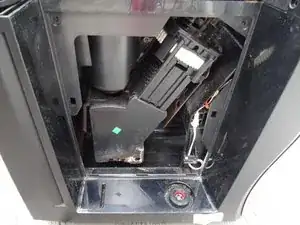
    • In the side part there is a lid over the brew group. The lid is fastened at the top with two oval head screws. Remove those to remove the lid.

    • With the cover removed the brew group becomes visible

    Ich verstehe nicht, wie man die beiden Linsenkopfschrauben entfernt

    William Brun -

    Man braucht halt das Ovalkopfbit, z.B. von iFixit. Eventuell geht es mit einer Zange oder einem selbstgebauten Werkzeug.

    VauWeh -

  7. WykR1Hedb1cDQOy5
    WykR1Hedb1cDQOy5
    cwiSAo5aKy6wjXpa
    1NIJSWXTB5cEpZkl
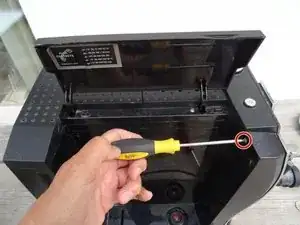
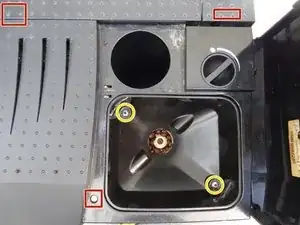
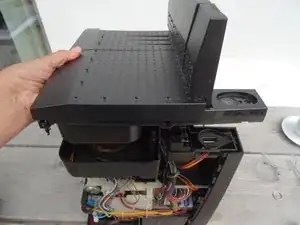
    • This step shows how to remove the top cover

    • Remove the powder tray and all coffee beans.

    • The cover is fastened with three Torx T15 screws. Those are easily visible under the covers as well as the small cover on the left back side.

    • Remove the two Phillips screws on the bean container and remove the bean container.

    • Lift the cover upwards.

    • If it is stuck, use a plastic opening tool to carefully pry it open.

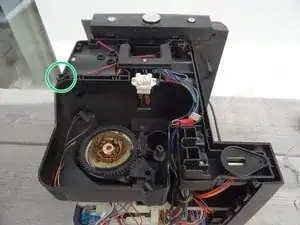
    • The lid of the bean container is held in place by a small, strong magnet that loosely rests. It is either in the green marked recess, or it remains hanging on the bean container. Make sure it is not lost!

  8. DrLCZ2PuVsps3SQX
    DrLCZ2PuVsps3SQX
    4ttktU4BpQTphYdT
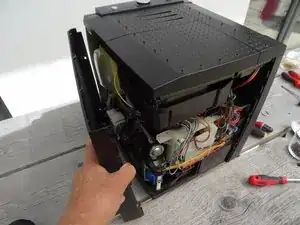
    • Pull the left side panel backwards to take it off.

    • For some repairs it is not necessary to remove the left side panel.

  9. V2ddMcLkFuxKgXPq
    • Here you can see new and old millstones. You can hardly see that the old grinding stones are no longer good.

  10. 4FYNTxhKl5iRHeuC
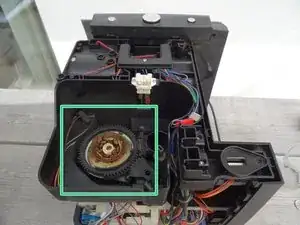
    • The grinder is located at the rear of the machine.

    • Pull off the grinder adjuster, remember its position.

  11. 1GJ5xf1HolWthJHU
    1GJ5xf1HolWthJHU
    OhtGlg5ausNWZCjC
    61AfoNOtYcQxjPQT
    • Now the grinder is free. Again take a picture, then pull out the axis of the adjuster with moderate force.

    • This adjuster may not be present on some models.

    • Depending on the model you will find a silicon sealing on top of the grinder ring, remove it.

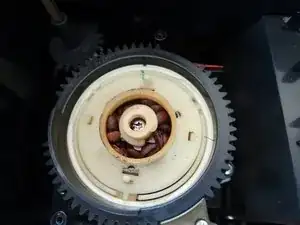
    • Watch the fabrication signs , here green. This alignment must be restored later. Now turn the great black gear about 90 degrees counterclockwise. The grinder ring is free and can be lifted off.

    The screw in my solo grinder is different. It looks more like a black ball than a screw. Any suggestions on how to remove that?

    Reni -

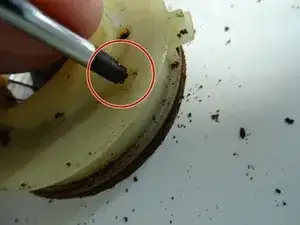
    Oh yes. On some models is a plastic cap. Insert a needle between cap and grindstone and pry it up, then remove it.

    VauWeh -

  12. aPM6tFmJhyUEFPw5
    aPM6tFmJhyUEFPw5
    mSjeHiilmSYWXp2l
    YFxePWOkt1lfGGH2
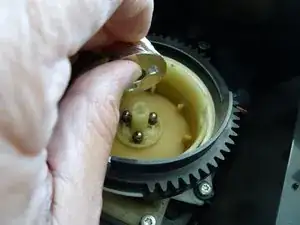
    • In the next step be very careful not to loose these three springs, balls and cartridges.

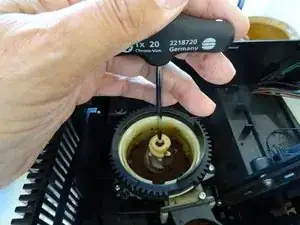
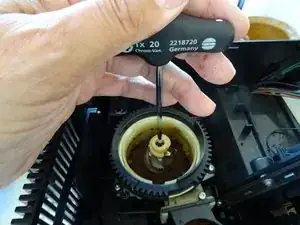
    • The grinding cone is fastened with a long Torx T20 screw. The screw head is often covered with remnants of coffee beans. Expose the head and turn the screw out counterclockwise.

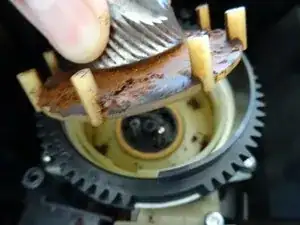
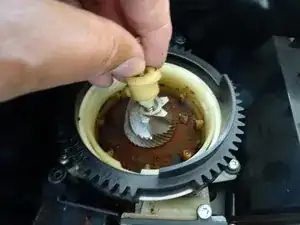
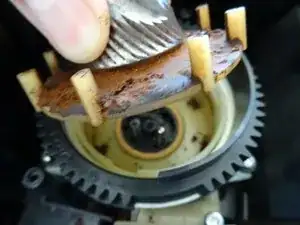
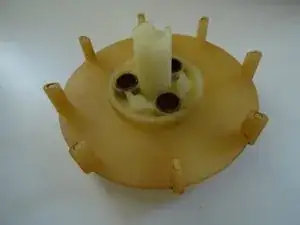
    • Now the bean feeder (the small white snail) can be removed. The grinder cone and drive can now also be lifted up carefully.

    Grinder screws are often left-hand screws. I assume this is not the case since it isn’t noted.

    Lisa W -

    Yes, that's true with Jura and others: open it counterclockwise . And you're right: the grinder screws in Saeco machines is left-handed, open it clockwise.

    VauWeh -

  13. GepSEhaBw6JbTTVG
    GepSEhaBw6JbTTVG
    5qf5c4YiAOIkp3Hx
    • The grinder is usually filled with old, sticky coffee grounds. Clean everything carefully for an excellent coffee aroma.

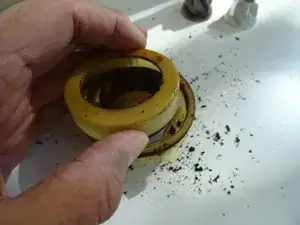
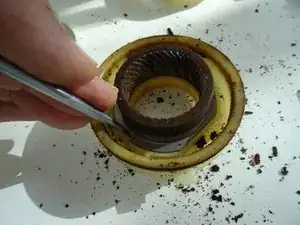
    • Gently lift the felt ring around the drive shaft with a needle, then wipe it clean with a damp cloth. Do not attempt to wash it, as there is a risk that it will swell. When first used, turn it over with the clean side up.

    • Clean the inside of the grinder with a brush and damp cloth, and the blades with a dishwashing brush. Ensure it is properly dried before use.

    What is your process for cleaning the felt ring once removed from the drive access?

    roger henry -

    I use a damp rag with a little dishwashing liquid. Another option is to simply turn the ring upside down.

    VauWeh -

    Cleaning the felt ring ruined it.

    roger henry -

    Uuu. How did you do that? You can buy it e.g. here.

    VauWeh -

    Do you know any vendor in the US that sells the felt washer?

    Jan Don -

    As I´m german, sorry no. Perhaps they do: https://www.jura-parts.com . And have a look for Capressa Infinity grinders, it´s the same. Or make one DIY using a piece of felt.

    VauWeh -

    the water expanded the felt ring and it did not shrink back once dry.

    Can you recommend a parts place in the US to get this felt washer? The link you sent does not show that it would fit the

    Jura ENA4.

    -Roger

    roger henry -

    In this case things are different. Did you really replace the grindstones? Or only clean the device? When my informations are right the ENA 4 is equipped with a "Aroma +" grinder, which means special grindstones, not the normal ones. As far as I know Jura does not sell them separately, only the complete grinder. I think, the felt ring will fit, but I don't know where to buy in the US. I think, the grinder also will work without the ring or cut one of a piece of felt. Good luck!

    VauWeh -

    If you can't find the felt ring, you have a few options, make one, beg the German jura parts seller to sell you one, or search aliexpress for felt ring, felt washer, felt gasket.

    jimmylasvegas -

    Hello. The piece where the springs and ball bearings are housed: where can I buy a replacement, please if you know.

    Thanks

    Farhan Miah -

    Do you mean this one? Don't know, If they ship to your country, ask them.

    VauWeh -

    Same thing happened with my felt ring. It expanded and never retracted after washing. Did anyone figure out where to buy it in the US?

    Jan Don -

    The Capresso Infinity grinder should be the same, so look for someone who supplies its parts.

    VauWeh -

    Make one, lots of materials at your local hobby store or online. https://www.aliexpress.us/item/325680549...

    jimmylasvegas -

    If you can't find it a wool washer from Michael's or Joann etc will work. You can also get them online at aliexpress and ebay.

    jimmylasvegas -

  14. tRZkRWYGjIefIaKH
    tRZkRWYGjIefIaKH
    qjvvZUOHeVpIkoN5
    oXxeMxUVxllQvEKp
    • Push both of the small latches alternately. Then the ring cover should come out.

    • Two clamps hold the grinder ring in its place, push them aside and it should come free.

    • Again clean everything. Press the new ring and cover in its place. With that the grinder ring is exchanged.

  15. TQPSPKUFKZbAXuF6
    • First insert the cleaned driver, then the three sleeves, springs and balls. Now fit the grinding cone on the three balls.

    • Then fit the auger, screw in central screws. When screwing in, push the cone downwards and make sure that everything meshes.

    • This screw turns into plastic. If it doesn't fit properly, the thread will be damaged. So first turn the screw counterclockwise until you feel that the first thread is engaged. Then tighten it turning clockwise.

    I think the balls have to go first. That way the middle stone can slip if the grinder is blocked.

    That is also what the exploded diagram that circulates online seems to show.

    Comments appreciated.

    Mark -

    I did this fix many times: the balls are on top oft the springs! They do fit into the corresponding holes in the underside of the cone, as you can clearly see in the picture. If the cone is stopped by e.g. a little stone, the balls come out of the holes saving the motors life.

    VauWeh -

    Thank you for the explanation! It is clear now.

    Mark -

    Everything is in right place

    I push as hard as I can. But it seem the that the screw is turning in the void. I remove all the part to see if the hole was strip , the screw seem to enter firmly

    jason warren -

    In this case I fear, you have to buy a new grinder. Replacing it is straightforward.

    VauWeh -

    i find a bit longer screw and it work but now the black ring is spinning in the void. the black outer ring and the white outer ring are suppose to be turning together ?

    jason warren -

    I have one more spring and ball, that are half a diametr of the rest. Can’t figure out where do they go?

    Aleksandr Sevastjanov -

    Might be the ball and spring beyond the big black gear, makes the “click", when turning it.

    VauWeh -

    Thanks. I followed the steps on the Nivona grinder and replaced the springs and the balls in the exact order. Now the grinder can only grind finely and this is too find for my brewer and hence my espresso machine is clogged. Can anyone see what when wrong after the reassembly?

    haydaru -

    I think the parts don't fit together properly. First: There are three holes on the bottom of the cone that the balls must fit into. Second: at the bottom of the helix are two tabs that must fit into corresponding grooves.

    VauWeh -

    How tight should you screw this screw in? Until it can no longer turn the screw driver?

    roger henry -

    Short answer: yes, not to hard. The screw ist spring loaded and cannot move easily. Be sure that the helix fits.

    VauWeh -

    Did you adjust the cone by turning the black gear and the "fourteen clicks" method?

    VauWeh -

    hello, changed the burrs and the coffee was too fine, clogging the machine. Haven't read correctly your tuto !!

    The adjustment oft the new grinder burrs must not necessarily be the same as the old ones. You can approximately find the mean position, which was marked before, by turning the outer ring as far as possible clockwise, then turning it fourteen clicks backwards.

    So you should not reallign the green mark , but use the 14 clicks from the grinder full closed for medium.

    En remontant les meules, on serre jusqu’à toucher les 2 cônes en tournant dans le sens des aiguilles, puis 14 clics dans le sens inverse pour avoir le réglage medium. Surtout si on a serré la vis centrale différemment du montage initial.

    intimepop -

  16. jGuM4GiVfciS3CZA
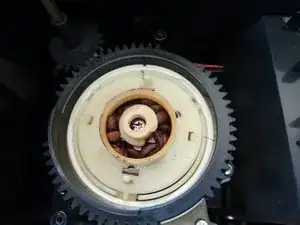
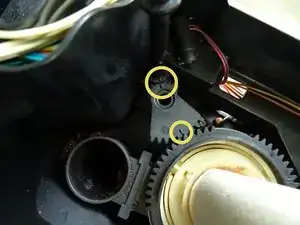
    • Insert grinding ring. The black gear is turned to the right again until the three marks are aligned. Then reinstall the adjuster drive shaft as it was originally.

    • The adjustment oft the new grinder burrs musst not necessarily be the same as the old ones. You can approximately find the mean position, which was marked before, by turning the outer ring as far as possible clockwise, then turning it fourteen clicks backwards.

    • It is a good idea to check if the grinder rotates freely. You can remove the meal hopper and look at the millstones from the side.

    • Then install the remaining parts in reverse order.

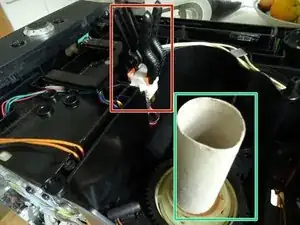
    • You can set the grinding degree nicely by placing an empty roll of toilet paper perpendicular to the open mill and filling it with a few coffee beans. Plug in the plug (be careful!), choose a cup of coffee and watch as the coffee grounds fall out of the grinder.

    i turn the black gear but the white one doesnt turn any more , they are suppose to turn together?

    jason warren -

    By turning the the black gear the grinder ring moves a little bit up and down and changes the grinder setting. The white ring holding the grinder ring indeed does not move. Or do you mean the big white gear beyond the black one? If the black and the white gears are not connected, press firmly the black gear down, until it clicks in.

    VauWeh -

    i remove a part the black and the white ring, it seem that there was black pin on the black ring that was maybe glue to the white ring ? but it seem broken or unglue , it whitish on the tip like if it was broke

    unless i see nothing that make those 2 ring jam together. maybe i should try to reglue with a dot of epoxy ?

    jason warren -

    Buy a new one, it's cheap! It ist just clicked in. Good luck.

    VauWeh -

    Thanks ! Alot!

    jason warren -

    Super Anleitung. Die neue Mahlsteinen war deutlich anders als die alten. Ich habe die Einstellring so weit wie möglich nach rechst gedreht, dann 14 Zähnen nach links, wie beschrieben. Die Maschine malt jetzt perfect. Danke.

    Joe Crites -

    if you move the ring fourteen clicks back, it means maximum opening or closing of the setting. Hope you understand what I mean. With these fourteen clicks, how to set this adjustment stick

    Jaroslaw Tylutka -

    First turn the ring clockwise so that the grindstones sit tightly on each other. Then open it by turning the ring counterclockwise for fourteen clicks. This is a medium setting. You can do a fine adjusting later. Watch the grinder in action using the toilet-paper-roll method. Good luck!

    VauWeh -

    Ok. Thank you very much.

    Jaroslaw Tylutka -

    I am looking to do the same replacement. The instructions looks great but I cannot find anywhere where to buy the two pieces grinder compatible for a ena micro 1. Any suggestions where I could buy that?

    thomas herby -

    This is indeed difficult. The grinder of the ENA Micro 1 is special. So far I have unfortunately only found the complete grinder, very expensive. (~ 150€). A reason not to buy this model, but that's no use to you anymore.

    VauWeh -

    or a cheaper used one (~70€): https://www.jura-ersatzteile-shop.de/mah...

    VauWeh -

    you can get that on eBay and aliexpress/alibaba. if you like take out the burrs and and measure them and I can tell you if they are the common ones being sold everywhere.

    jimmylasvegas -

    In the meantime, it is available.

    VauWeh -

    If you mark and line up all the rings as well as the spot on the “coarse -fine” adjuster and return them to the exact position at the end, do you have to bother about turning the clicks counterclockwise at the end.

    Ken Tuerk -

    Well, try it. Normally, everything should work fine and you can check the result on the grind. But the method with the 14 clicks is really simple.

    VauWeh -

    Great video. Ma problem is, there were only one mark on the rings, and I didn't mark the rings. Will the 14 clicks be enough initial adjustmet? Why is part of the black ring raised, and where does it go in relationship to the coffee shute? Thanks for any help

    fred4ernst -

    Did you remove the black ring? If the (green?) mark on the outer white ring is on 12, the middle of the raised part is on 8, as far as I remember. It serves as stop, there is a counterpart in the bean reservoir. Not really important and not in every model. And yes, the 14 clicks work fine. Try the grinder open, putting an empty toilet paper filled with some beans on it.

    VauWeh -

    Thanks for the instructions. It all worked out, but for me it was easier to remove the whole grinder housing (3 screws) in order to remove the top part (step 7).

    Also, before removing the grinder cone and the 3 springs and the 3 balls, a smaller spring and a smaller ball fell off somewhere and I could not figure out where to put them. Again all 3 springs and balls are as you describe but the extra smaller one I left out while re-assembling.

    At the end it is a success, but was curious if you knew where these extra parts are from

    GA376 -

    Sounds like the that's what makes the clicking sound when you adjust the grinder from course to fine.

    If you remove the top, black ring with the gear teeth, you will expose the off white plastic, it has holes all the way around,

    that where the ball and spring go to make that clicking sound. Not a big deal, I misplaced mine and I've been using the grinder

    for a few years now without it. https://www.juraprofi.de/Jura-Ersatzteil...

    jimmylasvegas -

    @jimmylasvegas is right. This ball is the detent for the adjustment of the grinder.

    VauWeh -

    I cleaned the grinder because it was dirty and didn't grind well: no coffee output. After everything is cleaned and replaced it is turning free but doesn't grind. There is still no coffee output. I do not understand why the coffea beans do not come through the grinder. Has anybody a soluton?

    D.M. van Bruggen -

    Thank you! I want to attempt this service after reading your post.

    Do the grinding burrs fit an XJ9 Jura? I cannot find the parts at a reasonable price anywhere else. Any advice is very much appreciated

    Jon -

    You need special grinder burrs, as it is a Aroma+ grinder. In the meantime they are available. I do not know, If they will ship it to your country, at least in europe they do.

    VauWeh -

  17. QvyTZDHNsviViSAM
    QvyTZDHNsviViSAM
    PMxUd3j1JI1gVRwZ
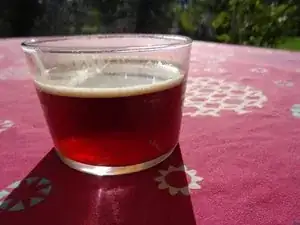
    • These two pictures are no fake: Before repairing the grinder the coffee is thin and transparent. With new stones the coffee is strong and has a fine crema. The repair was a real success!

    This is very helpful. My question is that when disassembling the unit, a very small ball came loose (not one of the balls under the grinder cone that you flagged). Now my grinder does not adjust for a fine grind so i think the ball was somewhere in the grinder adjustment assembly?

    Thanks

    Jared Rocco -

    Yes. This must be the ball in the grinder adjustment. Have a look to the steps 5 - 7 in the guide for saeco: https://de.ifixit.com/Anleitung/Saeco+Vi..., the grinder is nearly the same. The big black gearwheel can be lifted upwards using a little force and you can see all those little holes - and the ball was sitting under one of them thus keeping the adjuster in position. Hope it helps and you can fix it!

    VauWeh -

    Do you have a picture of where that tiny spring and ball should be placed back? When I was unscrewing the grinder unit from the body (hadn’t yet disassembled the grinder itself) the little spring and ball hopped out of somewhere and my video didn’t catch where from. I have a Bosch Benvenuto built-in and couldn’t find it in the parts diagram catalog.

    Jan Don -

    You lost your balls? there’s 2 ball bearings that make the clicking sound as you adjust the grind. I lost both of mine, never found them again. Anyone know what size they are? you can buy new balls at a local bearing store or on alibaba/ebay.

    jimmylasvegas -

    Hello VauWeh,

    I’ve cleaned my grinder and assembled it back. One thing I can’t restore is that grinder adjuster doesn’t click anymore. Could you please advise something that might affect it? The coffee is perfect but the grinder setting doesn’t stay in place. When it grinds, vibration makes it move towards a more coarse setting.

    Poogle Gixel -

    Hello, as I mentioned in my answer dated 18.11.2019, I suppose you lost the ball, which makes the clicking sound and holds the position of the big wheel. Sorry, I don't know a solution for that.

    VauWeh -

    Perhaps the spring and ball for DeLonghi will fit. They are available here.

    VauWeh -

    Another possibility: buy a used grinder, like this one

    VauWeh -

    At least I found it here, indeed the same as DeLonghi. Diameter is 3.2 mm.

    VauWeh -

    Thanks, coffee is black now, and full of aromas but a bit strong !! So take some time before reassembling all , to set the outer ring for default medium grind, not respecting the outside green mark.

    Merci le café est maintenant noir et sent très bon. Le réglage de la bague doit se faire avant de tout remonter, pour régler la finesse de monture par défaut. J'allais jeter la machine....

    intimepop -

    Thank you very much for the clear instructions. I started with just disassembling the grinding unit of my 9 years old Solo and cleaning it. That did not give the results I was hoping for. Bought an new set of grinders, installed following these instructions and the result is fantastic. Hoping for another 9 years on this machine with the help of the repair guides on this site (of which I have successfully used a couple now).

    pietpeer -

    It is always a pleasure for me when my guide could help.

    VauWeh -

    ou trouver les meules pour une caffeo solo ?

    Stéphane PIGOT -

    Ce sont les mêmes que pour Jura, affichées dans l'introduction.

    VauWeh -

    I followed these steps (helfpul, thank you). I was careful to set the grinding ring back to the standard setting as described, however when reassembling, the coffee comes out watery. Sure enough I take out the drip tray and the grounds are very large.

    I did notice that the burr and the ring were quite damaged/ rusty.

    Would you suggest that the grounds being far too large is more likely to be due to the reassembly being incorrect, or the stones being damaged/ worn?

    Jimbo -

    @jimbo27280 As a rule of thumb: if the stones have more than 10,000 cups on them, they should be replaced. But if you really see that they are broken, replace them in any case. It's worth the money and the effort!

    VauWeh -

    Just replace the burrs, you can find them on eBay and aliexpress. I can't post links here but they cost between $10-35 shipped. They look identical to the originals.

    jimmylasvegas -

  18. OKyq3LmLGJNKyXqd
    OKyq3LmLGJNKyXqd
    YdIX1p1FOP5i2IQc
    • These images show a way to test with the machine open. Be very careful and do not reach into the machine! There is a risk of injury and electric shock.

    • There are two microswitches at the top that trigger the display's "missing powder lid" and "powder chute open" errors. Outsmart the two microswitches with two clamps.

    • Place an empty toilet paper roll on the grinder and put a handful of coffee beans in it.

    • Plug in the power and draw a cup of coffee.

    • Now you can observe how the grind looks (it should be quite fine-grained, almost like flour) and how much falls into the brewing chamber. Change the setting very slowly, as the effects can only be observed after two cups.

    • The markings on the adjusters should be at medium grind as shown. When assembling, make sure that the knob on the top cover is properly engaged with the adjuster.

    • Never forget to disconnect the power plug before reassembly!

Conclusion

Work through the steps in reverse order to reassemble your device.
VauWeh

Member since: 19/10/15

234435 Reputation

0 comments