Introduction
Has the battery life of your device become unusable? Does the battery seem to refuse to charge? A faulty battery is possibly the cause of these power issues. As the battery undergoes more cycles, it holds less charge.
-
-
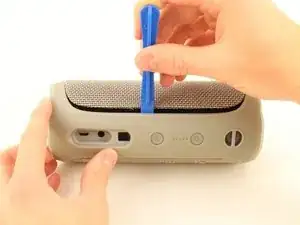
Insert the plastic opening tool in the crack in between the cover and the rubber spine with the power button.
-
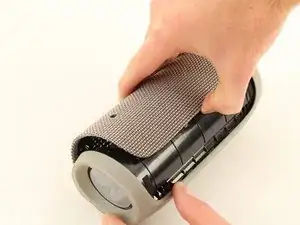
Pry off the cover, beginning with the side without the volume and bluetooth buttons.
-
Pull the cover off with your thumbs.
-
-
-
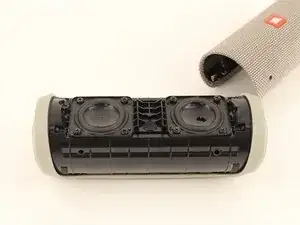
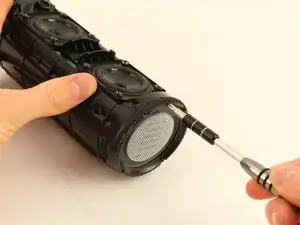
Remove four 13 mm JIS #0 screws attaching the rubber spine to the speaker, located on both sides of the inside of the speaker.
-
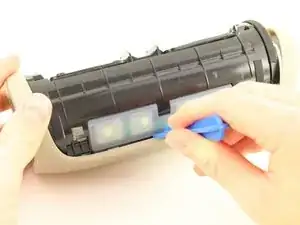
Use the plastic opening tool to release the clips holding the central part of the rubber spine.
-
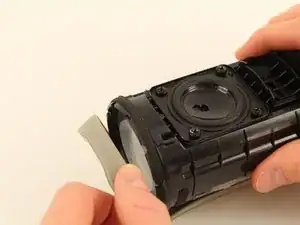
Pry away one end of the rubber spine with your thumbs and it should come off.
-
-
-
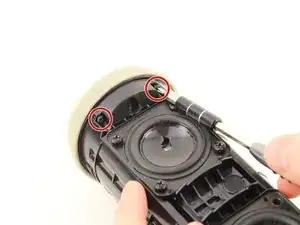
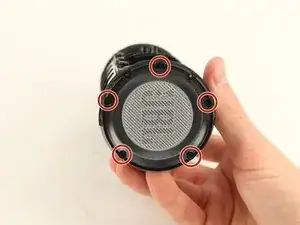
Remove five 9mm Phillips #1 screws from the end cap opposite to the USB port.
-
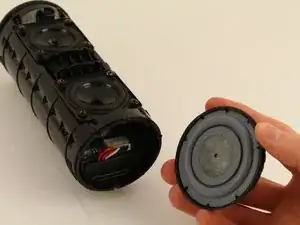
Pull the end cap off with your hands.
-
-
-
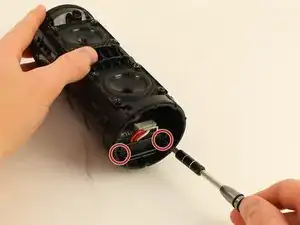
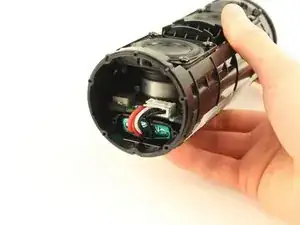
Remove two 11mm Phillips #1 screws on the battery cover.
-
Pull the battery cover off with your hands.
-
-
-
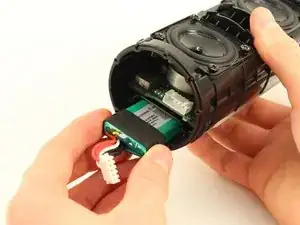
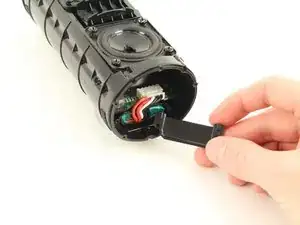
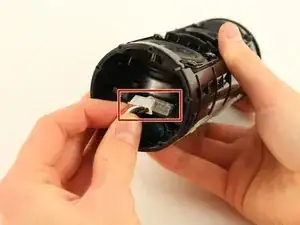
Remove the large white plug that connects the wires from the battery to the main board using your hands.
-
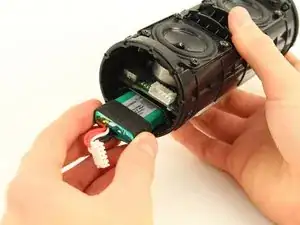
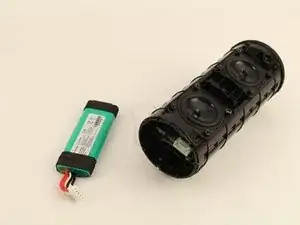
Pull the battery out with your hands.
-
In this case, you can try to remove the other radiator, unscrew the charging port and gently pull it out just a bit so a large screwdriver's end - without its bits - can fit in and push out the battery from this side.
-
To reassemble your device, follow these instructions in reverse order.
72 comments
Is the battery glued into the socket like the Flip 3?
Kenneth -
No it isn’t. but the black rubber around it makes it really hard to get out. try to push it from the otherside by removing the charging-port.
Be careful not to pierce the battery
Yes with me the battery was glued
Be careful and don’t do like me: my old battery was bloated, so I had to push from the other side, but when doing so, I ripped the ribbon cable from the power button… now trying to find a replacement cable
Did you find the cable of the power button?
I bought a 13pin cable for the buttons from here, but make sure it's the same number of pins for your cable as well: FFC/FPC Flat Flex Cable 13Pin 23Pin 33Pin 43Pin 53Pin Same Side 0.5mm Pitch AWM VW 1 20624 20798 80C 60V Length 15cm 5PCS
Afthrast -
très bon tutoriel, toute l’opération réussie à un bémol prêt, ma batterie aurait chauffé (?) et demeure inextricable de son logement soit elle a gonflé sous l’effet de la surchauffe, soit la bande noire en caoutchouc des extrémités de la batterie ont fondu.
Philippe -
Va voir le truc du WD-40 dans les commentaires de l’étape 5, c’est comme ça que j’en suis venu à bout.
Am I correct to assume that the speaker will no longer be water proof after performing this? or would it still be able to keep the water out even after the repair?
Important suggested edit to these instructions - make sure to pry off clips/ridges from BOTH sides before attempting removal of the cover.
I interpreted these instructions as saying you only needed to pry clips from one side - then peel off cover. Doing this broke a clip from the other side. Bummer. I'd like others to avoid that.
k9612 -
If you do break a clip - save it. They are relatively easy to glue back into the cover.
k9612 -
My Flip4 had a single long clip on the non-button side that ran the entire length of the rubber spine. The other side (with play/ vol buttons) had three seperate clips (middle and both sides) as mentioned above.
takentrashout -
What if my speaker battery dies very fast and makes weird crackling noise, is it counted as faulty battery?
Jayden Koh -
Yes. I first thought one of the drivers was defective.
Paul Sommer -
What was the fix in the end ?
Jack Mulcahy -
I used the flared edge of a metal measuring spoon handle since I didn’t have an opening tool. Worked great! Replacement battery from iFixit is on order. Thanks for the guide!
Greg -
My battery was glued. Tried it anyway to remove. Battery exploded!!!!
Don't go on if the battery is glued.
darthvader007 -