Introduction

This Guide shows the how to remove and replace the WiFi Card of this device.

  1. KRKvyTZJsr2RTnqf
    KRKvyTZJsr2RTnqf
    ZeDJaBrEOQMjFaEM
    • Set the laptop top-down onto the workstation.

    • Remove all screws circled in red.

    • When removing screws, group them by size. The bottom case of the laptop includes a sticker that shows the size of the screws.

    • When reassembling the device, note the numbers by the screw holes and use them to know what size screw correlates to what hole.

    There are two more screws that have to be removed before the keyboard can be removed. The first one is in the top right corner of the picture above, and the second is along the right hand edge of the base, 85 millimetres down from the first screw.

    Colin Hart -

  2. g141fqwCQOtQcVKe
    g141fqwCQOtQcVKe
    Gi1xFirovp1thLYV
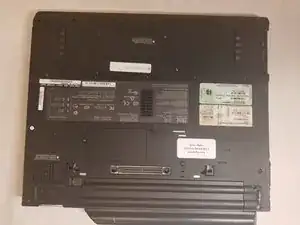
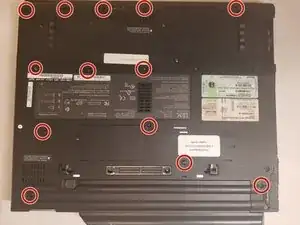
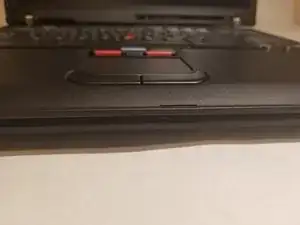
    • Flip the laptop so that the IBM ThinkPad logo is facing up.

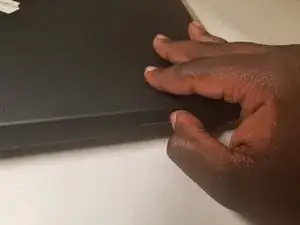
    • Slide the unlocking switch to open the device, and lift the display (not the palmrest assembly).

    • Make sure to unlock the laptop before opening, as the palmrest assembly is not screwed in to the bottom case.

  3. ZXJPwZiBcWtbIr5D
    ZXJPwZiBcWtbIr5D
    12dQo6sYXUB3ETfB
    • With the laptop open, hold the bottom edges of the top case and slowly lift.

    • Be sure to not lift the palmrest completely, since there is a ribbon cable still attached to the bottom case.

  4. Vydpb4YUQJh2nuiy
    Vydpb4YUQJh2nuiy
    E5LnpUs4WhBTpIgx
    • Disconnect the ribbon cable by lifting on the plastic backing square.

    • Do not lift by the ribbon cable itself, as this can cause it to tear.

  5. wNQg5frdUjsiYBOg
    • The Wi-Fi Card is located towards the middle bottom of the laptop

  6. tPCLEpFFuVhaUual
    tPCLEpFFuVhaUual
    D41ZdausZGRAldRS
    • Locate the two wires connected at the top of the Wi-Fi card.

    • Hold the card down and use the tweezers to pinch the plug and pull up.

  7. YDR4Q1vQC46ByQcX
    YDR4Q1vQC46ByQcX
    uLoPqY4Yh6IWOXmi
    2hdONUOW5NtMbkyZ
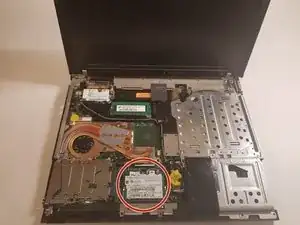
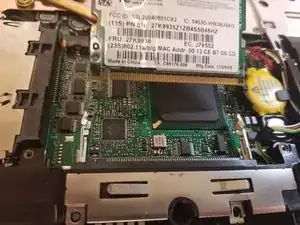
    • Place fingers on the two clips holding the card in place

    • Pull the clips outwards until the the card pops up

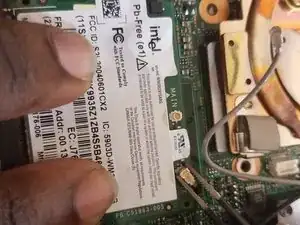
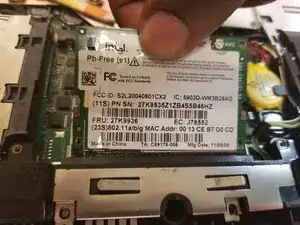
    • Pull the card out by pulling out away from your body

    • To replace, follow these steps in reverse order

    • Make sure that the side with the short end is on the left when you put it back in.

Conclusion

To reassemble your device, follow these instructions in reverse order.

aLiX pIeRRe

Member since: 19/03/18

855 Reputation

2 comments

I need to know what's role of the cables AUX and MAIN because i cut one

M a n i _001 -

AUX and MAIN cables are antenna cables. In this laptop there are two antennas, MAIN and AUX.

If you have a soldering iron, simply solder the two parts of the cable you cut and everything is gonna be fine.

I also recommend using shrink tubing to isolate the soldered part.

Note : laptop can work without this câble, but WiFi speed and stability will suffer.

If you can't solder the câble or can't by a new one, you can try to use only main by pluggin the only remaining antena câble to MAIN and leaving AUX unlpuged.

Brendan -