
Introduction
Use this guide to remove and replace the display in your Huawei P10 Lite smartphone.
To protect your eyes from glass shreds and get a better grip to open the phone you might want to apply some tape onto the screen.
When reassembling apply new adhesive where it is necessary.
-
-
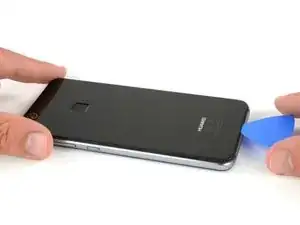
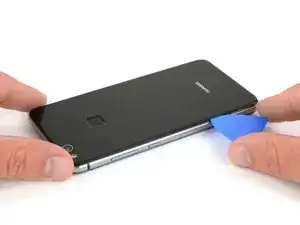
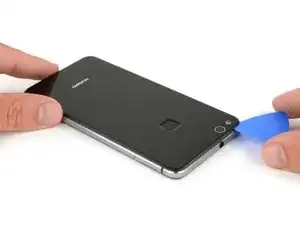
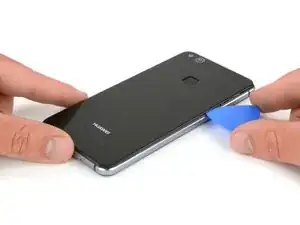
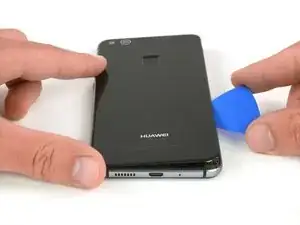
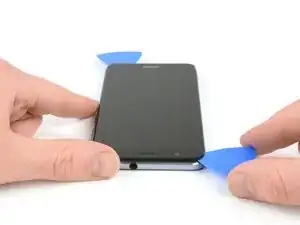
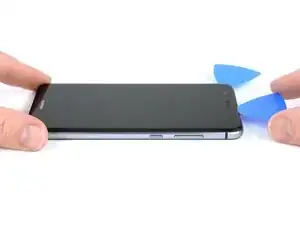
Insert the tip of an opening pick between the back cover and the mid frame and slide it around the phone, to cut the adhesive.
-
Using a suction handle to lift the back cover may help to get an initial gap for the opening pick to put in.
-
-
-
After you cut the adhesive on every edge, twist your opening pick, to separate the rear cover from the phone.
-
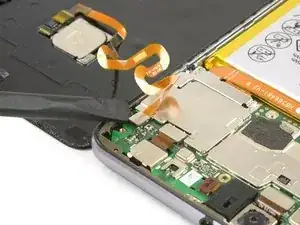
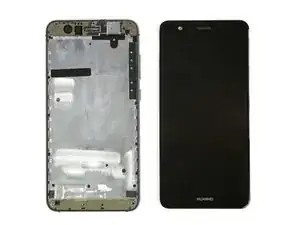
Flip the rear cover over to the right side of the phone.
-
-
-
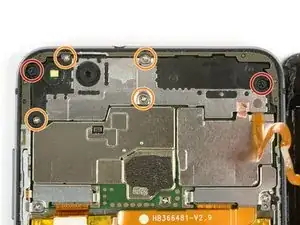
Use tweezers to remove the mainboard shield.
-
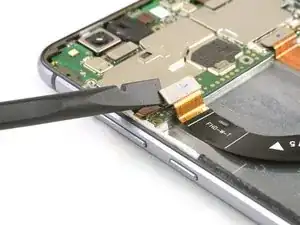
Use the flat end of a spudger to disconnect the finger print sensor flex cable.
-
-
-
Remove the Phillips screw holding the battery connector plate in place.
-
Remove the battery connector plate.
-
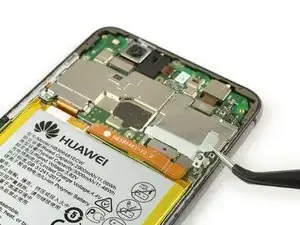
Use the flat end of a spudger to disconnect the battery flex cable.
-
-
-
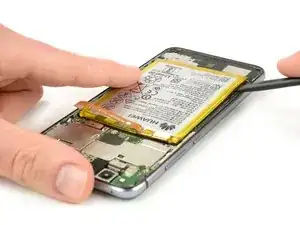
Use an iOpener to loosen the adhesive beneath the battery.
-
Insert a spudger between the battery and the mid frame to create a gap.
-
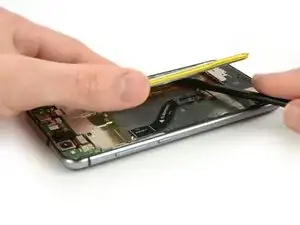
Insert an opening pick or use the spuder in the gap to cut the adhesive beneath the battery.
-
-
-
Use a spudger to cut the rest of the adhesive and lever the battery out of the phone.
-
Remove the battery.
-
-
-
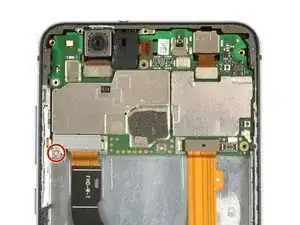
Remove the Philipps screw holding the display connection bracket in place.
-
Remove the display connection bracket.
-
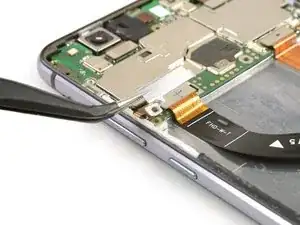
Use the flat end of a spudger, to disconnect the display flex cable.
-
-
-
Use an iOpener to loosen the adhesive under the display.
-
Insert the tip of an opening pick between the display and the midframe.
-
Insert a second opening pick next to the other one.
-
-
-
After you slid the opening pick completly around the phone, twist it at the top of the phone, to seperate the display from the midframe.
-
Grab the phone at the upper part and seperate the display from the frame while working the flex cable through the gap.
-


To reassemble your device, follow these instructions in reverse order.

2 comments
hey bam ich habe ein glück wegend euch ifixit danke dafür die anleitung hat mich zu glück gebracht dank ifixit ist mein
huawei p10 lite heile danke für alles lg der besitzer des huawei p10 lite
Hallo,
soweit ich sehe, ist die Klebefolie nicht im Ersatzteil enthalten, und die vorgestanzte Klebefolie ist nicht (mehr) erhältlich. Statt dessen verweist ihr auf das doppelseitige Klebeband von tesa, das als Rolle erhältlich ist - aber in verschiedenen Breiten.
Welche Breite ist für diese Reparatur hier denn die passendste?
Und wird das phone damit wieder genauso staubdicht wie zuvor (man wird ja puzzlen müssen, und an den Übergangsstellen hat man Stöße statt durchgehende Verklebung…)?
Mit dem Saugnapf die Rückseite anheben hilft ungemein…
Matthias Eberle -
Had to use blue wedge tool to wedge open bottom plate from the rim part in order to then use the tip of the blue opening pick under the back plate to then cut the glue. It’s like placing a pie server or knife under the plate once there’s a gap between the rim and the back plate.
Jane -
Be careful, there’s a cable to fingerprint sensor, very close to the edge (see pictures below)… It’s very easy to cut it through with the pick, as I just learned :)
dambig -