Introduction

Use this guide to replace a worn out or defective battery.

  1. hGVUDvnfuCXpWenF
    • Choose a side of the tablet to start; i took the one with the home button and heat it with the iOpener

    • Heat up the rest of the tablet

  2. bvuGBXGuA1KaXL6G
    bvuGBXGuA1KaXL6G
    ETIFkAnI6JWQedyb
    uXIYJi6WXtn1DMYa
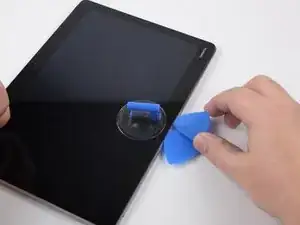
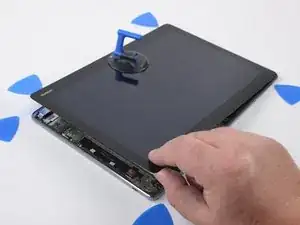
    • Put the suction handle roughly where the home button is and try to lift the display so you can slide with a pick between the display and the back cover. Be paitent it may take a while.

    • Take a second pick and try to get between display and the back cover

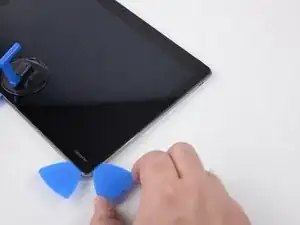
    • Once you are in with this pick move the pick from the middle to one of the edges

  3. TusvBC5SjGjtB6OG
    TusvBC5SjGjtB6OG
    PSkqiAXVVmTRNT4W
    • Take the next pick and move it to the next corner of the tablet

  4. RQnj21EWIo3GYaKK
    RQnj21EWIo3GYaKK
    IIHAPQRsXQOCrwAE
    ZjEr1ticaCu6SXYl
    • Insert another pick and move along the whole side of the tablet up to the next edge of the tablet

  5. aZLgjYefWZYJpurk
    aZLgjYefWZYJpurk
    GlUFrZGsEZY4ZKqL
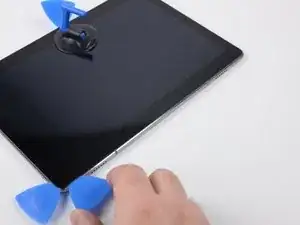
    • Same procedure as on the other sides. Take another pick and move it to the next corner of the tablet

  6. bRL2BRMYAXnCkjHp
    bRL2BRMYAXnCkjHp
    huEOgGjrxTPoX3wC
    BaBGmHEPEyPKCxjY
    • With the tablet in standard landscape orientation lift the display to the right.

    • Attention: There are cables on the right side connecting display and motherboard

  7. ARhb1wHjnYSY1QwW
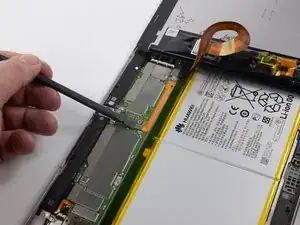
    • Remove one screw from the battery connector plate

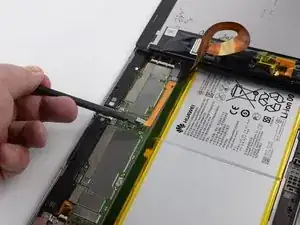
    • Remove two screws from the display connector plate

  8. K2RX3koLTLCb4A6I
    K2RX3koLTLCb4A6I
    dNbZmjGBhAUr6wTZ
    J1aljWMBxDK2Yppo
    • Use a pair of tweezers to remove the battery connector plate.

    • Use a spudger to disconnect the battery.

  9. rCGV3HOrSgBm4Enx
    rCGV3HOrSgBm4Enx
    F5ORKV1S2aB1hDSu
    fXxZnZQBaULtQkUn
    • Use a pair of tweezers to remove the display connector plate

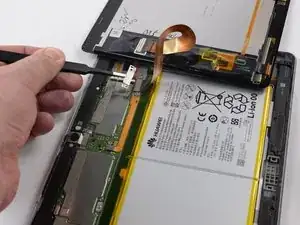
    • Use a spudger to disconnect the display

  10. YJMcymnxP4j5aLIf
    YJMcymnxP4j5aLIf
    VdKhwEJlXeQJXarP
    • Carefully dribble Isopropanol in the gap between the battery and edge of the battery well

  11. NZZoGhm2pXSkdATA
    NZZoGhm2pXSkdATA
    XLWXStoPoS2Ldgy1
    IItZoB1HKZAlSMbK
    • Same on the next side of the battery

  12. hyKvC1amPrV4OubZ
    hyKvC1amPrV4OubZ
    TMZy3TUuiNPQnnwP
    • and the same on side no. 3

  13. NBZBHxYiEF1OAAf2
    NBZBHxYiEF1OAAf2
    qFCGQUSOvN2HvXiI
    WMMUf5KHIwUEAw6K
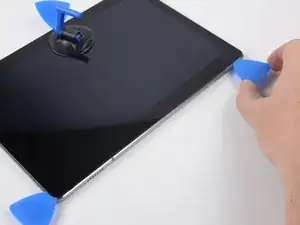
    • and on the last side of the tablet

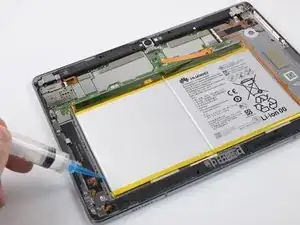
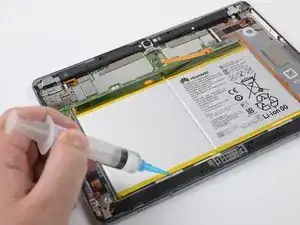
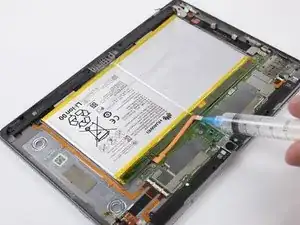
    • Wait a few minutes (~ 3min) to let the isopropanol do its magic and soften the adhesive

  14. P44hR24NpIxjBXQg
    P44hR24NpIxjBXQg
    yFBnMHuGVOSDdwwE
    XEWZlg3UrdwhMcSN
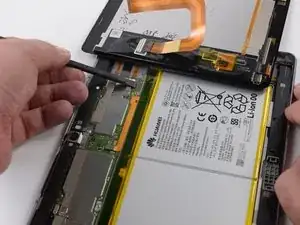
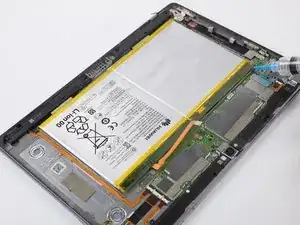
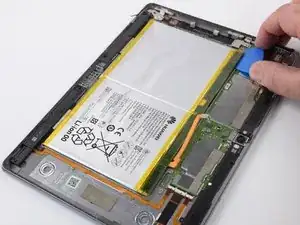
    • Start with a pick to get under the battery. Move the pick along all sides of the battery. It can be difficult as the battery is glued over the entire surface of the well.

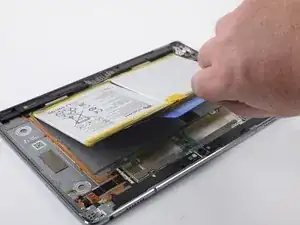
    • If the battery won´t move enough use some more Isopropanol

  15. A6ldBs35CXrSI4Vy
    A6ldBs35CXrSI4Vy
    NYXrlpBiZirASsMH
    LZ5KQUDDJRqGKEgW
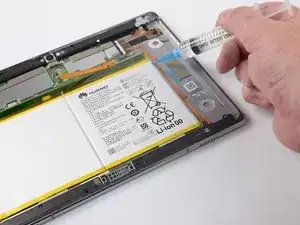
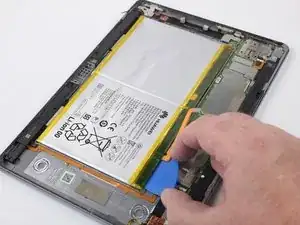
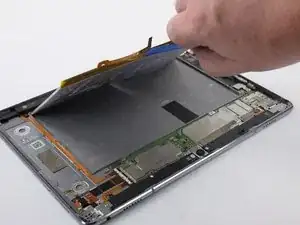
    • Once you have soften the adhesive enough, you can use a bigger tool e.g. a plastic card.
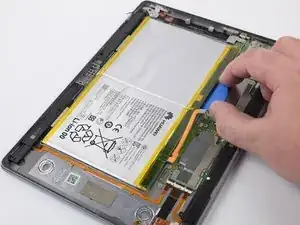
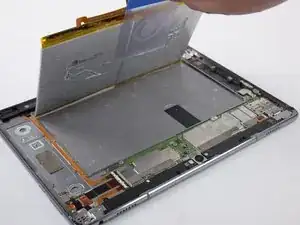
    • Remove the battery

    • Do the steps described in both report in reverse order

Conclusion

To reassemble your device, follow these instructions in reverse order.

Benjamin Haase

Member since: 20/03/23

343 Reputation

0 comments