Introduction
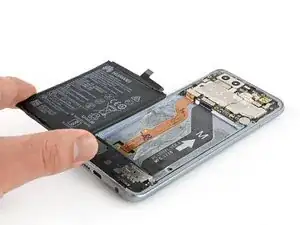
Use this guide to remove an old or worn-out battery in the Huawei Honor 9.
Before disassembling your phone, discharge the battery below 25%. If your battery is swollen, do not heat your phone. Swollen batteries can be very dangerous, so wear eye protection and exercise due caution, or take it to a professional if you're not sure how to proceed.
You’ll need replacement adhesive to reattach components when reassembling the device.
For optimal performance, calibrate your newly installed battery: Charge it to 100%, and keep charging it for at least two more hours. Then, use it until it shuts off due to low battery. Finally, charge it uninterrupted to 100%.
-
-
Switch off your phone.
-
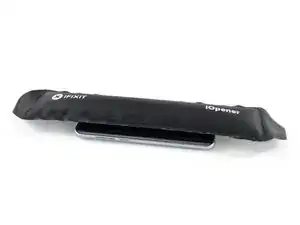
Heat an iOpener and apply it to the back of the phone for around two minutes. This will help soften the adhesive securing the rear glass.
-
You might need to reheat and reapply the iOpener several times during the rear glass removal.
-
-
-
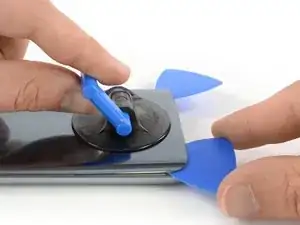
Secure a suction handle to the lower edge of the rear glass, as close to the edge as possible.
-
Lift the rear glass with the suction cup to create a gap between the glass and the frame.
-
Insert an opening pick into the gap.
-
-
-
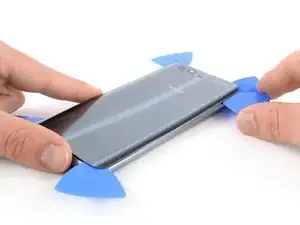
Slide the opening pick to the bottom right corner.
-
Insert a second opening pick and slide it to the bottom left corner.
-
Leave the opening picks in place to prevent the adhesive from resealing.
-
-
-
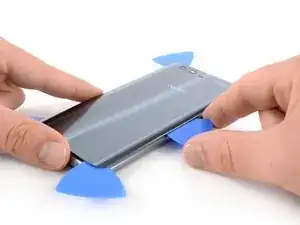
Insert a third opening pick at the bottom left corner.
-
Start to slide the tip of the opening pick from the bottom left corner along the side of the Huawei Honor 9 to cut the adhesive.
-
Leave the opening pick in its place at the top left corner to prevent the adhesive from resealing.
-
-
-
Insert a fourth opening pick under the top left corner of the rear glass.
-
Slide the opening pick along the top edge of the phone to cut the adhesive.
-
Leave the opening pick in the top right corner to prevent the adhesive from resealing.
-
-
-
Insert a fifth opening pick at the top right corner of the phone.
-
Slide the opening pick along the right side to cut the remaining adhesive.
-
-
-
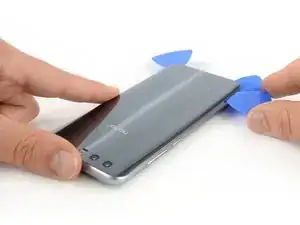
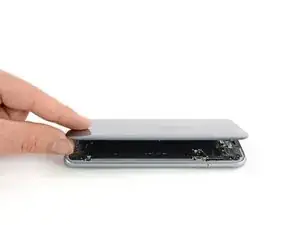
Carefully lift the rear glass and remove it.
-
Secure the new rear glass with pre-cut adhesive or double-sided adhesive tape.
-
After installing the rear glass, apply strong, steady pressure to your phone for several minutes to help the adhesive form a good bond, such as by placing it under a stack of heavy books.
-
-
-
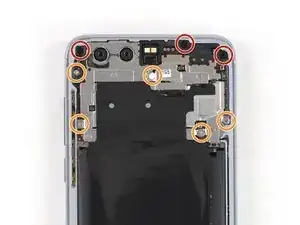
Remove the three Phillips #00 screws (3.45 mm length).
-
Remove the five Phillips #00 screws (2.9 mm length).
-
-
-
Carefully peel up the black thermal foil and remove it completely.
-
Remove the Phillips #00 screw that is located underneath the thermal foil at the bottom center of the motherboard.
-
-
-
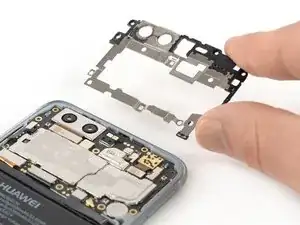
Slide an opening pick under the right side of the motherboard shield.
-
Twist the opening pick sideways to release the clips that hold the shield in place.
-
Repeat the previous process and work your way around the motherboard shield until it pops out.
-
-
-
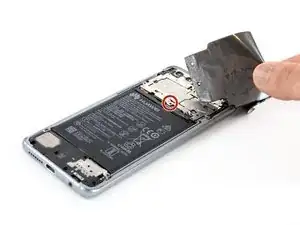
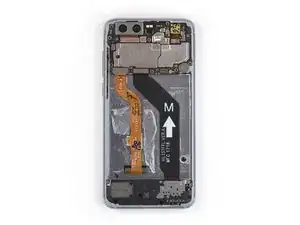
Apply an iOpener to the center of the display, to loosen the adhesive beneath the battery.
-
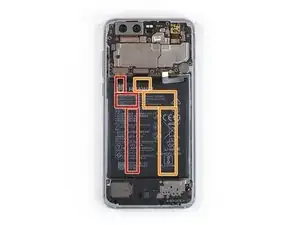
Display flex cable
-
Interconnect flex cable
-
-
-
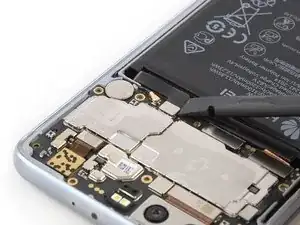
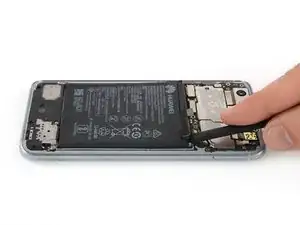
Insert the flat end of a spudger at the top right corner of the battery where the flex cable is located and start to pry the battery up.
-
Work your way down the right side of the battery and loosen the adhesive with the spudger.
-
-
-
Insert the flat end of a spudger at the top left corner of the battery and pry the battery up.
-
-
-
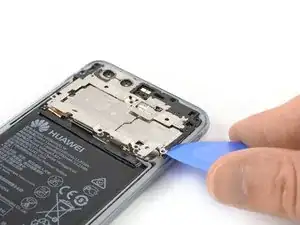
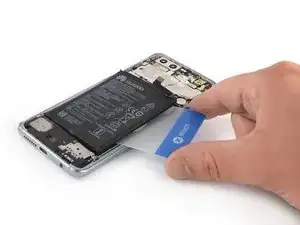
Insert an opening pick or plastic card between the frame and the battery.
-
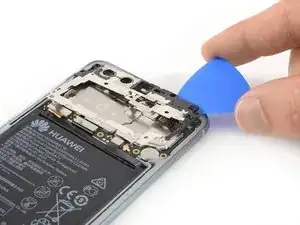
Cut any remaining adhesive underneath the battery.
-
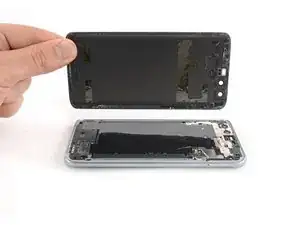
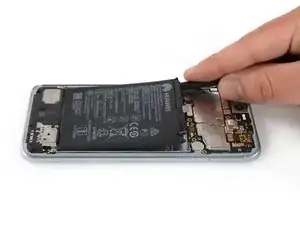
Pry up the battery until you can get a good grip.
-


To reassemble your device, follow these instructions in reverse order.
Take your e-waste to an R2 or e-Stewards certified recycler.
Repair didn’t go as planned? Check out our Answers community for troubleshooting help.

2 comments
J’ai réussi ce remplacement de batterie
Il ne faut pas hésiter à bien chauffer la partie basse pour réussir à y rentrer un médiator, et éviter de tordre l'appareil lors de l’insertion !
La batterie est vraiment très bien collée et il faut forcer plus que ce que je m’attendais pour réussir à l’extirper ! Ne pas hésiter à bien la chauffer également après l’avoir déconnectée !
Merci pour le tutoriel ainsi que sa traduction !
Merci beaucoup pour ce tutoriel !
Apres 4 ans d’utilisation, c’est reparti j’espère pour au moins 3 ans de plus avec ce téléphone.
Pour le iOpener, j’ai du réchauffer à la casserolle, cela fonctionne mieux en laissant un peu plus de 3 minutes dans l’eau bouillante. J’ai du répéter l’opération environ 3 fois pour venir à bout de cette fichue colle.
A l’étape 7 “fixez votre nouvelle vitre avec de l'adhésif prédécoupé ou du ruban adhésif double-face.” La nouvelle vitre est en fait l’ancienne mais qu’on colle à la toute fin de la réparation.
Je ne sais pas si il fallait remettre la feuille thermique noire mais je' l’ai fait grâce aux bouts de ruban adhésif.
Encore merci iFixit pour ce précieux travail :) !
Roger -