
Introduction
As many of you may already know, the DVD drive is matched or "locked" to the motherboard. Put simply, it is not intended to be a "pop-out/pop-in" repair.
This repair involves purchasing a new drive (after verifying which model you have), and repairing the components that have failed
In most cases that I've seen, its either the ejection assembly or the laser assembly - both which can be done in a fairly reasonable amount of time, and the laser replacement requires no soldering (removing entire slide assembly)
I will be posting images of a drive teardown (Philips), and parts identification
Component Level Diagnosis
Common Symptoms and failed parts identification:
SYMPTOM: Slow/No-load but drive is audible
CAUSE: Dirty/damaged laser assembly
RECOMMENDED REPAIRS: Run a DVD cleaning disc in the console; if this doesn't cure or improve the problem ,then replace the laser assembly
SYMPTOM: Fails to eject/slow eject
CAUSE: Dirty ejection mechanism; weak eject motor; streched ejection motor belt
REPAIR: Clean ejection mechanism with compressed air and lubricate with white lithium grease; replace motor and belt if no improvement
-
-
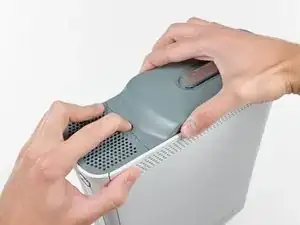
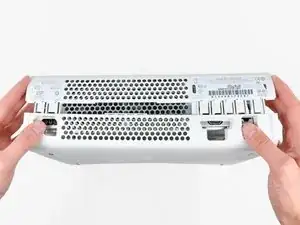
Grasp the hard drive assembly and press the release button while lifting its front edge.
-
Remove the hard drive assembly from the top vent.
-
-
-
Insert the flat end of a spudger or the edge of an Xbox 360 opening tool into the small gap at the front edge of the bottom vent.
-
Pry the front edge of the bottom vent away from the faceplate.
-
-
-
To release the clips, work from the front edge of the bottom vent.
-
While slightly lifting the front edge of the bottom vent, use the tip of a spudger to push the clips closest to the front of the bottom vent towards the inside of the console.
-
-
-
Use the tip of your spudger to release the clips on the bottom vent nearest the back of the Xbox.
-
-
-
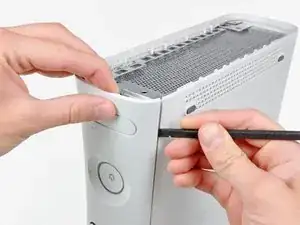
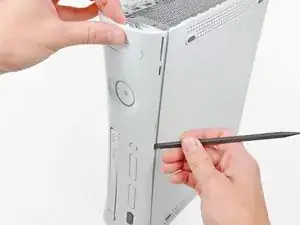
Insert the flat edge of a spudger between the faceplate and the outer casing near the power button.
-
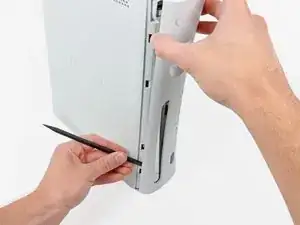
Run your spudger along the edge of the faceplate to release the clips securing it to the front of the console.
-
-
-
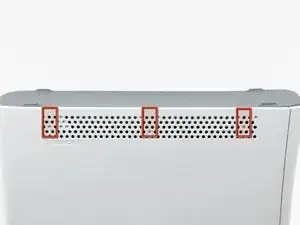
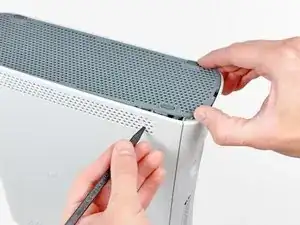
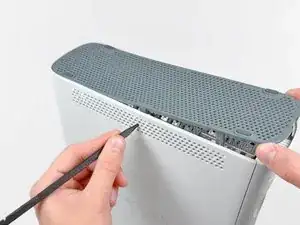
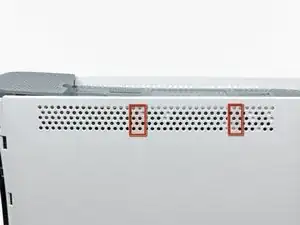
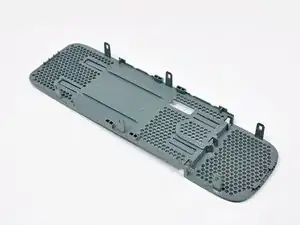
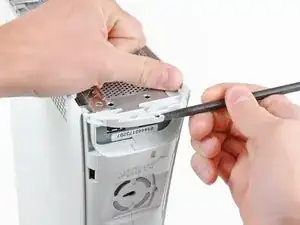
The top vent is secured to the console via clips. The first two clips are located underneath the top vent closest to the faceplate, as shown in the pictures.
-
-
-
Insert the flat end of a spudger into the small gaps previously mentioned to release the clips.
-
-
-
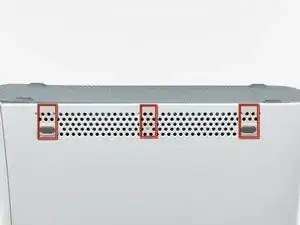
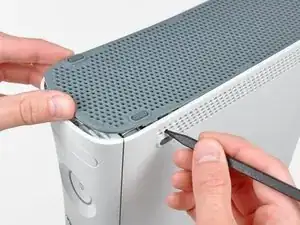
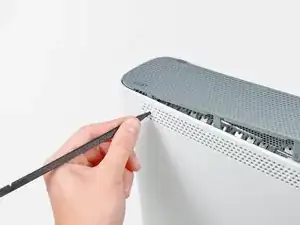
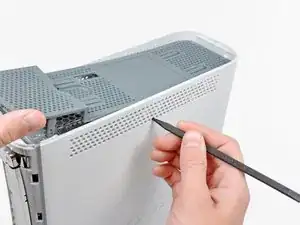
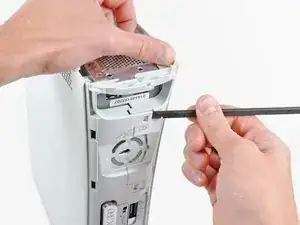
To release the clips, work from the middle of the top vent.
-
While slightly lifting the front edge of the top vent, use the tip of a spudger to push the clips closest to the center of the top vent towards the inside of the console.
-
-
-
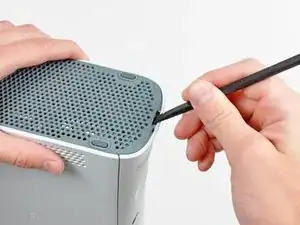
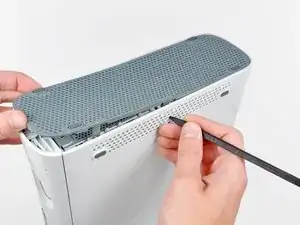
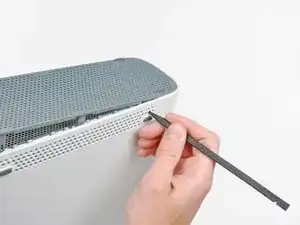
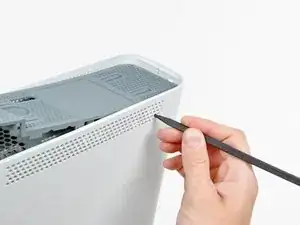
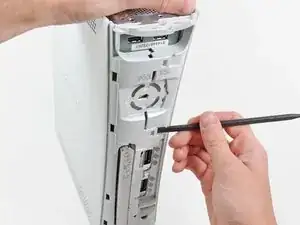
Use the tip of your spudger to release the clip on the top vent nearest the back of the Xbox's upper case.
-
-
-
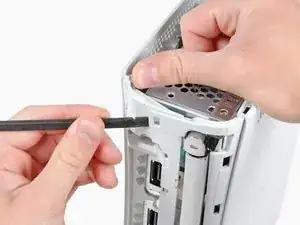
Use the tip of your spudger to release the clip on the top vent nearest the back of the Xbox.
-
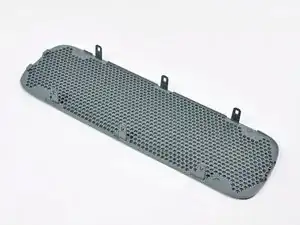
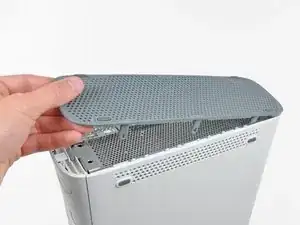
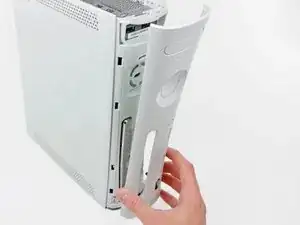
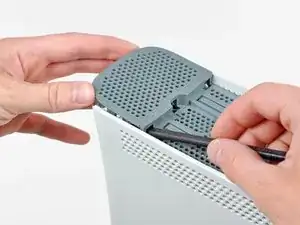
Remove the top vent from the 360.
-
-
-
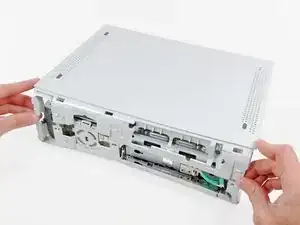
Stand the console vertically with the top edge facing down.
-
Carefully peel the warranty sticker off the console.
-
-
-
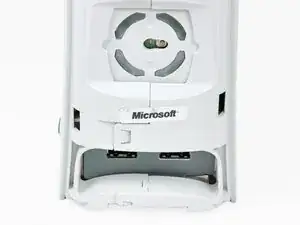
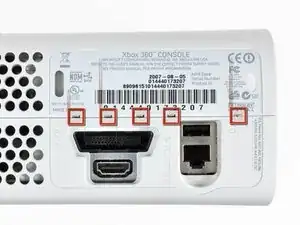
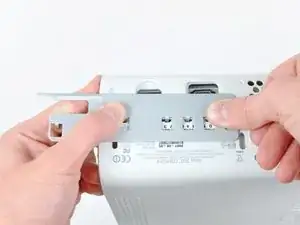
Use the flat end of a spudger to release the following latches:
-
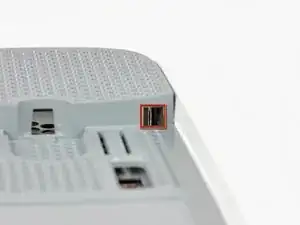
Above the front-facing USB ports.
-
Beneath the front-facing USB ports.
-
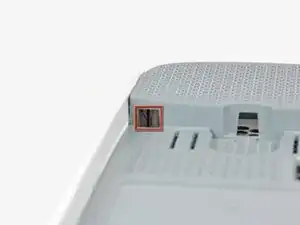
Above the Memory Unit slots.
-
-
-
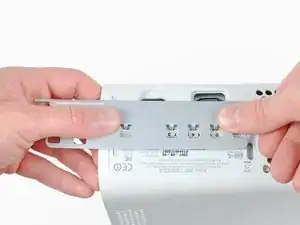
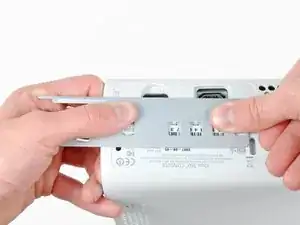
Insert the flat end of a spudger and pry upwards to release the last remaining latch located above the eject button.
-
-
-
Slightly lift the front portion of the lower case to ensure that the latches in the front have been completely released.
-
-
-
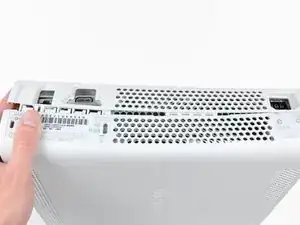
Press the Xbox 360 opening tool down into the clips securing the lower case to the upper case near the I/O ports.
-
While pressing down on the tool, push the lower and upper cases apart to separate the retaining clips.
-
-
-
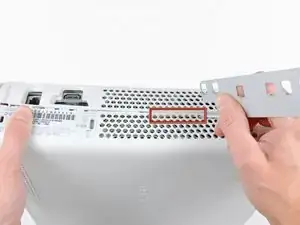
While pushing the upper and lower cases apart, use the tip of a spudger or the finger of an Xbox 360 opening tool to push the long clip highlighted in red toward the center of the 360.
-
The clip should release, leaving the clips near the power connector as the only thing holding the upper and lower cases together.
-
-
-
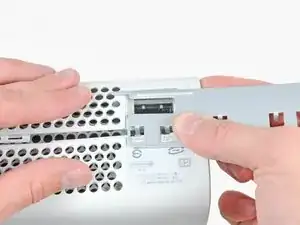
Press the Xbox 360 opening tool down into the two remaining clips near the power connector.
-
Push the upper and lower cases apart to fully release the retaining clips.
-
-
-
Grasp the back portion of the lower case and lift it upwards to separate it from the console.
-
-
-
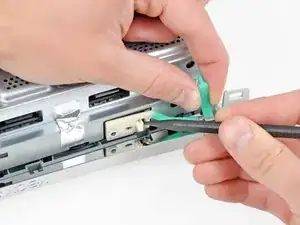
Use the tip of a spudger to release the clip securing the eject button to the metal casing.
-
Insert the flat end of a spudger between the eject button and the optical drive.
-
Pry the eject button off its retaining posts and remove it from the 360.
-
-
-
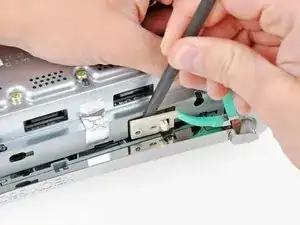
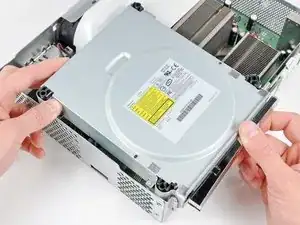
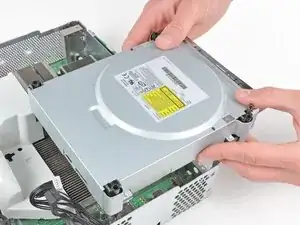
Slightly lift the optical drive upwards to gain clearance to disconnect the SATA and power connectors located on the backside of the optical drive.
-
-
-
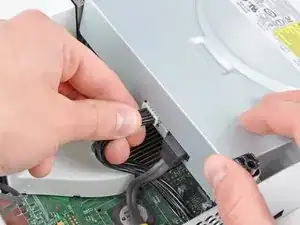
Grab the power connector by its cables and pull it straight out of its socket on the optical drive.
-
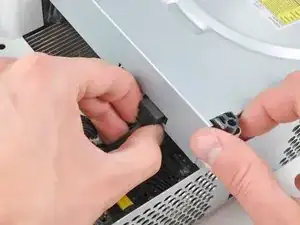
Disconnect the SATA data connector from its socket on the optical drive by pulling it straight away.
-
-
-
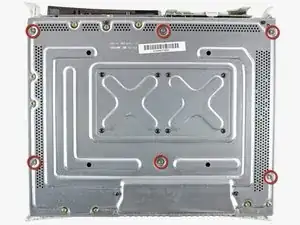
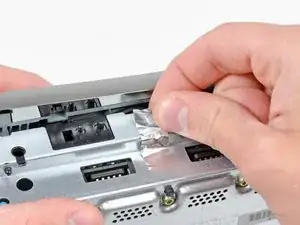
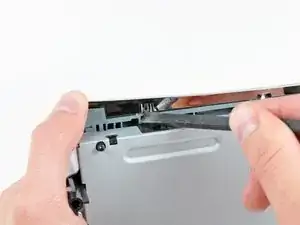
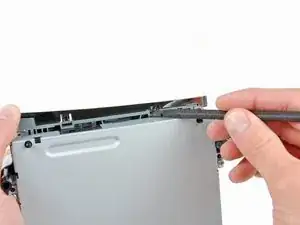
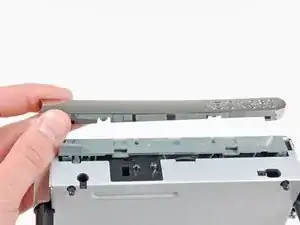
While pressing the optical drive cover toward the top face of the optical drive, use the flat end of a spudger to release the two retaining clips on the underside of the cover.
-
-
-
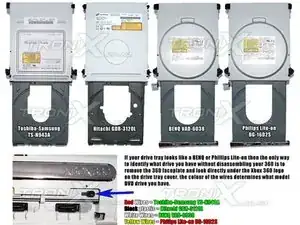
One of the easiest ways to replace your DVD Drive is to swap out the circuit board from your faulty drive into a new drive. However, you need to make sure that you use exactly the same model of DVD Drive as the one you own. The key is kept on a chip on this board we are swapping, so as far as the Xbox is concerned nothing has changed.
-
-
-
This is a simple procedure for the Hitachi and Samsung/Toshiba Drives (you only need to disconnect two ribbon cables and then reattach them) in the BenQ drive you need to de-solder and resolder 9 wires too.
-


To reassemble your device, follow these instructions in reverse order.
5 comments
Thank you. That helped me a lot.
just a quick question about the Phillips LiteOn does this only have the ribbon cables or is there desoldering and soldering needed. Thanks
Rick -
Its needs to be desoldered
For those of us who are a bit inferior, is there any "alternative" parts one could use to fix the eject problem on DVD-Drive? Like the rubber parts? Maybe a small rubber band with strong resistance? TIA.
WARNING: Just replacing the drive will not make it work correctly. Microsoft has married the drives to the motherboard. Hence, in order to get full operation out of the drive you'll have to perform more steps not listed here. Search in the FAQ on this specific topic for more details. Otherwise, before buying a new drive, try cleaning the inside of the old one and/or replace the belt involved in opening and closing the drive door.
- Good Luck
Eric -
Thanks..helped!
joseph zulu -
bress the button and lift with the same hand! i thought mine was stuck because of this pic!!!
Maths with Luigi -