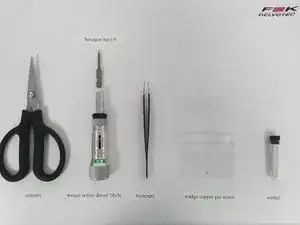
Introduction

  1. NnQGUhpOEx3cOCpv
    • Prepare Tools and replacement parts.

  2. ZSdQxpYlTClYCKtj
    ZSdQxpYlTClYCKtj
    AVJZhlQYHf3PadUI
    QPCRKjQPuVVIUIlk
    • Grab wegdge with tweezers

    • Loosen the screw. (while holding the wedge)

    • Get rid of the copper screw. To NOT use it more than once

  3. WGGGEQ4nO6ZatbcP
    WGGGEQ4nO6ZatbcP
    SeVmUTJCLhu4oARo
    fZGUkgmLMMAPZXxe
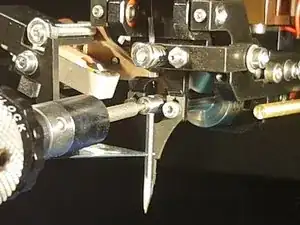
    • Put the wedge in the tranducer from below.

    • Take care, that the Tool Top is flush with the Transducer surface

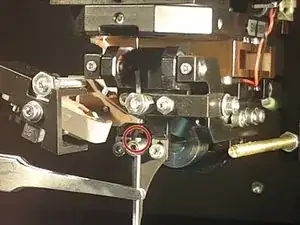
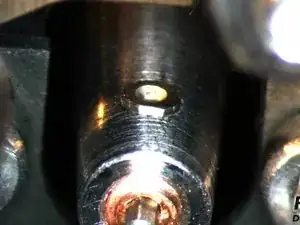
    • Correct Placement. Tool is flush with transducer.

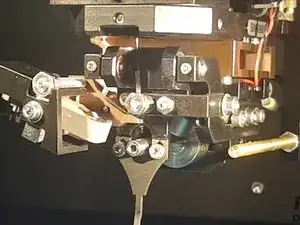
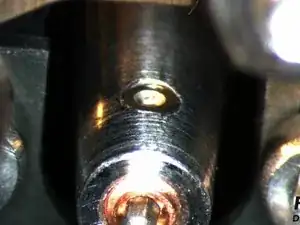
    • Incorrect Placement. tool is too high.

  4. SZfBvaxmhvRjOoSX
    SZfBvaxmhvRjOoSX
    JPJgRhrnUPD4dBM4
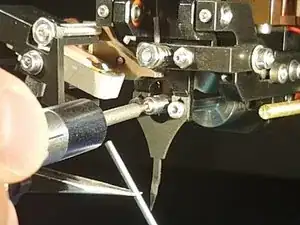
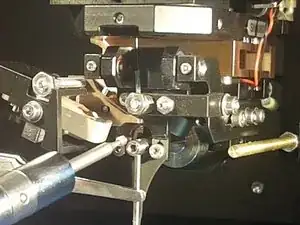
    • Fasten the screw lightly

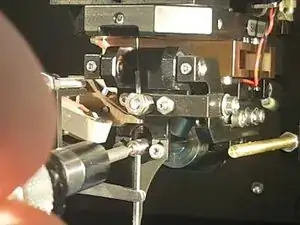
    • Tighten the screw just so the wedge does not slip out of the tranducer.

    • in case of appliying too much torque. Use a new screw and get rid of the old one.

  5. w2nJIXLFBtcZylJH
    w2nJIXLFBtcZylJH
    JjmhBIpBNDbsbnyB
    WwGUShGwKyobgaXJ
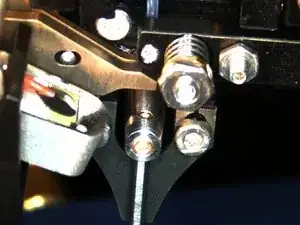
    • Place gauge below Tool

    • Loosen the screw so the wedge slides onto the gauge Lever.

    • Lift the gauge up until in contact with the transducer horn.

    • Now the Tool-Top should be flush with the Transducer-Horn

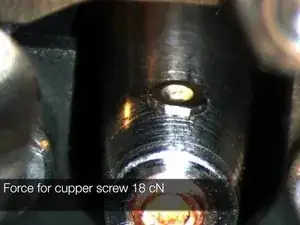
    • Tighten the screw with the torque- wrench

    • Use Torque wrench with 18cN limitation

  6. Use tweezers to push the wire down the wire hole, until it Ends some cm below the tool wedge.
    • Use tweezers to push the wire down the wire hole, until it Ends some cm below the tool wedge.

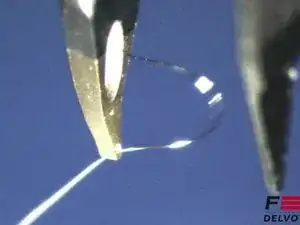
    • Use scissors to cut the (contaminated) Wire down to a length of about 1cm below wedge end.

  7. OsQWK6VNjChmCMxL
    OsQWK6VNjChmCMxL
    KWrjZlHMpXYmKKI2
    RTEDjZQJgaOGbYQi
    • Use tweezers to thread the wire through the hole at the end of the wedge.

    • Afet threading pull the wire some cm through the hole.

Conclusion

To reassemble your device, follow these instructions in reverse order.

Hans Panz

Member since: 10/03/16

289 Reputation

0 comments