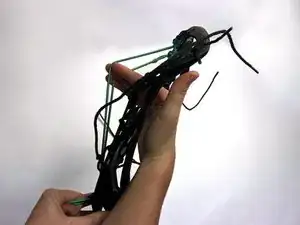
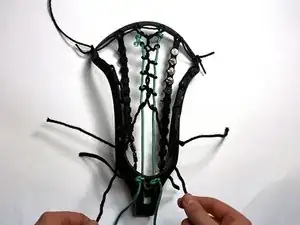
Introduction

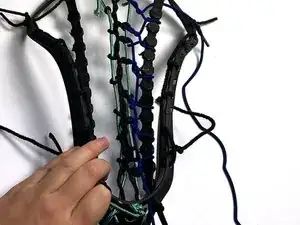
If your lacrosse strings are too tight, too loose, or just generally out of repair, your playing will be negatively affected until you can get a restring. Many sporting goods stores offer this service, but any women's lacrosse player can save themselves time and money if they know how to restring their own stick.

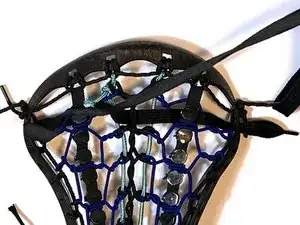
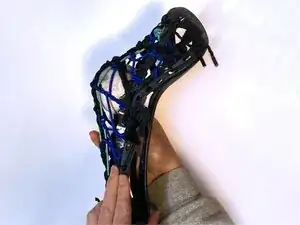
While there are many customizable ways to restring a women's lacrosse stick, this tutorial will set you up with the basics for one of the commonly used styles. This guide will walk you through the steps of stringing a pita pocket, which has a channeled center that provides better hold and release than a traditional pocket.

Before starting this guide, get familiar with the types of strings used for a restring, as well as how to tie a poacher's knot.

  1. PmYYA5ZTlEMXhCWh
    PmYYA5ZTlEMXhCWh
    w2oiou6UuQqZ4h2e
    WeecymjNtMJagjCv
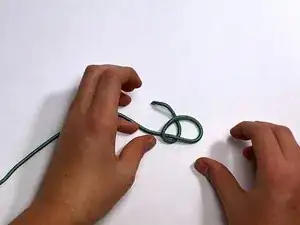
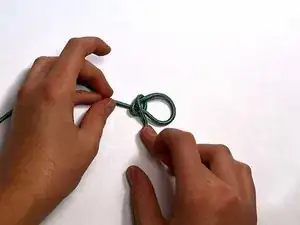
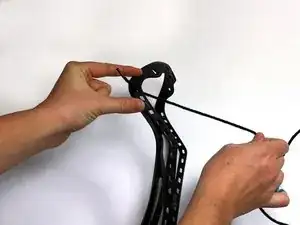
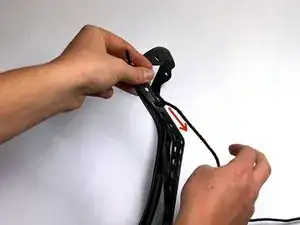
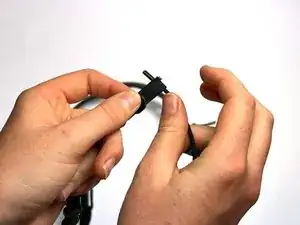
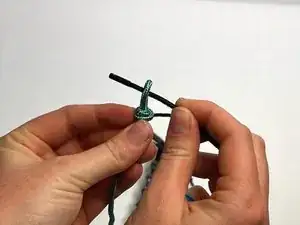
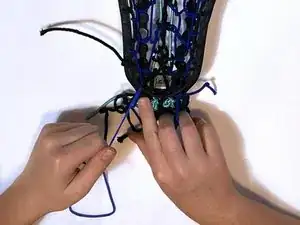
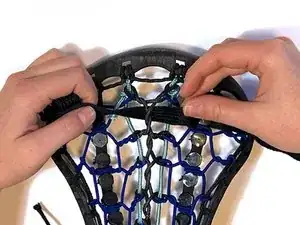
    • Prep the nylon strings for the pocket with a poachers knot.

    • Create this knot at one end of each nylon.

    • There are two nylons for this stringing instruction.

  2. 1tSiCBII1S2PLH2G
    1tSiCBII1S2PLH2G
    AiFLCHJsGnZFHplS
    • Tie a double knot on a sidewall string.

    • Make sure the lacrosse head is face down.

  3. aH5cIQFxkfrDqAcq
    aH5cIQFxkfrDqAcq
    PJTxjfermXnXSAdN
    3I3HGRNdB6bgHwg5
    • Lace the string through the topmost sidewall hole.

    • Skip a hole.

  4. HXghqFPp5OVMPhJN
    HXghqFPp5OVMPhJN
    KmCavTtGjJavDXiM
    MeIMtXK16xOsJByM
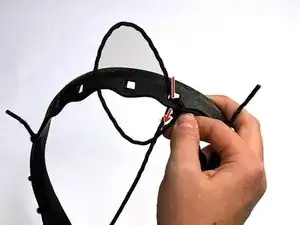
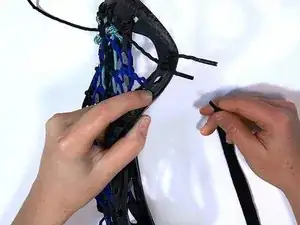
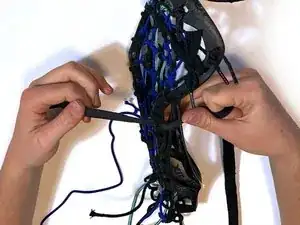
    • Thread the end of the sidewall-string through the loop made via "stitch."

    • Pull tight, towards the next hole.

  5. fXwjZl2jOwHLBLZr
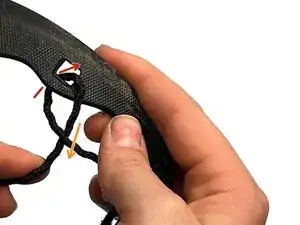
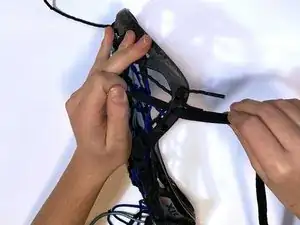
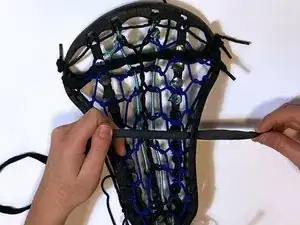
    • Repeat step 3 all the way down the side wall, skipping a hole each time.

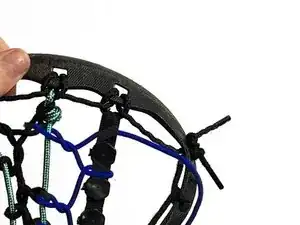
    • Tie off at the end. Repeat for the other sidewall.

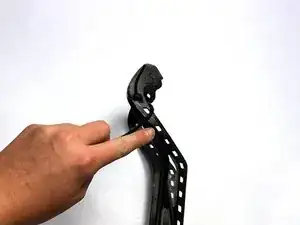
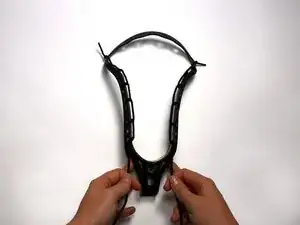
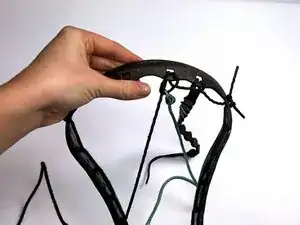
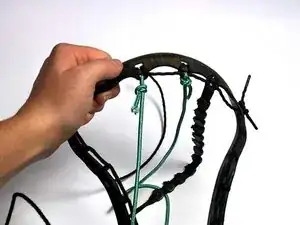
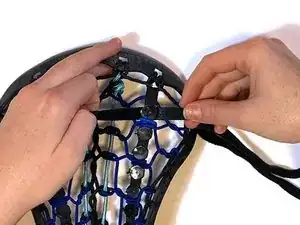
    • Ensure that the holes match up on both sides.

    • Stitches should be facing inwards.

  6. hPDRMkBaPU2tjVba
    hPDRMkBaPU2tjVba
    pUIpTcePuTFRfeAm
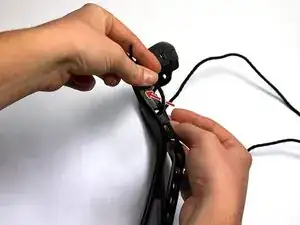
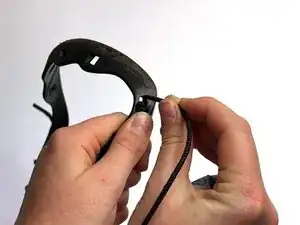
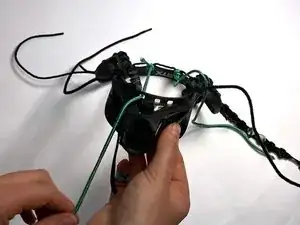
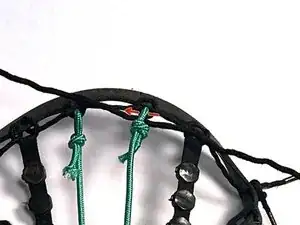
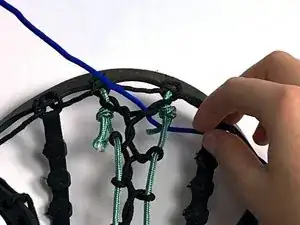
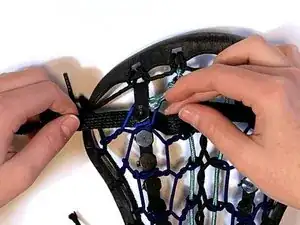
    • Knot the top-string on one end.

    • Thread the top-string through the topmost sidewall hole with the sidewall-string knot.

  7. KkM1mHq1hvcWbkCX
    KkM1mHq1hvcWbkCX
    hRhYl15o5RvQKdIe
    iqninMYerlyRoxOL
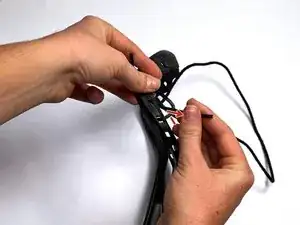
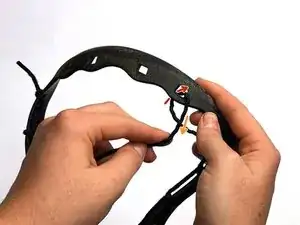
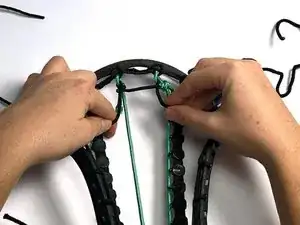
    • Start each hole with pulling the string back to front.

    • Pull tight!

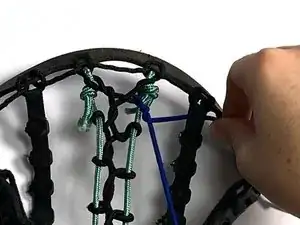
    • Feed the top-string through the 1st leather.

  8. PXcrtEqgiRrcuZaP
    PXcrtEqgiRrcuZaP
    XupuVnUwvvdY2xbu
    IoHtobrY46GiNeID
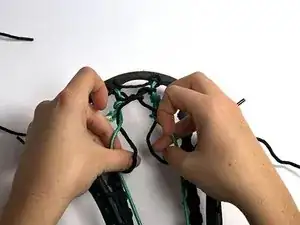
    • Thread the top-string front to back.

    • Pull tight!

    • Make sure that the continuing string comes in front of the knot.

    • Start the same loop pattern on the next hole. (back to front)

  9. hHhejrueUw12h5De
    hHhejrueUw12h5De
    xirsOOf4gEJ6DINK
    PxPMQGSEjvsUqEKD
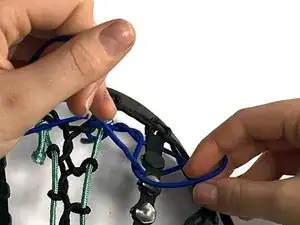
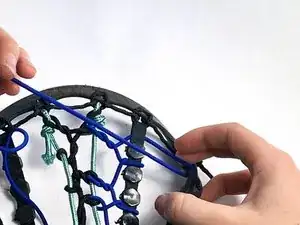
    • Grab one of the prepped nylons from step 1.

    • Thread the top-string through the nylon poacher's knot.

    • Finish the loop pattern by pulling tight. (front to back)

  10. ekk4VKPgsZLPKZhr
    ekk4VKPgsZLPKZhr
    JcxCah1ICVQMmBVm
    • Repeat Step 9 to tie in the second nylon.

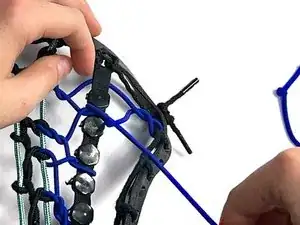
    • Repeat Step 8 to tie in the second leather.

    • Pull through the top sidewall.

    • Tie off with a knot.

  11. vMVqXIE3dbrri1Rd
    vMVqXIE3dbrri1Rd
    1WsTiXpUIOC54FMS
    N6vCgcC25KIjEEWM
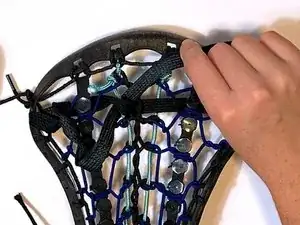
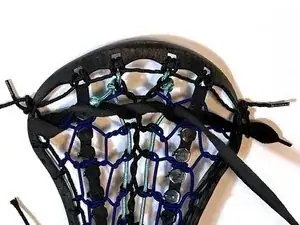
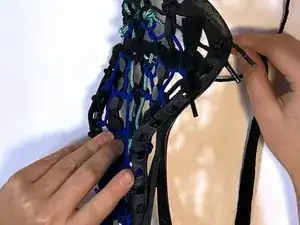
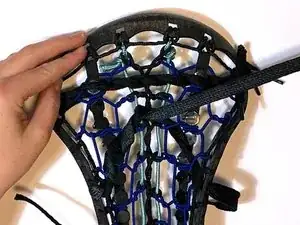
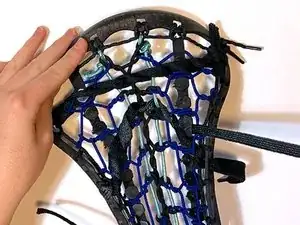
    • Lace all the 4 strings through their respective holes at the bottom of head.

    • Do not tie off yet!

    • Push the leathers and the nylons to the desired pocket depth.

  12. P4yVgL1ZGXFWlcvG
    P4yVgL1ZGXFWlcvG
    NOkJrpLfAhNrGyP4
    • Thread the pocket cross-string through both nylon strings.

    • For this manual, the pocket will be black.

    • Ensure that once pulled, both end lengths are the same.

  13. ngvpIt2UIFf3RsKF
    ngvpIt2UIFf3RsKF
    vqLAyTgmvIbnGnbh
    UxYOkWC1WbwiCfnP
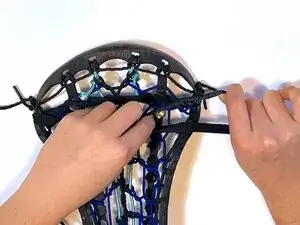
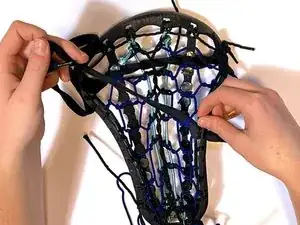
    • Wrap the cross-string up and around its adjacent nylon.

    • Bring both of the string ends towards center to form a twist.

    • Finish by wrapping the string around each nylon again.

  14. RIEhpqvtrxg1EspT
    RIEhpqvtrxg1EspT
    QYJFiyiiQKnHuLWO
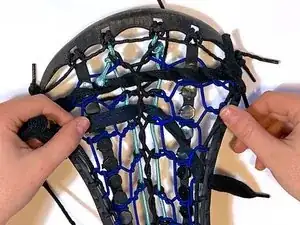
    • Repeat the twists and wraps in Step 13 until the end of the nylons.

    • Pull the ends of black cross-strings through the same holes the nylon strings are tied off at.

    • The pocket should consist of 8-10 twists. (The pocket tightness is based on the player's preference.)

  15. ookUtJP634QQ3UAy
    ookUtJP634QQ3UAy
    TuQ6cAmYUJoXFWMI
    ZfFwedgOrNNE1cXX
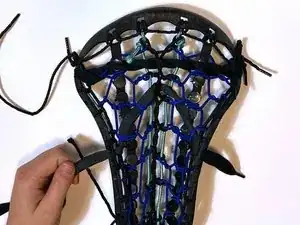
    • Thread the cross-string through the top of the leather.

    • The inner cross string will be blue for this manual.

    • Make sure that each end of the cross-string is of even length.

    • Bring the cross-string under the nylon and through the first twist of the black pocket string.

    • Lock the string in place by bringing it back around itself and pulling down.

  16. iomXCV3YxmmWIKQx
    iomXCV3YxmmWIKQx
    bkycEZcKQJpWOMSb
    gmsMgQpInJrNE2BL
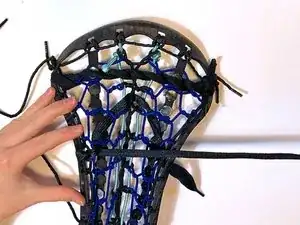
    • Wrap the cross-string around the leather, front to back.

    • Thread the cross-string under nylon and through the second twist of the black cross-string.

    • Repeat this pattern (steps 15-16) until each twist in the pocket has been threaded through.

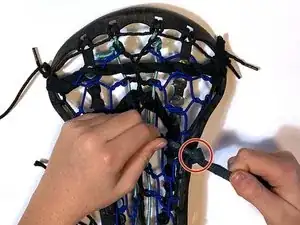
    • Pull the end of the cross-string through the hole of the leather at the bottom.

  17. FSRN6k3BjVxwZTbX
    FSRN6k3BjVxwZTbX
    WNuLx2nY4sp6SRhP
    36kVAHGBLaZEcKWH
    • Thread the remining blue cross-string through the first loop of the sidewall string.

    • This will create the outer cross-string section.

    • Wrap the cross-string around the leather.

    • Twist the cross-string around itself so it's "locked."

    • Repeat this step, threading through each sidewall loop until the bottom.

  18. cgUcU5x1eCxFgQEw
    cgUcU5x1eCxFgQEw
    d6vFiFARPJj1LqmJ
    • Repeat steps 15-17 to string the other side. (inner and outer cross-string)

    • Thread both of the ends of the blue cross-string through the same hole the leathers go through.

    • Knot the two ends together to tie off.

    • Repeat for the other blue cross-string ends.

  19. 3cwx4SctfttkYfCt
    3cwx4SctfttkYfCt
    WPvdLDiLFE6VaMtI
    • Thread the first shooting lace through the second hole down on the left side of the head.

  20. KlpTIrUjqpL5EjtY
    KlpTIrUjqpL5EjtY
    PAGOhdffEcqyB5FP
    Xq3ZrlUeGEQDxSJh
    • Weave over the blue cross-string.

    • Weave under the leather.

    • Weave over the nylon.

    • Weave under the black pocket-twist.

    • Weave over the nylon.

    • Weave under the leather.

    • Weave over the blue cross-string.

  21. fgqKIvXPTgmdxPDM
    fgqKIvXPTgmdxPDM
    JOsysoQEau5tIgRY
    BJf4AyXKEdqLhBQs
    • Thread the lace's end through the second sidewall hole down.

    • Return the shooter-lace over the sidewall hole.

    • Create an opposite weave of over and under through each section.

    • Be sure to twist the lace around itself as you weave over and under.

  22. jEvc1RtGpOsWs6Kg
    jEvc1RtGpOsWs6Kg
    TdSaISbOD4dur3sw
    • Tie off the shooter lace with itself, creating a knot over the sidewall hole.

  23. nUlfAX3vfvXFOCay
    nUlfAX3vfvXFOCay
    NYXFdggGVHOiFZJJ
    • Cut off any excess lace, leaving about an inch.

    • Make sure to cut after the knot.

  24. DTaSHaVSVu5p2XFs
    DTaSHaVSVu5p2XFs
    XVYXQ3xIikPGdCya
    6AwnpFoJrqVKoVQG
    • Pull the 2nd shooter lace through the 5th or 6th sidewall hole from the bottom.

    • The position will be based on player preference.

  25. kBinmRu1ZxrKsBaA
    kBinmRu1ZxrKsBaA
    IQenjgoXLgqCESXE
    4GKOBDXriRoj1KEL
    • Weave the shooter lace under the cross-string.

    • Weave over the leather.

    • Weave under the next cross lace.

    • Weave over the nylon.

    • Weave under the center pocket strings.

    • Create an upside-down U shape to help form a defined pocket.

    • Pull the lace through the sidewall hole across from the starting point (5th or 6th up from bottom).

  26. ZvoNehjmvcFNxeCY
    ZvoNehjmvcFNxeCY
    ArpOfmXKaItJhrr6
    TaUmW6sTIoxWpwbH
    • Thread the shooter-lace back through the U-shape, inversing the over/under pattern.

    • Be sure to twist the lace around itself as done with the first shooter lace in steps 22-23.

  27. 6OHKIHISqKqXglqm
    • Tie off the shooting lace using both ends.

  28. OCMgoYxUsHGPIZJJ
    OCMgoYxUsHGPIZJJ
    eqmHXqCDxRWgoZBv
    ZDe11L3HrsBNdmUj
    • Cut the excess off of all strings that are tied off with knots.

    • Leave 1/2 an inch or so on each string for tightening purposes.

  29. Q5MJCIOHIcTd5gki
    Q5MJCIOHIcTd5gki
    uDU4YrGjHCUAuTtl
    • Use a glue gun to seal all of the cut strings.

    • Glue gun tip and fresh glue is very hot!

  30. Fx2OIljqBkcHInbf
    Fx2OIljqBkcHInbf
    MByEVcK2lRNW245R
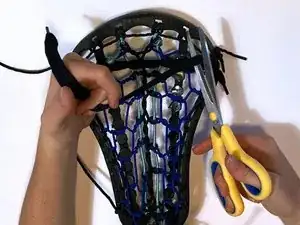
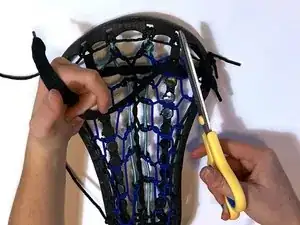
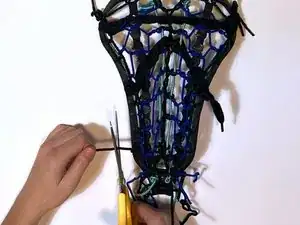
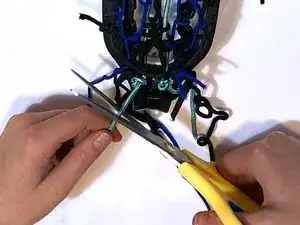
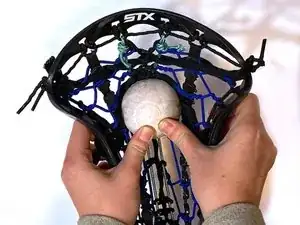
    • Use a lacrosse ball to test the depth and tension of your completed pocket.

    • Readjust as needed.

Conclusion

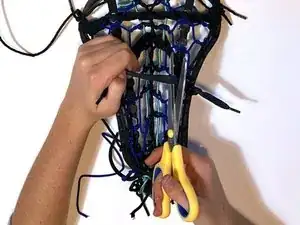
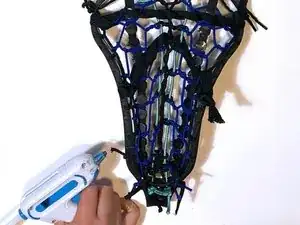
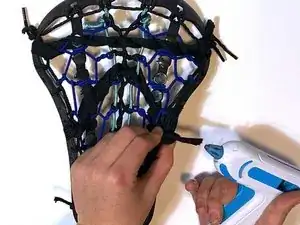
This guide is a complete replacement of all strings. Each step per string can be done solo if only one string-part of the lacrosse head needs repair.

Katharine Strong

Member since: 05/11/24

425 Reputation

0 comments