Introduction

This repair guide was authored by the iFixit staff and hasn’t been endorsed by Google. Learn more about our repair guides here.

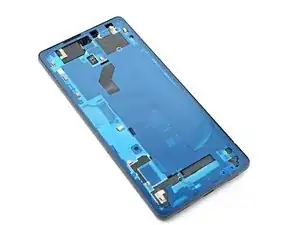
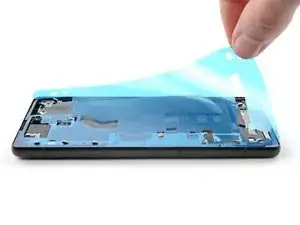
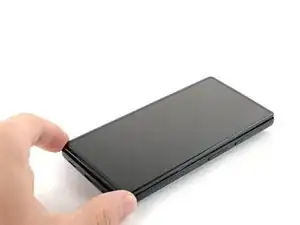
Use this guide to apply new adhesive in your Google Pixel 6a following a repair. Your Pixel's screen should be removed before following this procedure. Follow this guide to remove the screen if you haven't done so already.

  1. DhnRPBJD2wHav5TL
    DhnRPBJD2wHav5TL
    VW1UXMOhhIQTXN6Z
    GqIigaklAQoRtII3
    • Any residual adhesive or debris on the frame will prevent your screen from sealing properly.

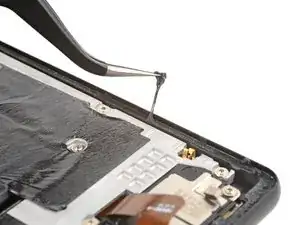
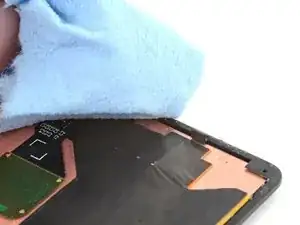
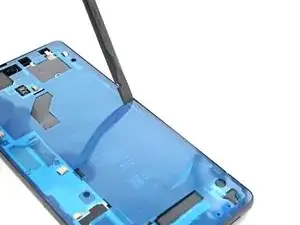
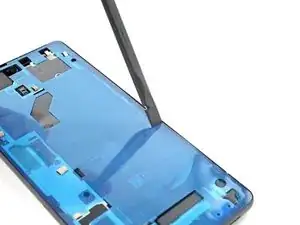
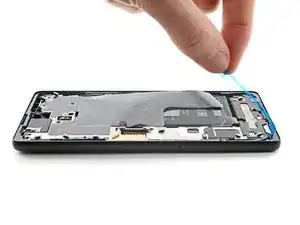
    • Use the flat end of your spudger to scrape off as much adhesive from the frame as you can.

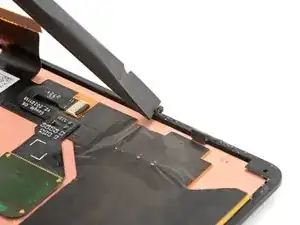
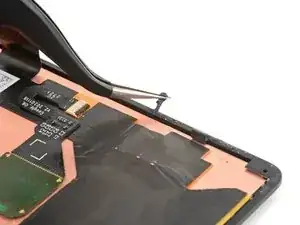
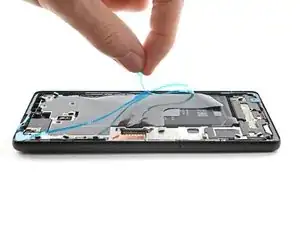
    • Use tweezers or your fingers to peel and remove any remaining adhesive.

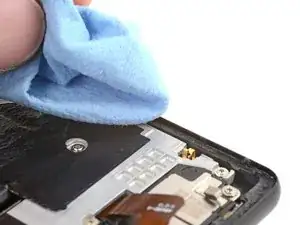
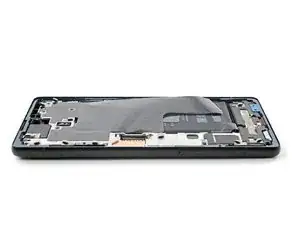
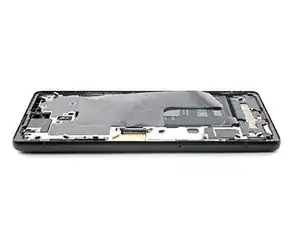
    • Clean the perimeter of the frame with a small amount of highly-concentrated isopropyl alcohol (over 90%) and a lint-free or microfiber cloth.

    When I cleaned my frame I noticed I had dented 2 corners. I did not have my small file set so I had to improvise. I have a small set of electrical pliers with flat, ribbed sides and a 90 degree bend. I carefully ran these around the corners to get rid of the dents and used the ribbed edge to file them smooth. Would suggest getting a jewelers loop and a set of fine files if you at all suspect the frame/case may have a dent in the corner. Kind of obvious in hindsight - after all I dropped the thing and broke the glass, which got me here making this repair! My only other observation is to use plenty of alcohol - it only temporarily removes the stickiness of the adhesive so as it dries the adhesive re-sticks to the frame.

    mark schneider -

    fwiw - I found getting the original adhesive off the frame to be near impossible. But I pulled off any clumped up bits. Applying the new liner with adhesive went fine, as did placing the new glass and pressing around the edges to seal it. The seam looks as if brand new (i.e., it's not bigger or open because of too much adhesive). The phone is now in a case and it's not like I'm going swimming with it, so I'm confident the seal is adequate. Of course, YMMV.

    Steve -

    I found the adhesive very hard to remove. Tried Acertone, Methylated Spitits and Isopropyl Alcohol. I found the Metylated spirits worked best but it still took about 40 minutes to remove all of the adhesive.

    Aaran Stent -

    I couldn't remove all the adhesive, so just removed as much as I could. Placed the new adhesive on top and phone still seems to hold up well.

    Leon -

    Work one edge at a time.

    Tilt phone so working edge is lowest.

    Wet adhesive channel with isopropyl 90%. Tilt will keep it in channel. Wet, not soak.*

    While wet, spudge from inner to outer edge, i.e. perpendicular to channel. Adhesive will pill up.

    Repeat until adhesive pills are large enough to remove with tweezers or spudger.

    When channel is mostly clean, finish by scraping spudger sideways into channel.

    Repeat for all sides.

    *Idea is that wetting will make adhesive less tacky on surface but remain tacky to the inside. Resulting pills are easier to remove because of the resulting structure

    Andrew Olney -

    I found tearing a little bit of the alcohol wipe, rolling it into a ball and using the pin head tweezers to rub it along the glue line quite vigorously helped break up the adhesive up.

    Richard Collins -

    I removed some of the clumps using the tweezers as suggested by other people, given the adhesive is REALLY resistant. I didn't want to take the risk of spilling alcohol or something like that inside. The fit didn't seem to be affected by the new adhesive, which seemed a lot thinner than what was previously there. I wager that my phone will be much less water-resistant now.

    YuropeCat -

    This part is so difficult and took forever, easily 40 minutes. Here's what worked for me:

    1) scrape with spudger a ton. So very much. so much spudging.

    2) pull off balled up bits with tweezer.

    3) Carefully apply 70% isopropyl alcohol (it's all I had) to edges with q tips.

    4) More spudging.

    5) Apply more alcohol with spudger tips.

    6) Scrape up the adhesive with the plier tips, yeah it's super tedious because they're tiny but you can get a ball going, and then the adhesive starts to stick to itself better than the frame, so it will start pilling up more effectively. Then pull off.

    7) Repeat until you want to cry. Eventually it will all come up!

    EMC -

  2. oOUcLMuaNcPYgqs3
    oOUcLMuaNcPYgqs3
    tsFtceV6ATljpTL4
    5JvmQkALhT4e3WFU
    • If you're reusing your screen, clean it as you did for the frame.

  3. M4iGUkhtQE35UFlF
    M4iGUkhtQE35UFlF
    Q5oYnhTQwrVZeHBB
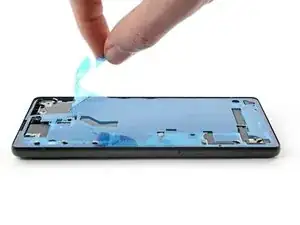
    • Before removing any liners, position the adhesive with the clear liner facing down over the frame to find the proper orientation.

    • Use features such as the upper loudspeaker cutout and conductive tape to orient the adhesive.

  4. 3pgu63PJmvTnxOCp
    • Peel the clear liner off of the adhesive.

  5. C55FQPbqpVuJuGW4
    C55FQPbqpVuJuGW4
    WRrdaA34BHhbnJLZ
    aMjuBWjHdXPrCVUf
    • Be very careful during this step! The adhesive is very sticky and can't be repositioned once it sticks. Misaligned adhesive can lead to an improper seal.

    • Lay the adhesive onto the frame, starting with the bottom or top edge. Make small corrections as you go.

    They are not kidding, it is really sticky. The way I did it was to slot the top left end in first, top-right end after, and then just kinda let it fall into place. The edges aren't sticky, so you can hold it from there. Carefully.

    YuropeCat -

    This part was so easy compared to times I've done similar repairs on older phones. Definitely start with the left top corner.

    EMC -

  6. cKsdtFxTkTJxyt3d
    cKsdtFxTkTJxyt3d
    EuRPodv2iZOwofUU
    • Use a spudger or your fingers to press along the perimeter of the adhesive and adhere it to the frame.

  7. cy3LtmP1ImjTNVY6
    cy3LtmP1ImjTNVY6
    TJREoK65swtSMCh4
    dgtgFAKTKMQEwRYi
    • Grab the pull tab on the upper right of the frame and peel off the main liner.

    There is another pull tab at the bottom. Do NOT pull it off. You are only pulling the main, inside liner. Step 10 has the final removal.
    In fact, I think this could be specified in the guide.

    YuropeCat -

  8. duhiyHZgOXHiHXOv
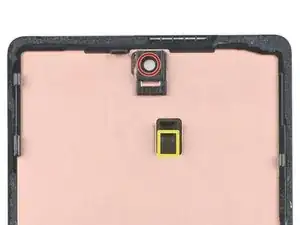
    • Check the front-facing camera hole on the replacement screen and remove any remaining protective liners in it.

    • Check the sensor cutout on the replacement screen and remove any remaining protector liners in it.

  9. D6qGnoIQdwbUj41I
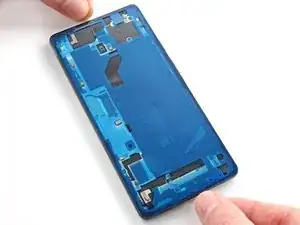
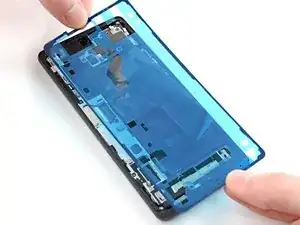
    • Return to your phone's guide and continue reassembly.

    • Remember to reinstall the display cable bracket.

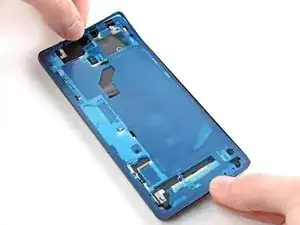
    • Finish this guide when your screen is installed and you're ready to seal the phone up.

    Don't forget to add the display cable lock like I did...

    Alex -

    This comment just saved me making the same mistake!! Thank you Alex!

    Michael Roberts -

    Take your time. This is hands down the most difficult portion of the process. There's a very slight click when the cable is assembled again. Barely audible, if at all, but you can feel it under your finger. You can unfurl the cable a little to make the process easier, because it will try to bend back into it's folded position otherwise.

    YuropeCat -

  10. KXxk42nPjPLhNkFj
    KXxk42nPjPLhNkFj
    dOlQeKSpkkr1fEJM
    lPnH1lQyWUZSQfOV
    • Grab the pull tab on the bottom edge of the frame and peel off the remaining liner.

  11. j5n5EBckfcTRd1Mp
    j5n5EBckfcTRd1Mp
    1KhReSujY5rB3n3x
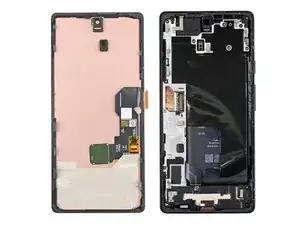
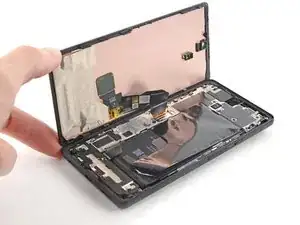
    • Flip the screen over and lay it onto the frame.

    • Press along the perimeter of the screen to secure it.

    After you remove the final liner, and the guide says to install the screen to lay it onto the frame and to secure it, are you done? like when you press the screen to lock it on the phone the work is done? because I haven't seen any of the guides explaining how exactly do you really finish, if you just lock the screen in place and you are ready to go or if you have to do some other things that I don't know.

    Francesco -

    You just kind of squeeze it together, really. Don't crush it, but press it together pretty tight. It's adhesive, after all. It likes pressure. I didn't really feel any sort of clicks when I was done. On the main page, there's a link and lots of comments regarding the fingerprint scanner.

    YuropeCat -

    Mine did make some clicks as I pressed it in. Start with the left edge and be gentle with aligning it and it will just sort of fall into place.

    EMC -

Alex Diaz-Kokaisl

Member since: 16/01/22

151892 Reputation

21 comments

Yup. That worked, Don't rush it, and get a proper suction cup, but i have a perfectly repaired 6a, very happy, and thank you

Eoin Fleming -

Great advice, but there must be something I'm missing. Now my phone can't show the screen

icanwecanyoucan -

When this happened to me, I went back and put the display cable in again. It wasn't done properly. I'm sure you got it fixed by now, but you should not forget the metal bracket too.

YuropeCat -

Will this provide the same water resistance as the original screen?

Noam Etten -

Depends on how well you seat the adhesive, but generally speaking, it's very hard to get to the same level of water resistance. It will probably be somewhat resistant.
Water resistance should be treated as an additional protection, not as a feature. Do not submerge your electronic device in water by purpose. (even if it's factory new)

Gabriele Turelli (CappyT) -

You guys are awesome, you know that? After almost 2 hours of work, everything works again. Thanks a lot. Greetings from Belgium

DaMuf84 -

magnifique! merci

munos renovation -

Thanks guys :) It worked fine. Special thanks to all the warnings :)

Ruben, former Nokia developer :)

Ruben Hansen -

It was a surprise to me that the P6a screen part did not come with replacement adhesive. I didn't discover this until I had my phone apart and went to open the package the screen came in... so, learn from my mistake!

Ben Scott -

Wow! i took my time, especially removing the glue (where i think i was too perfectionist). in the end it was faster and more easy than i thought.

the ifixit tools are worth its price! struggling to recalibrate the fingerprint sensor cause im running grapheneOS...

albert -

i can not get my clips in

Muhammad Zain Ali -

I think it is important to mention that you need to recalibrate the fingerprint sensor, I tied to use the qr code on the sticker on the replacement screen, but it resulted in me havig to reset my phone, which was very annoying. A better way is to use this: https://pixelrepair.withgoogle.com/udfps

M H -

Great instruction. It would be helpful to explain the process of removing the old adhesive better. It took me half an hour to get the old adhesive of.

Daimonion -

Nice guide! I was able to replace the display in about 2hrs and the recalibration of the fingerprint sensor also worked flawlessly! Removing the remaining glue from the frame was what took most of the time. Very happy with the outcome!

Tobias Wittmann -

Am I supposed to lay the adhesive over the cable once the screen is plugged in? There is no hole in the adhesive for the cable to pass through once it’s on

Tim -

Scraping off the old glue was a nightmare. I cut off the bent tip of the spudger 3 times but I scraped off almost all the old glue. I don't recommend it unless it's necessary because I wasted about 3 hours on it ;-)

Snake -

On mine the actual screen came out of the bezel. There seems to be a foam gasket in there, but no adhesive on it or the edges of the screen. Any suggestions how to reattach securely that won't damage the screen (which is working perfectly after I re-seated the loose connector)?

barefootedmike -

This guide worked well for me. The only difficult part was that the adhesive doesn't really want to go, and reattaching the screen connector was quite time consuming.

YuropeCat -

Ich habe das Display nach Anleitung getauscht, beim testen war auch noch alles soweit ok. Einziges Problem, der Fingerabdrucksensor funktioniert nicht mehr.

Steven Fritsche -

Hallo, die Hilfe und richtiges lesen habe das Problem gelöst. Vielen Dank euch.

Steven Fritsche -