Introduction

Use this guide to open the Apple TV 4K 2021 Siri Remote for repairs.

  1. rcaxy6nLUP6jLCOF
    rcaxy6nLUP6jLCOF
    pJ35PQvpaEdfoeYB
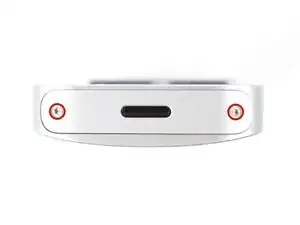
    • Use a P2 Pentalobe screwdriver to remove the two 6.1 mm-long screws securing the bottom cover.

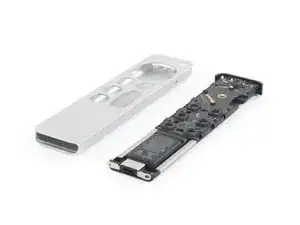
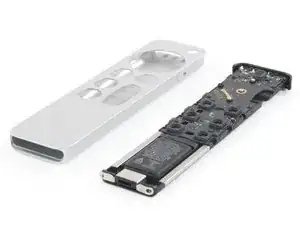
    • Remove the bottom aluminium cover.

    These screws seem larger than a P2. My P2 keeps slipping on the screws.

    prplecake -

    The two screws are at a slight outwards angle. Also the iFixit screwdriver is a little too small for the screws. I had to file off the tip a bit to get a secure grip.

    Bachsau -

  2. oejDhRsQlImTItBB
    oejDhRsQlImTItBB
    NidDLaoXStWENXIF
    yQsfDqGDULRqA3qY
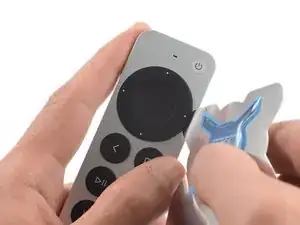
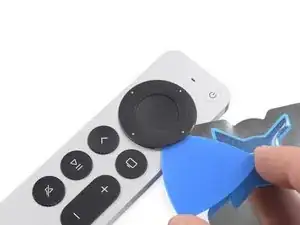
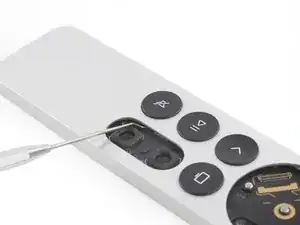
    • Insert an iFlex into the gap on the right side of the circular clickpad.

    • Insert the iFlex about 3 mm.

    • Use the iFlex to create a gap by prying the circular clickpad upwards.

  3. MBBfULhYrhOWZGTy
    MBBfULhYrhOWZGTy
    cMgV33xD1PgiSAmp
    eA5QbTDh5aZ2tH2w
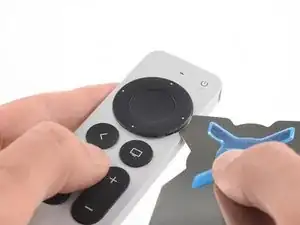
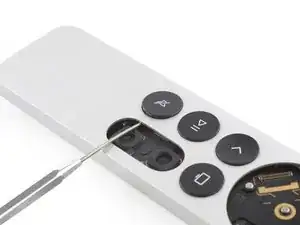
    • Insert an opening pick into the gap. Remove the iFlex after inserting the opening pick.

    • Slide the opening pick around the top half of the clickpad.

    • Avoid sliding the opening pick to the bottom half of the clickpad. A flex cable runs there!

  4. EjGIpVCUhWoH3BDN
    EjGIpVCUhWoH3BDN
    NSPrRjxQVRnjOUjF
    hPAOEtWo2jJ3NZkQ
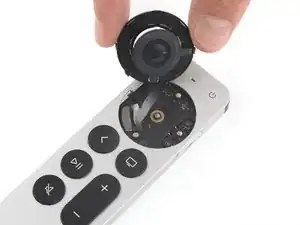
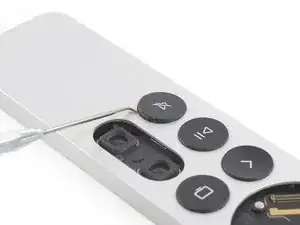
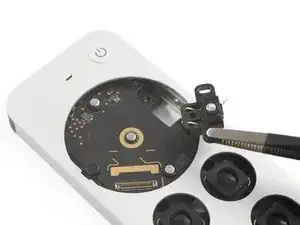
    • Lift the clickpad from the lower right side to access the press connector.

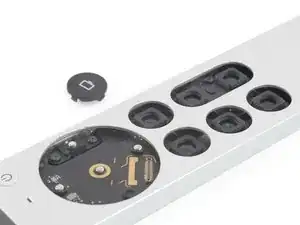
    • Use an opening pick to pry up the clickpad connector to disconnect it.

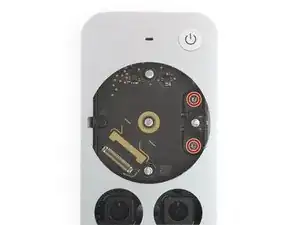
    • Remove the clickpad.

    Why doesn't iFixit sell replacement clickpads? This component is the most likely to fail on these remotes, and it is one of the easier things to replace.

    BitingChaos -

  5. aEXDdF2Gtv6CWPdg
    aEXDdF2Gtv6CWPdg
    2OnRwcMCPEVgYUXT
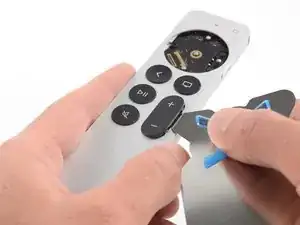
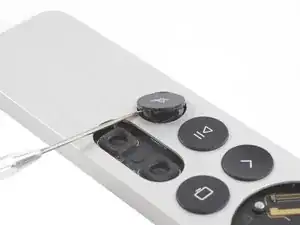
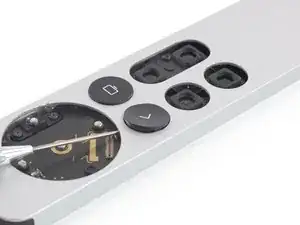
    • Insert the iFlex into the gap on the right edge of the volume button.

    • Insert the iFlex about 3 mm.

  6. N2kBUVUYBKpDtGFF
    N2kBUVUYBKpDtGFF
    SuTWkmHLMsW5D3rZ
    liUO5t5CAxaSwVdD
    • Use the iFlex to pry up the volume button to unhinge the plastic clips which keep the button in place.

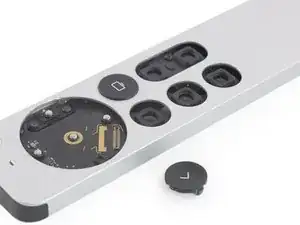
    • Remove the volume button.

  7. ke2PD3alBwklFAD2
    ke2PD3alBwklFAD2
    jYZJvdQEeAjT3RI2
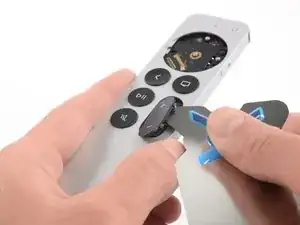
    • Insert an angled probe into the housing to release the right plastic clip of the mute button.

    • Carefully push against the buttons clip from the inside.

    • Make sure that the probe doesn't hit any components on the mainboard and is inserted horizontally.

    Getting the power button aligned when reassembling is very tough.

    Tracey -

    It's much easier to just use one's fingernails to pull the buttons out.

    Bachsau -

  8. ZJsdb41ZZacf6awG
    ZJsdb41ZZacf6awG
    YVaOTRVxrYK2XTHi
    42UDGP42OlcyjLL4
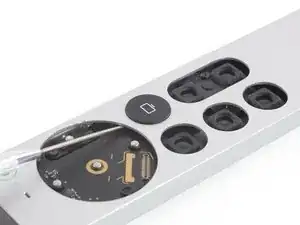
    • Insert the probe into the gap on the surface of the mute button.

    • Use the probe to pry up the mute button and unhinge the remaining plastic clips.

    • Remove the mute button

  9. YpgA2nfpGFBlMSw6
    YpgA2nfpGFBlMSw6
    KyjoML6ps5vtsX4S
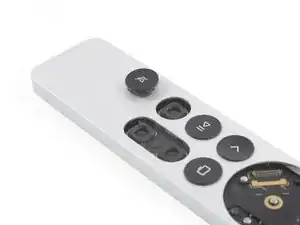
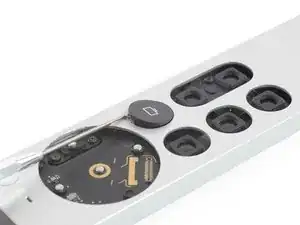
    • Insert a probe into the case to release the right plastic clip of the play/pause button.

    • Gently press against the clip from the inside.

    • Make sure that the probe doesn't hit any components on the mainboard and is inserted horizontally.

  10. TO626cgl2ZbfGPIc
    TO626cgl2ZbfGPIc
    Sch2j3e1dHAV11KQ
    qP3jganrUGV4m16j
    • Insert the probe into the gap on the surface of the play/pause button.

    • Use the probe to pry up the play/pause button and unhinge the remaining plastic clips.

    • Remove the play/pause button.

  11. xvXIpXcMyrXGvQEG
    xvXIpXcMyrXGvQEG
    wm1bemBrSbbFLj2A
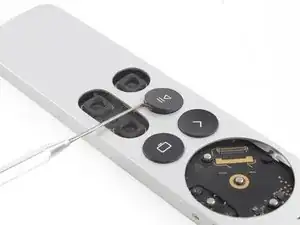
    • Insert the probe into the housing where the clickpad was previously to release the upper plastic clip of the back button.

    • Carefully press against the clip from the inside.

    • Make sure that the probe doesn't hit any components on the mainboard and is inserted horizontally.

  12. qmJGiOxqTFUOUCqx
    qmJGiOxqTFUOUCqx
    rTSMaAAXDr2CbMIy
    f3Bl2ftZrNm3L1Kc
    • Insert the probe into the gap on the surface of the back button.

    • Use the probe to pry up the back button and unhinge the remaining plastic clips.

    • Remove the back button.

  13. eHFKQYQwQwwdiAOa
    eHFKQYQwQwwdiAOa
    Op2wpQTTeisYJy1a
    J1lp4WkaIsLvEyE1
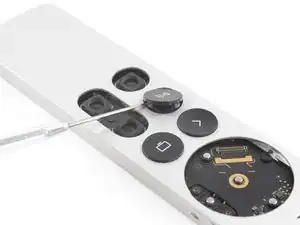
    • Insert the probe into the inner housing where the clickpad used to be to release the upper plastic clip of the TV button.

    • Carefully press against the clip from the inside.

    • Make sure that the probe doesn't hit any components on the mainboard and is inserted horizontally.

  14. UQBLKg4l36CZNOKs
    UQBLKg4l36CZNOKs
    1sVhpw4eoBNNTK6n
    tsFMFJk3HvOIyPob
    • Insert the probe into the gap on the surface of the TV button.

    • Use the probe to pry up the TV button and unhinge the remaining plastic clips.

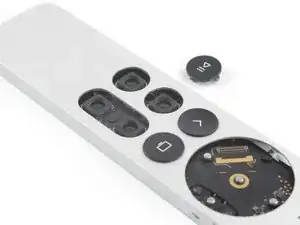
    • Remove the TV button.

  15. SblBsrokLoiRnHyi
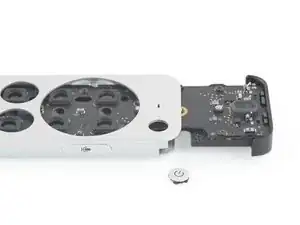
    • Use a T3 Torx screwdriver to remove the two 4.7 mm-long screws securing the Siri button on the right edge of the remote.

    Those are T4 on my remote.

    Jason Tertadian -

  16. kotaTbayqfBU4lXT
    kotaTbayqfBU4lXT
    bCyHOHJcxWZDaH5K
    YJYCQKPF2m2GgAG4
    • Use the pointed end of a spudger or a pair of tweezers to lift the Siri button up and out of the remote.

    • Remove the Siri button.

    Just leave it inside and slide it out with the main board. With the screws removed, it can be slid inwards far enough as to not be an obstacle.

    Bachsau -

  17. xKMqVCRpCGQxCKPH
    xKMqVCRpCGQxCKPH
    XAFYMIOwg5jcPETo
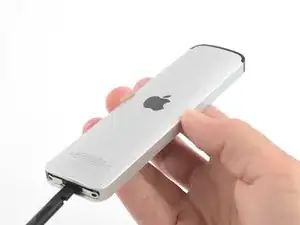
    • Turn the remote upside down.

    • This will avoid the power button falling into the case and getting jammed.

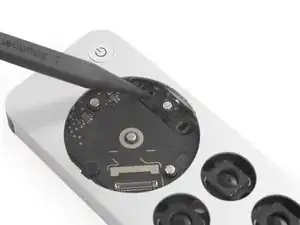
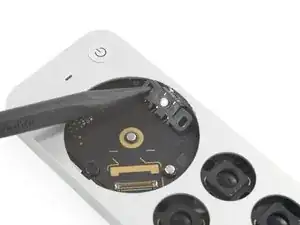
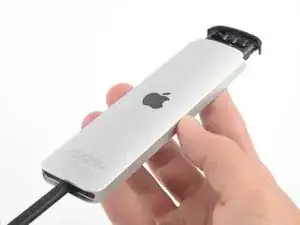
    • Insert the flat end of a spudger into the charging port.

    • Don't worry! This won't damage the port.

    • Push the spudger in to slide the insides of the remote out about 1 inch (2.5 cm).

    • Don't try to push it all out yet! The power button needs to be removed first.

    It's very hard to push out. Do NOT insert a spudger into the charging port, as it WILL damage the port. You might need to press it against a flat surface to even get it moving, which is not possible with the sharp tip of the spudger. I'd recommand a flat piece of wood or plastic to push against the full length of the tray instead of inserting something into the port. Also during sliding out and back in later, pay special attention to that knobs of aluminum around the clickpad. They are held in place only by adhesive tape and there's already one missing on the images of this guide. I had to replace one with a piece of plastic. They are exactly 1mm in height and 2mm in diameter.

    Bachsau -

  18. pwLWXuHXdgPtmVtW
    pwLWXuHXdgPtmVtW
    5bOVpeoICDbjjuLk
    KGVpBPO4M55QQojw
    • Turn the remote back over and make sure that the recess of the inner frame aligns with the power button.

    • Use the pointed end of a spudger to press the power button into the recess of the inner frame (if it didn’t already fall in by itself).

    • Remove the power button.

    Someone picked the power button off from the front and broke two of the four little black clips that hold the power button in place.

    Where does one get a new power button, or maybe just the black plastic piece on the back?

    Cuepawn -

    I have the same problem! Power button fell out on a short drop to the hard floor. Help anyone!

    Eric Pattengill -

    When reassembling, don't try to put it back before sliding in the tray. Instead push it in from the top afterwards. Hook in the plastic piece on the right side first, then push it in.

    Bachsau -

    this would be helpful in the actual guide. I just destroyed my remote by trying to do it in reverse order as instructed.

    Jason Tertadian -

  19. iAfRBABeFIgyeMFr
    iAfRBABeFIgyeMFr
    qu1ZFX1PD3E2x4v3
    • Pull the inner frame out of its aluminum housing.

    • There is a slight resistance when pulling out.

Conclusion

Compare your new replacement part to the original part—you may need to transfer remaining components or remove adhesive backings from the new part before installing.

To reassemble your device, follow the above steps in reverse order.

Take your e-waste to an R2 or e-Stewards certified recycler.

Repair didn’t go as planned? Check out our Answers community for help.

Adriana Zwink

Member since: 18/12/19

54794 Reputation

10 comments

Hi,

Thank you so much for the guide - I was able to open up my coffee spilled on remote clean it and actually fix it! However...somewhere along the lines I broke the Siri button (it was working fine prior to me opening up the remote)! It's a physical problem - I can't push it down physically, there is no spring like behavior...was there something in between the button that I dislodged? Any ideas?

Joanna -

Loosen the screws under the clickwheel and place the button a bit farther inwards.

Bachsau -

Whaa? I just wanted to slide out the module and desolder the Siri button in the same fashion I cleanly remove panic buttons on key fobs. I’ll be using JB Weld. Thank you for the heads up. Apple presenting two screws, lol!

wolear -

May not be immediately clear from the photos, but to extract the two P2 Pentalobe screws, you'll need to hold the P2 bit about 10-degrees off-axis. The screws are not longitudinal to the case.

John Shirley -

I found the screw heads to be extremely brittle, got them out once and inserted again but now I am seeing small shavings coming off and can't open it again, word of caution

Ryan Owens -

I tore the connection between the center button and the outer ring when removing the main dial. Anyone have any idea if that tiny thin ribbon can be repaired?

Morgan Kaplan -

This is a very bad guide. Sliding the electronics out of its case needed excessive force, which should NOT be applied to the charging port, which doesn't even have a fast connection to the tray. Also it's missing any instructions on how to remove the battery cable from the main board and how fragile that aluminium knobs under the clickpad are. Just following the steps in reverse order to re-assemble also doesn't work for the power button. It needs to be pushed in from the top.

Bachsau -

Where can I purchase the buttons?

geckx7 -

The screws in step 1 were in fact P3 Pentalobe screws instead of P2. In case this helps anyone.

Zachary -

While working with a P2 Pentalobe driver, the head of the screw is damaged. Could someone provide me with a link where I can purchase this screw?

OnTheWay -