Introduction

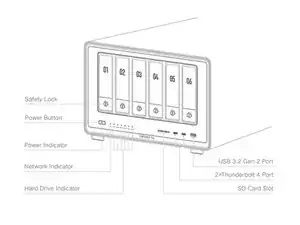
Use this guide to install an M.2 SSD on a UGREEN NASync Series DXP6800 Pro and the DXP8800 Plus.

  1. iFCMATYRNlcKBEeh
    iFCMATYRNlcKBEeh
    Vs5EkCwaNJW2XkGE
    • Power off the NAS device, then turn it over.

    • Before inserting or removing any hard drive (including M.2 SSDs) and/or Memory module(s), please power off the device and disconnect if from its power supply.

  2. ISH12yUqI1yxVmLQ
    ISH12yUqI1yxVmLQ
    WIgDJfc6AaTSJdxw
    • Using a small Phillips screwdriver proceed to loosen the screws and remove the bottom panel.

  3. gH3WVXOSi4tMqKhN
    gH3WVXOSi4tMqKhN
    P1Qc51WfjYEnCBmI
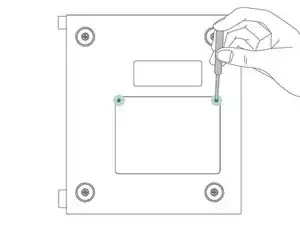
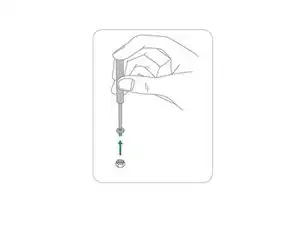
    • After the panel has been removed. Locate the M.2 fixing screw(s) on the circuit board, as shown in the image. Proceed to unscrew the M.2 fixing screw(s).

  4. tfIKObFHjXgUhdwr
    tfIKObFHjXgUhdwr
    vpFTaQkJxWIbN3IO
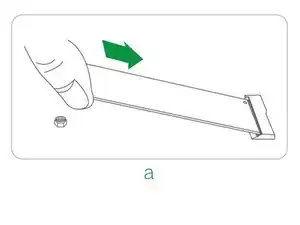
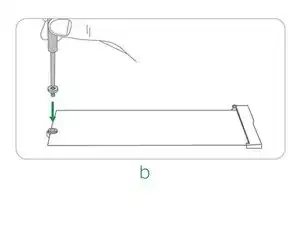
    • Insert the M.2 SSD into the slot based on the direction shown in image a.

    • Once in place, proceed to tighten the fixing screw(s) as shown in image b.

    • Please take proper care in tightening the screws and do not overtighten.

  5. RvuDvqmOEYvs2Dqn
    RvuDvqmOEYvs2Dqn
    xjxqMtIk3XoqloGk
    • If your M.2 SSD came pre-installed with a heatsink, make sure to check to see if it’s compatible with your UGREEN NASync Series NAS's specifications prior to installation.

    • While some M.2 SSDs come pre-installed with heatsinks, many do not. Attaching the UGREEN NASync silicone/thermal pad will help dissipate heat more effectively, keeping the SSD’s temperature within safe limits and allowing it to consistently perform at its best.

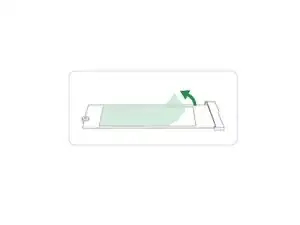
    • Using a pair of tweezers or your fingers, proceed to peel off one side of the protective film away from the silicone/thermal pad.

    • Align the exposed side of the silicone/thermal pad with the top-facing surface of the M.2 SSD, then proceed to lay the silicone/thermal pad on the surface of the M.2 SSD.

    • Use your finger(s) to lightly press down on the silisone/thermal pad to adhere it to the surface.

    • The opposite side will come in contact with the bottom panel, which doubles as a heatsink for the M.2 Solid State Drive(s).

  6. PRhueSJU2KeEqQlj
    PRhueSJU2KeEqQlj
    plOVEoEiquAxFlEE
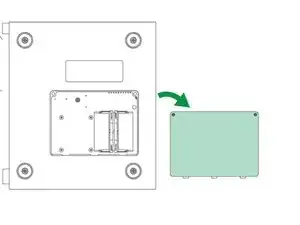
    • Proceed to replace the bottom panel, then using a small Phillips head screwdriver, tighten the screws.

    • Once you have tightened the screws, you're ready to reconnect the power cord, network adapter and power on the device.

Conclusion

Congratulations. You've successfully installed an M.2 SSD in your UGREEN NASync Series DXP6800 Pro/DXP8800 Plus.

Zeus, the Defender

Member since: 27/07/11

718 Reputation

0 comments