Introduction

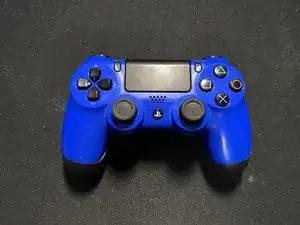
This is a guide for a Sony DualShock 4 PlayStation 4 Controller and can be used on any other companies’ controllers (Scuf or Custom Controllers).

This procedure will help fix an R3 or L3 button on a controller that is not working properly or is having issues when trying to move.

Take care during this whole operation as these are very small and sensitive parts, but be very careful in Steps 1 and 2 to not damage any wires that connect the controller and the battery, as well as while reassembling.

  1. KPRR5xPVQvwtwTZ4
    KPRR5xPVQvwtwTZ4
    JgiImQlD6YoAed3H
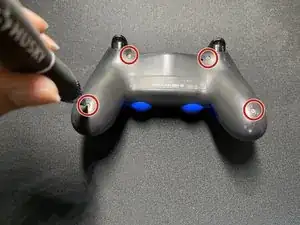
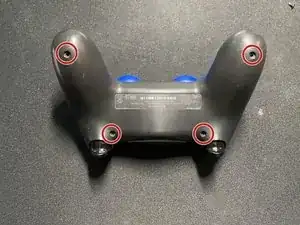
    • Remove the four screws from the back of your controller using a Phillips #0 screwdriver.

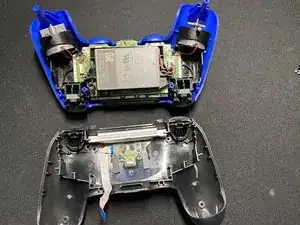
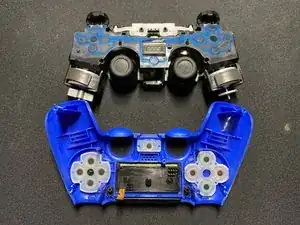
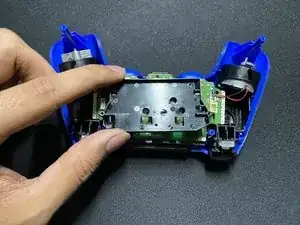
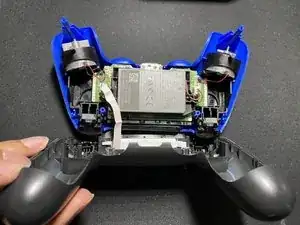
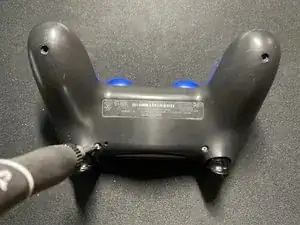
    • Separate the front and the back of the controller.

    This actually breaks the clips on the upper left and right side of the top cover.

    You can see it happen on their screenshots as well. It doesn’t matter too much because it gets assembled without an issue.

    GlossGhost -

    I think this is for telling if someone has broken into their controller, as I couldn’t find a way to open the controller without breaking this clip. The controller works perfectly fine without it, but its annoying its there.

    Cameron -

    It’s perfectly doable once you know where they are, just slide a prong between the case pieces, and twist in a way that “unlocks” the clips. All of my clips are intact after studying the images for a bit

    Franz Rolfsvaag -

    Hu… didn’t break either of mine.

    Jake Fatwin -

  2. MDpHvIo51mvYSs6U
    MDpHvIo51mvYSs6U
    JtGfjIpeDrhG3NYH
    CNWMZF2AUXoZCrMY
    • Unplug the ribbon cable to disconnect the Micro-USB Type B port from the controller itself.

    • Be careful not to tear or damage the cable.

  3. deBMkvdTYbIpIBFy
    • Unplug the battery from the controller and take it out.

    • Be careful not to tear or damage the wire as this is an important component for your controller.

    The battery may be glued to the base. Some strength may be needed - just be careful not to break the board under it.

    Yoav Moran -

  4. UYH6C1DGfLFTFNMT
    UYH6C1DGfLFTFNMT
    YYojdUWpRxu4TYPM
    BqG5XYhNPkFPGvmk
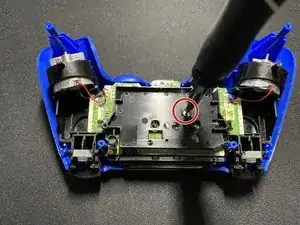
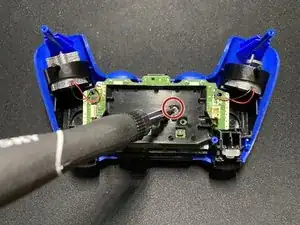
    • Remove the single screw from the black plate covering the motherboard using a Phillips #0 screwdriver.

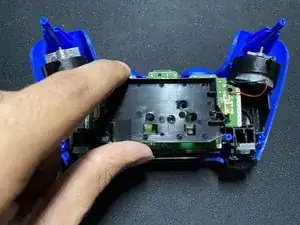
    • Remove the black plate from the controller.

  5. 2YvSl2HqlNsLIcsk
    2YvSl2HqlNsLIcsk
    X6WB1mrjok1krvfC
    r6HNMUGYH4wBqbDU
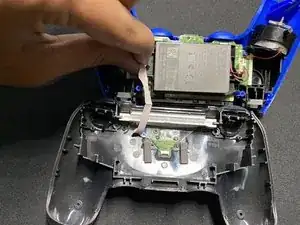
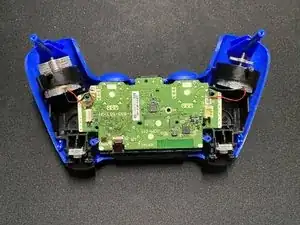
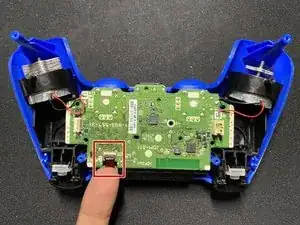
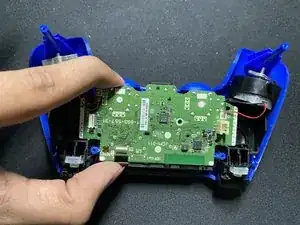
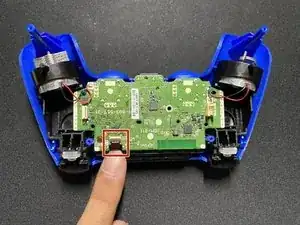
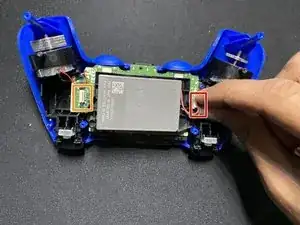
    • Disconnect the ribbon cable that connects the back of the controller to the motherboard.

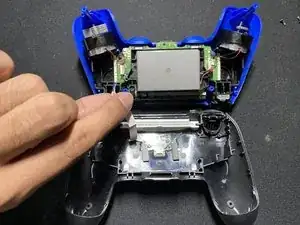
    • Remove the motherboard from the back of the controller.

    • Be careful not to tear or damage this wire as it is important for your controller.

  6. KIvoqOJhKZio2mOg
    KIvoqOJhKZio2mOg
    OwWB161IxIRcdcwK
    kwYcUr6NyjxNLZhx
    • Remove the toggle sticks from the controller.

    • Be careful of the sensors as they are very sensitive.

    The handles are shoved over the toggle handles. Some force may be needed to release them. Pull strongly - but not to strong!

    Yoav Moran -

  7. SRBLyup4ovAn5Q5B
    SRBLyup4ovAn5Q5B
    ZQg4b6FN1BkBnqIh
    UmycCqsYbnZMbJ5S
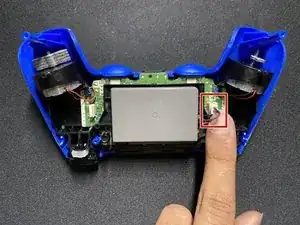
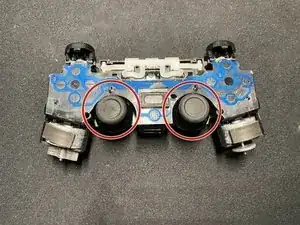
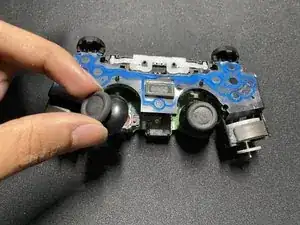
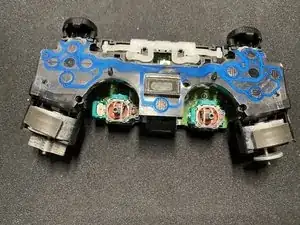
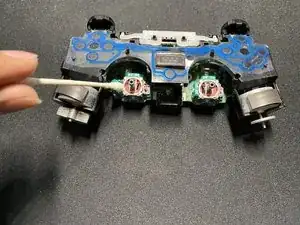
    • Use a spudger to pry open the toggle stick sensor.

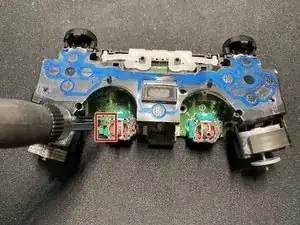
    • Use a cotton swab with a little bit of rubbing alcohol to remove the grease and build-up from the sensor.

    Careful with this step as it has a short make/break cycle. Attempting to open the plastic latches on the toggle stick sensor repeatedly over time will break it and your analog stick will become useless.

    steven.tacle -

    This is true! I did it once (a few seconds ago) and will never try again. The %#*@ thing was very clean. (There was one or two cat hair stuck. I pull them without having to open the toggle stick sensor.

    Philippe Morin -

    Opened one sensor half-way, but felt I used too much force. Opened the comments and read this, thanks for the heads up

    Franz Rolfsvaag -

    Sorry but the only way to stop drift is to solder in new modules. Cleaning may work but not for long.

    [deleted] -

  8. 15qSPBkYNYdxpMLK
    15qSPBkYNYdxpMLK
    xZPGVomfB4JJHyZO
    • To reassemble the controller, place the back cover onto the motherboard.

    • Slip the red wire through the controller cover and plug it in.

  9. OXX3vRyYmwa23nRB
    OXX3vRyYmwa23nRB
    PHPWaPsJWLFDVOaV
    • Put the black plate back on top of the motherboard and screw it in.

    • Make sure the back of the controller and the motherboard are firmly connected.

  10. v2X5Rd6INa1pLfyF
    v2X5Rd6INa1pLfyF
    WsshvjwH2X3gOFXY
    eSWYZan6QYScP3ih
    • Plug the battery back in and put it in its place.

    • Plug the white wire back into the motherboard.

  11. NhPvStLmWwWEZM6G
    NhPvStLmWwWEZM6G
    IdmHRT3xqOy1ejZM
    • Connect the front cover and the back cover of the controller and screw the four screws back in.

  12. ORUuIdSOca3FSPou
    • You're all done.

Sabih Akram

Member since: 20/09/20

1851 Reputation

5 comments

Thank you for this!! So many great pictures!! :D

The drift for me also prevented or interrupted movement with the left analog stick. Menus would continue to scroll after i scrolled them or wouldn’t move my character on screen.

briandewitt -

Nach Wechsel der Potis hatte mein Controller Drift an beiden Achsen. Das liegt daran, dass die Potis nicht 100% mit denen der Werkskalibrierten übereinstimmen. Eine nachträgliche Kalibrierung ist leider nicht so einfach möglich, da die Korrekturdaten im EEPROM des Controllers gespeichert sind. Deshalb habe ich parallel zu den Potis je einen 2MOhm Poti gelötet, mit denen der Spannungsoffset kompensiert werden kann. Ergebnis: Keine Drift mehr. Die Controller arbeiten wieder einwandfrei.

zapf2000 -

Well organised pictorial lecture.great work.

Egeonu -

Great walkthrough and high-res images makes the job a lot smoother. Only remark I have are three things: 1) There are four clips that are hard to see on the images, and aren’t detailed; they are on the top right and left, under the “SHARE” and “OPTIONS” buttons, as well as the two clips on either side of the docking port. These easily break, although I avoided that. 2) The sensor housing have very fragile clips which easily break after a repair or two. DO NOT USE FORCE ON THESE! If you’re in doubt, just try and blow some air into them. Some remaining dirt is better than a broken stick. I also avoided this thanks to a comment on the step, but I’ve heard many has broken their sensors doing this. 3) The USB connector isn’t labeled as a pull-out connector. This isn’t much of an issue, but in sub-par lit environments, it looks like a clip connector. Have some friends ruining their USB ports due to ripping the connector off the PCB, thinking it’s a clip connector.

Franz Rolfsvaag -

tidak membantu sama sekali seperti padi yang terbanjiri dan tidak bisa di proses untuk menjadi nasi lalu di nikmati

Dzakwan Afiq -