Introduction
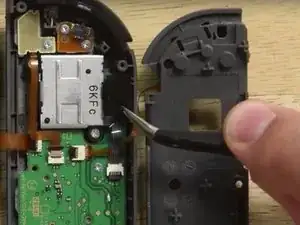
Some of Nintendo’s first-batch left Joy-Con controllers are notorious for sync issues. This is due to a minor design flaw, and can be remedied with a small piece of conductive foam that can be often be found in old packaging around the house!
Conclusion
To reassemble your device, follow these instructions in reverse order.

What thickness of conductive foam should I choose? There are 3 sizes: 3mm/0.12, 5mm/0.20", 10mm/0.39"
maximaleks -
The space is ~9 mm wide, so I would go with the 10 mm size and you can trim it down if you need to!
Taylor Dixon -
I've got the same problem but with the right joycon but I don't know where the wireless card is, please help
Nathan Currie -
Hello I opened up my left joycon and saw conductive foam inside already! I replaced it with one that I bought on amazon (I made sure it was actually conductive foam). But it still won’t sync. Any ideas? Could it be that little solder bubble that connects to the antenna has gone bad? Should I try to reflow it? I also checked to see if any capacitors in the top of the board were shorted and none of them were. If you have any ideas I would be happy to hear!
Chaim Bendahan -