Introduction
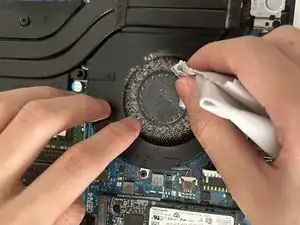
Over time, dust accumulates on your laptop’s fans, hampering its ability to cool down the system efficiently. Thus, we will show you how to clean them properly for optimal heat dissipation.
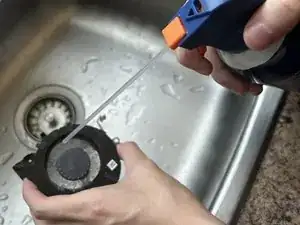
We're presenting two effective methods for cleaning laptop fans: a simple clean option and a comprehensive clean option. Follow the streamlined procedure below to efficiently maintain your laptop’s cooling system.
For the simple option, once you've done step 6, jump right to step 15.
For the comprehensive option, follow step by step, except for step 6.
-
-
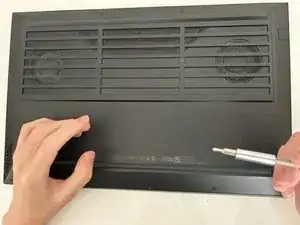
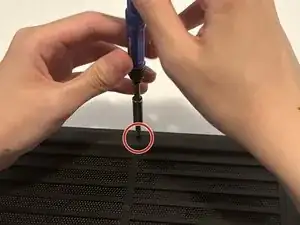
Remove four 8 mm screws from the base enclosure of the laptop using a Phillips screwdriver.
-
Remove four 5 mm screws from the base enclosure of the laptop using a Phillips screwdriver.
-
-
-
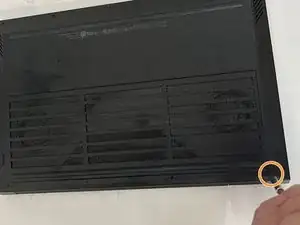
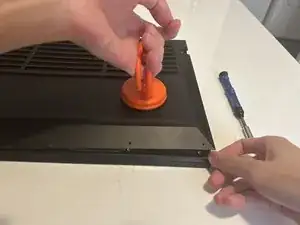
Use the suction cup to lift up the bottom case while gently pressing downward on the laptop to keep it in place.
-
Start with one side then repeat this step on the other side.
-
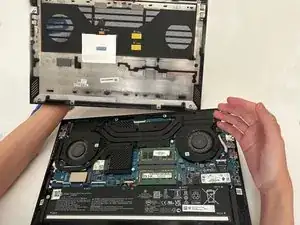
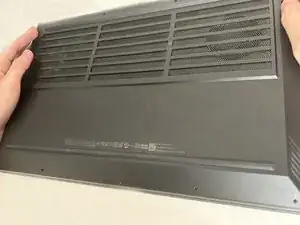
Remove the base enclosure from the laptop.
-
-
-
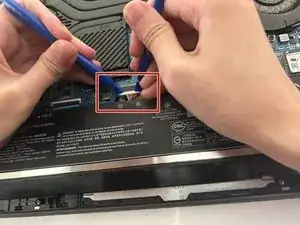
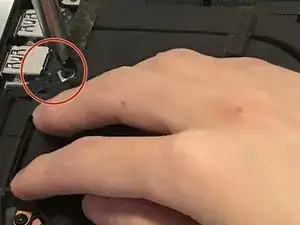
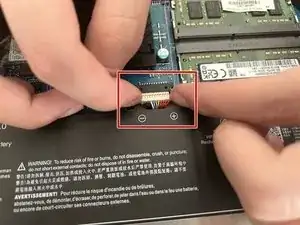
Use an opening tool to disconnect the battery from the motherboard by pulling out the small white plug toward you.
-
-
-
Tap the power button on your laptop multiple times to discharge any remaining static electricity on the motherboard.
-
-
-
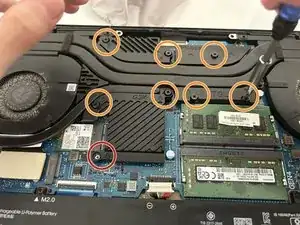
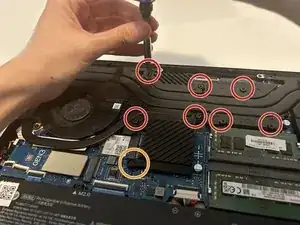
Remove the 3 mm number 8 screw using a Phillips screwdriver.
-
Partially loosen the number 1, 3, 6, 5, 7, 4, and 2 screws respectively, using a Phillips screwdriver. Then repeat this process to loosen them up completely until you hear a clicking sound.
-
-
-
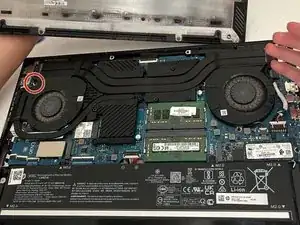
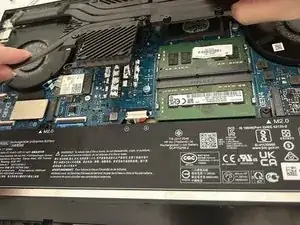
Lightly move the heat pipes from side to side to detach them from the motherboard. Then carefully lift them up and remove it.
-
-
-
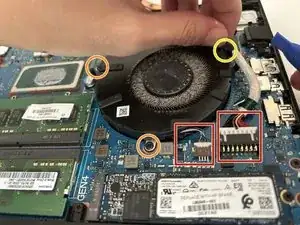
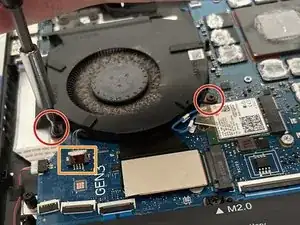
Remove the two 6 mm screws from the left-side fan using a Phillips screwdriver.
-
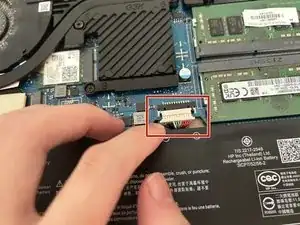
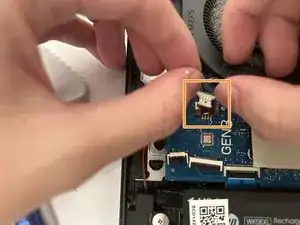
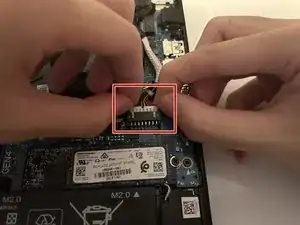
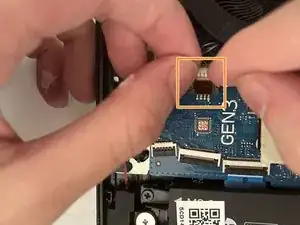
Carefully and slowly pull out the small white plug.
-
-
-
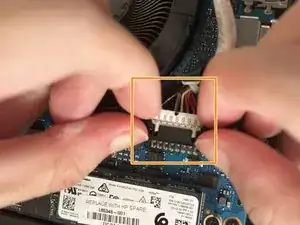
Carefully and slowly disconnect the two white plugs connecting the right-side fan to the motherboard.
-
Remove two 6 mm screws using a Phillips screwdriver.
-
Move the pack of cables to the side to remove the third 6 mm screw using a Phillips screwdriver.
-
-
-
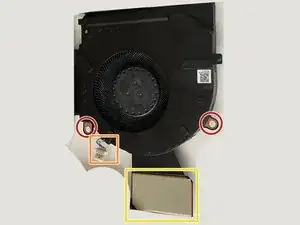
Two screw holes
-
One cable connector plug
-
One extended pad
-
Reinsert the two 6 mm screws and tighten using a Phillips screwdriver.
-
Carefully reinsert the white plug into its connector to reconnect the fan to the motherboard completely.
-
-
-
Three screw holes
-
One cable connector plug
-
Reinsert the three 6 mm screws and tighten using a Phillips screwdriver.
-
Reposition the pack of cables back to its designated location.
-
Carefully reinsert the white plug into its connector to reconnect the fan to the motherboard completely.
-
-
-
To reinstall the heat pipes, carefully align the attached screws on the heat pipes with the standoffs on the motherboard, then place the heat pipes into position.
-
Partially fasten the screws in numerical order using a Phillips screwdriver. Then, tighten them one by one.
-
Fasten the 3 mm screw back into ''the number 8 location using a Phillips screwdriver.
-
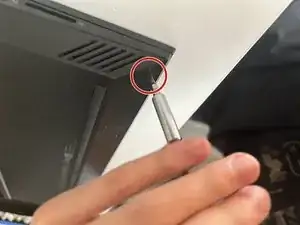
Fasten the screw back into 'the top-right location using a Phillips screwdriver.
-
-
-
Position the bottom base enclosure back in place without tightening any screws.
-
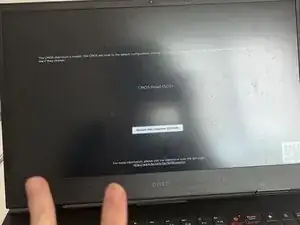
Turn on the laptop to ensure it is successfully powered up.
-
Ignore the message on the screen, and restart the laptop.
-
-
-
Fasten the screws back into the designated locations with 4 longer screws on the top and 4 shorter screws at the bottom using a Phillips screwdriver.
-


With less than 40 minutes, you not only enhance the longevity of the laptop but also contribute to reducing electronic waste.
Embracing the practice of fan maintenance is an investment in both the longevity of the device and the sustainability of the environment.

3 comments
Thank you for this. You rock!