Introduction

Use this guide to replace the battery stretch release adhesive in your Kobo Libra Colour eReader.

Regardless if your battery came with stretch release adhesive or normal adhesive, you should replace it with stretch release adhesive for easier future disassembly.

  1. g64fZIjbLcSbLAr6
    g64fZIjbLcSbLAr6
    jXNjL3kKnirgFCBP
    • If you're reusing your battery, use blunt nose tweezers, or your fingers, to remove any remaining adhesive on the bottom of the battery.

    • Take care not to puncture or bend the battery—it can leak dangerous chemicals and/or catch fire.

  2. KJ45VMxpZWGQ1NDt
    KJ45VMxpZWGQ1NDt
    BgFiIANN3V6BHXpS
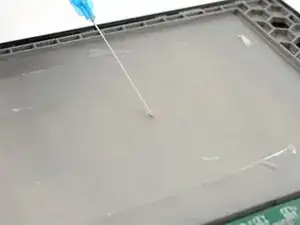
    • If you're reusing your screen, remove any remaining adhesive residue and use isopropyl alcohol and a lint-free cloth to clean the frame.

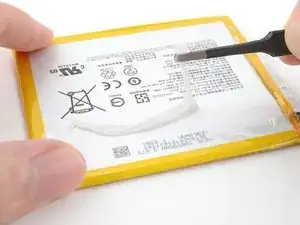
    • Scrape away any leftover waterproofing coating from around where the battery was located.

    • Make sure there's no remaining coating flakes, as their sharp edges can puncture the battery during reassembly.

  3. OiGEePsUm5ZWBYbR
    OiGEePsUm5ZWBYbR
    MJxrsQCMsJw6ZXXU
    rXFMyCWRIx6fYYpH
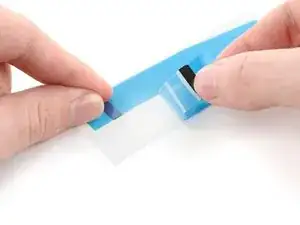
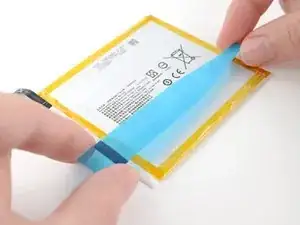
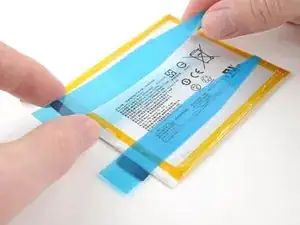
    • Use your hands to grip the black pull tab and the blue liner on the new stretch release adhesive strip.

    • Just gripping the blue liner could prematurely separate it from the adhesive.

    • Peel the adhesive strip off its clear liner to expose the adhesive underneath.

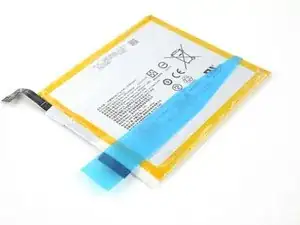
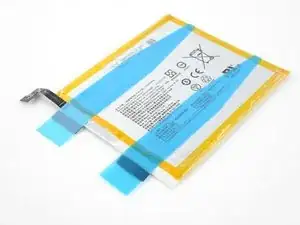
    • Place the strip on the bottom of the battery, making sure the black pull tab sticks out slightly from the edge of the battery with the cable.

    • The strip doesn't have to be aligned perfectly, but make sure its covers the entire length of the battery.

  4. OUjIVuySboKVaYU4
    OUjIVuySboKVaYU4
    RsU1lH1nBdp4uL2t
    • Use your fingers to press down the adhesive strip to the battery and adhere it.

  5. bB2K2rqXEcLKPKAm
    bB2K2rqXEcLKPKAm
    OHOONqK1Q3LXFdVO
    • Repeat the same adhesive application procedure for the other adhesive strip.

  6. tdMUZ12GvP2Jssiy
    tdMUZ12GvP2Jssiy
    hXdOZYQLXyFBxS6P
    DnxM3DS6avweZvQN
    • Peel off the blue liners to expose the adhesive.

  7. LDkLBUOekYM2mmtV
    LDkLBUOekYM2mmtV
    TjUMGrFp1lAlkt2C
    FLVNRoHL1FFsGZXp
    • Be careful with this step, as it's easy to stick the battery in the wrong spot. Take your time and work slowly.

    • While holding the battery over its spot in the frame, temporarily reconnect the battery cable to ensure the battery gets aligned properly.

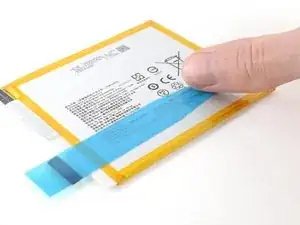
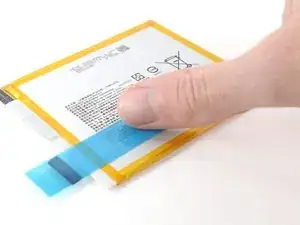
    • Place the battery into its spot in the frame and press down to adhere it.

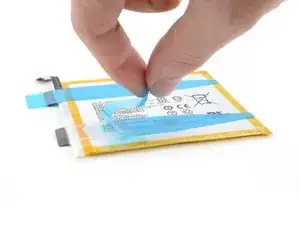
    • If you have more internal reassembly remaining (like reconnecting other cables) disconnect the battery. Otherwise, you can keep the battery connected.

    • Return to the original guide and continue reassembly, skipping steps you did for this procedure.

Conclusion

Repair didn’t go as planned? Try some basic troubleshooting, or ask our Answers Community for help.

Alex Diaz-Kokaisl

Member since: 16/01/22

151892 Reputation

0 comments