Introduction

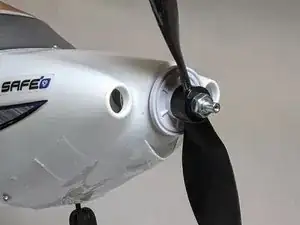
Learning to fly an RC plane takes practice, inevitably experiencing minor crashes and damaging parts. Replaceable parts for RC planes are expensive or are not available for purchase. We will show you how to fix the Horizon Hobby Mini Apprentice S RC Plane Motor Mount by using a 3D printed model.

This guide requires a certain part to be 3D printed (resources will be mentioned later in the guide).

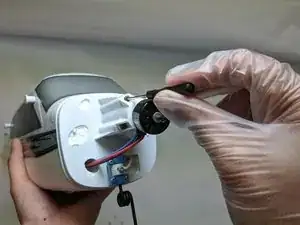
Also, a Phillips PH000 sized screwdriver (Phillips #000) comes with the plane itself but can be purchased if lost.

Please read the entire guide prior to attempting the repair.

  1. ZJ3QJ5pDNSBaXday
    ZJ3QJ5pDNSBaXday
    TRKHroXCPFpwlWN3
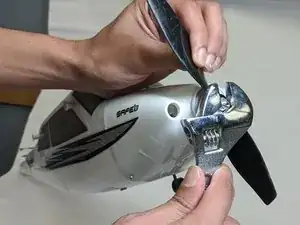
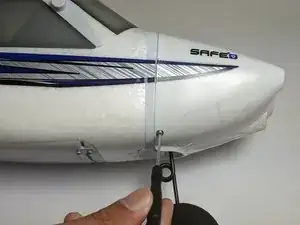
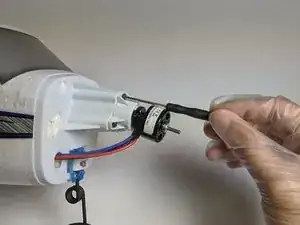
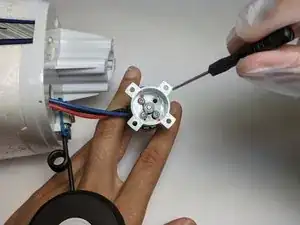
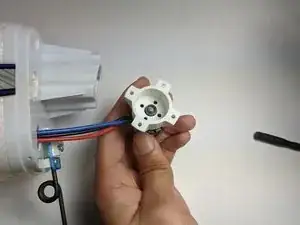
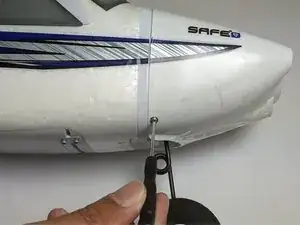
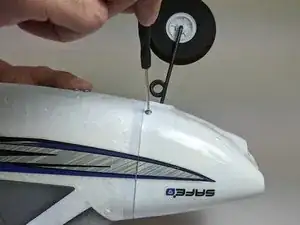
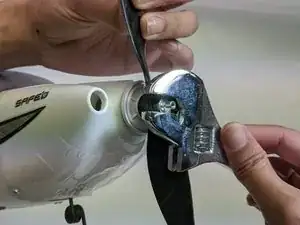
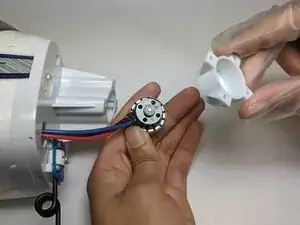
    • While holding the propeller in place with your other hand, unscrew the single Phillips screw securing the front nose tip.

  2. ebAJlmJSBRnCUBox
    ebAJlmJSBRnCUBox
    CjNRFFIvNYSPEuWF
    fMRIarGUpOWVkHpI
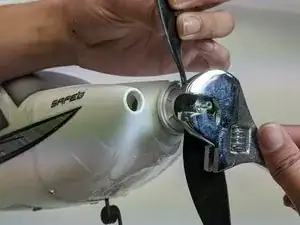
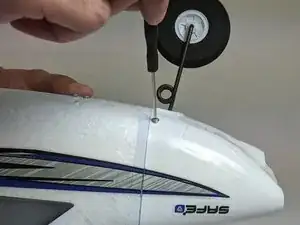
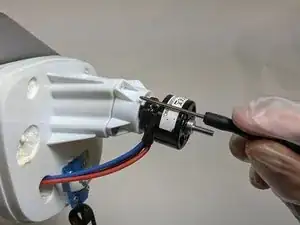
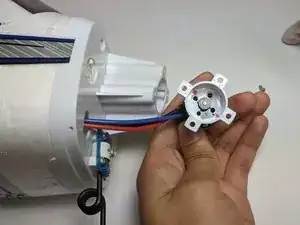
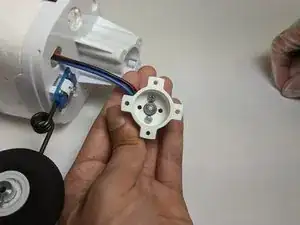
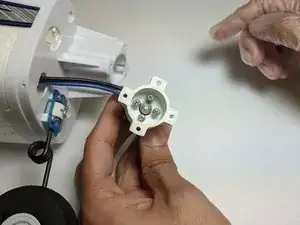
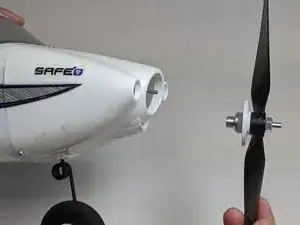
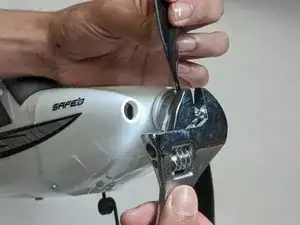
    • While holding the propeller in place, remove the front propeller assembly from the motor by loosening the hex nut.

    • It is encouraged to loosen but not completely remove the hex nut: loosening the nut allows the propeller assembly to be removed from the plane, but it's best to keep the propeller assembly as one piece (see last photo).

  3. ISXermNLgXmnaiXb
    • Working with screws can result in small metal splinters.

    • Put gloves on for safety.

  4. oxbclBeZlTRNiOfM
    oxbclBeZlTRNiOfM
    v5fJsJYE4KNiS6w1
    aKnAJXeEsmj1dLNM
    • Remove the three Phillips screws that secure the hull.

  5. GJEMnFc4xGcZORcT
    GJEMnFc4xGcZORcT
    VpbmtLYDN66Rfihw
    cJUFVJEKfJVQOWNB
    • Remove the hull and locate the four screws that secure the motor.

  6. OIqM1bqaih51fkZ4
    OIqM1bqaih51fkZ4
    AUQLcpvCVfGmssK5
    LklagGUHEZLrLePQ
    • Remove the four Phillips screws and carefully remove the broken motor mount.

  7. YveYN1BZ2VcZlRxn
    YveYN1BZ2VcZlRxn
    a14O1sWjPLk2dYlX
    FUNRyiTOTPDssnjB
    • Remove the four Phillips screws under the motor mount.

  8. lPOXaRYFpK4WR1Up
    • Remove the broken motor mount.

  9. sMDVQLhBSVeiQZNw
    • 3D print the replacement motor mount. Ifixit does not allow .stl or .3mf files to be imported, so Google Drive links to the files are given below.

    • If you do not have a 3D printer, try your local library or high school. Otherwise, google any of these: Protolabs, Shapeways, PCBWay, JLCPCB, or just google “3d printing service” (these cost money). When prompted, ask them to use PLA filament on an FDM 3D printer.

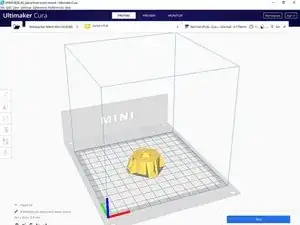
    • If you own a 3D printer: convert the .stl file into a .gcode file by using a slicer software such as Cura. If needed, look up Youtube videos on how to use your specific 3D printer. If needed, rotate the object along its z-axis in the slicer software until it matches the orientation in the image relative to the x, y, and z axes (very important).

    • If needed, resize it so the x, y, and z dimensions of the part are 39x39x15mm. In the image the x, y, z axes are red, green, and blue respectively. Also, the .3mf file is posted in case anyone wants to edit it in Fusion 360 (shouldn't be necessary).

    • STL file: https://drive.google.com/file/d/1edjSS3a...

    • 3MF file: https://drive.google.com/file/d/1IEwvLOI...

  10. 1VHyJ1cZo4BcEP1K
    • Replace the broken part with the 3D-printed replacement.

    • Due to varying tolerances between different 3D printers, it may be necessary to enlarge the center hole slightly with a drill if the motor can't spin freely.

  11. Gwbiy1DXD3sFPJTF
    Gwbiy1DXD3sFPJTF
    lM3iYTNG3LvIOSeZ
    6LNcXZpSPtTlTuEQ
    • Screw the four motor mount screws into the replacement mount.

    • Screw the second opposite to the first screw to ensure alignment!

  12. ZwhTY1Y2EeCGSAol
    ZwhTY1Y2EeCGSAol
    KH6npEV2I6B2Oi35
    OVKqhHnF5sTqFEeC
    • Screw the replacement mount back onto the body of the RC plane.

  13. JrSVuoLFnxZlvOaO
    JrSVuoLFnxZlvOaO
    eXueU4uUcG2IL1wo
    Z4sPy52nsMrkbrHw
    • Attach the hull back onto plane body with the three screws removed previously.

  14. 6oSBkHACgpdCgciN
    6oSBkHACgpdCgciN
    sQpFFg5ltIuecAoK
    YDyQO4oHS1PSciYM
    • Reattach, screw, and secure the propeller assembly back onto the plane.

  15. miMmLH1oR4B1gnf3
    miMmLH1oR4B1gnf3
    XlREaYyOxLRNTurE
    • Resecure the nose tip.

Ryan Hang

Member since: 22/01/24

277 Reputation

0 comments