Introduction

  1. WyubUTQlAbj6XdZO
    WyubUTQlAbj6XdZO
    mZypAA2egRyckZVW
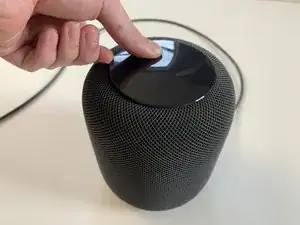
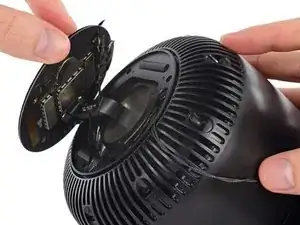
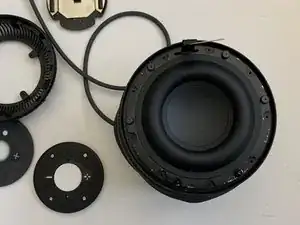
    • Be sure to unplug your HomePod before disassembly.

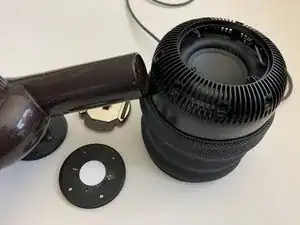
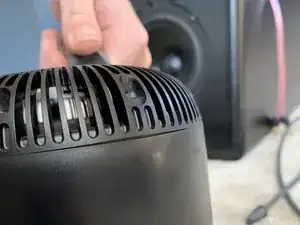
    • Using a hairdryer on hot, heat up the top touch surface and remove.

    • The cover is not flexible. Special care must be taken to avoid cracking or snapping the top cover.

  2. gCucLYkOuPOs3TnF
    gCucLYkOuPOs3TnF
    HNm2sfUyEQd5oCcj
    YXxadoNaJJNsjY2E
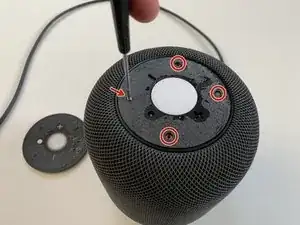
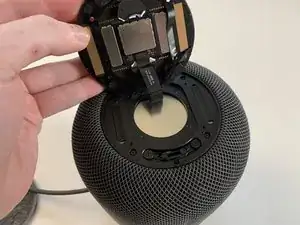
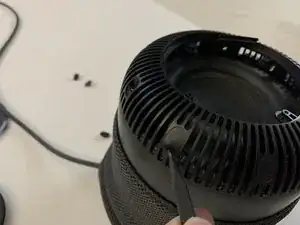
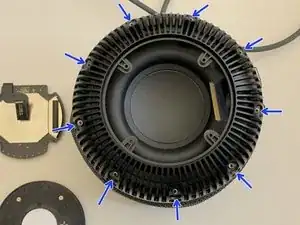
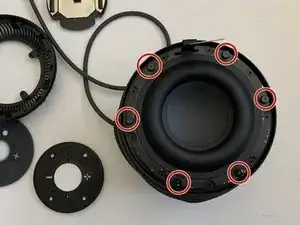
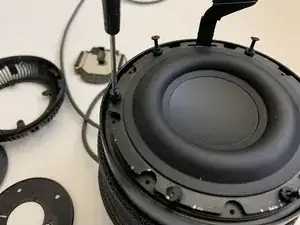
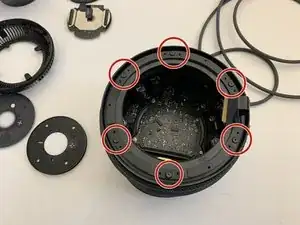
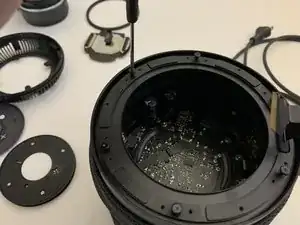
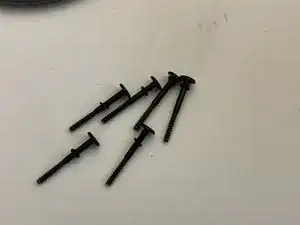
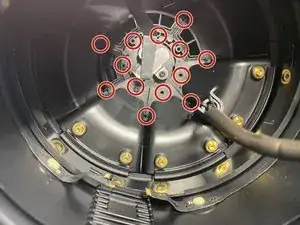
    • Remove four T6 screws.

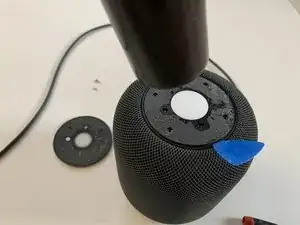
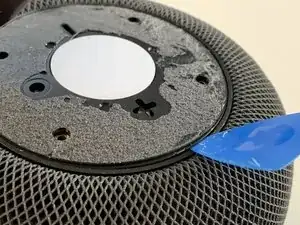
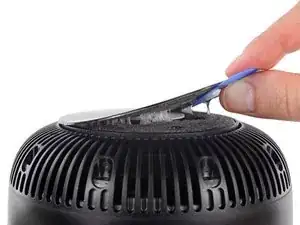
    • Using a hair dryer on hot, soften the adhesive holding the touch pad assembly to the top frame.

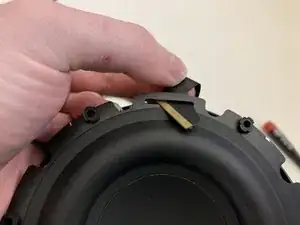
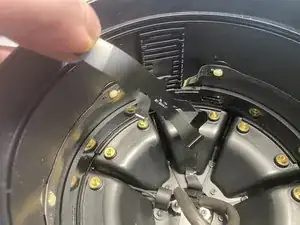
    • Using a guitar pick, carefully pry up the touch pad.

  3. cUKcwtlVvKEQQXir
    cUKcwtlVvKEQQXir
    poPwvoNfoOIjUVsr
    MyqLHrRrKLECCZIE
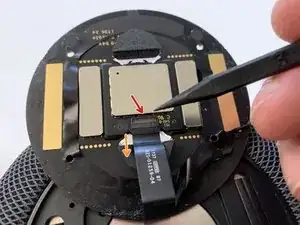
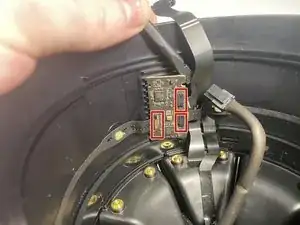
    • Maneuver the touch assembly board up from the top frame.

    • Flip the retaining lever upwards with a spudger to release the ribbon cable.

    • Remove the ribbon cable from the connector.

  4. JRonWRurV5TPvIvL
    JRonWRurV5TPvIvL
    SvhotRV25Z2DBKsr
    2BT5paiSE6uTwl4g
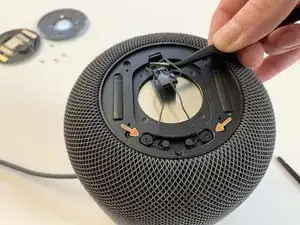
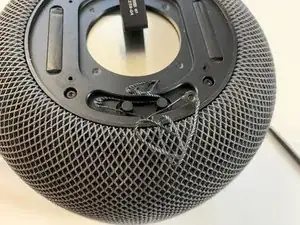
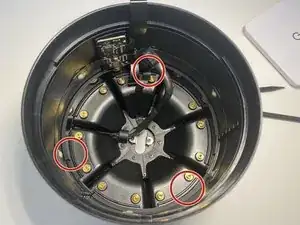
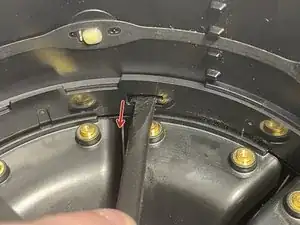
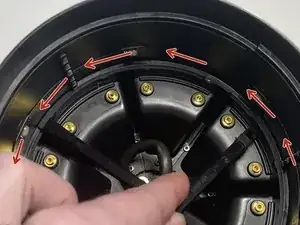
    • Using tweezers (or fingers) unwind the drawstrings from the moorings.

    • The drawstrings are wrapped/looped around each T6 screw post. Remove or loosen each and unwrap the drawstring.

  5. XpmVtaCsbRSbILEu
    XpmVtaCsbRSbILEu
    65fDjlObCjNC2JTE
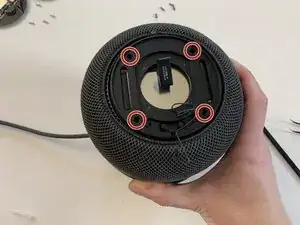
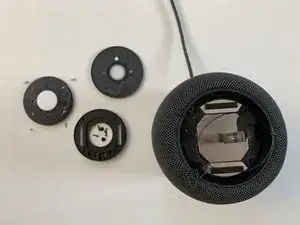
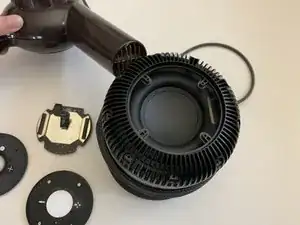
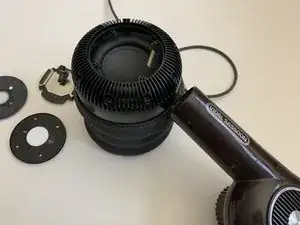
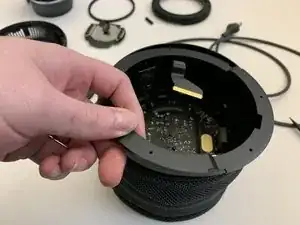
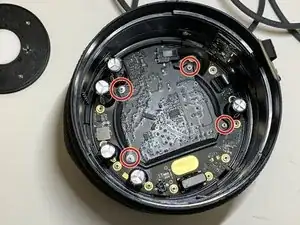
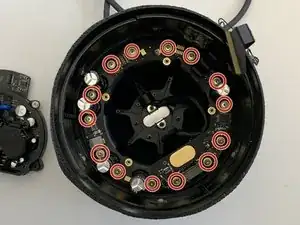
    • Remove the four T6 screws securing the touch surface support disc to the lid and slide the 3D mesh fabric sleeve downwards.

    • Remove the touch surface support frame disk from the HomePod.

  6. MoSqFdNjtigWsTy6
    MoSqFdNjtigWsTy6
    5sVxauwPV156Ycee
    JRurs5HM2ibWVFGe
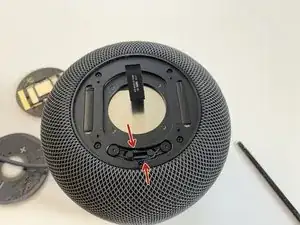
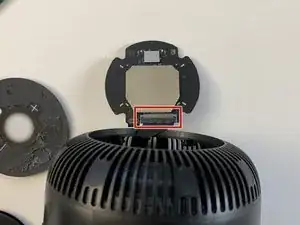
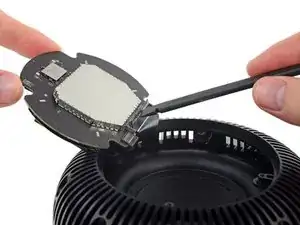
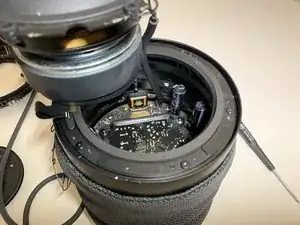
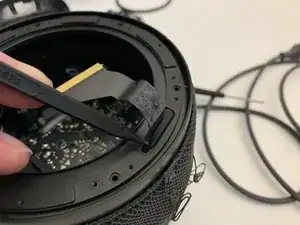
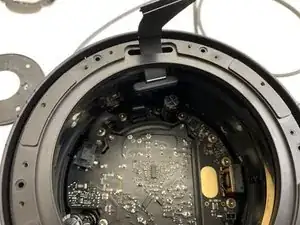
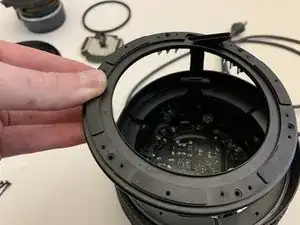
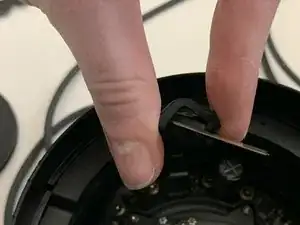
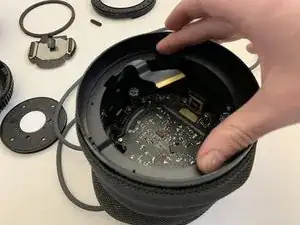
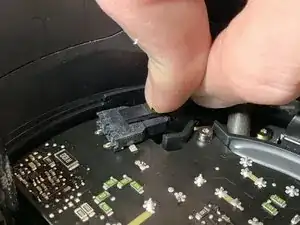
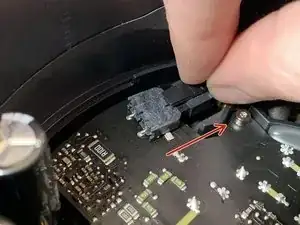
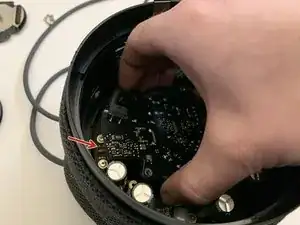
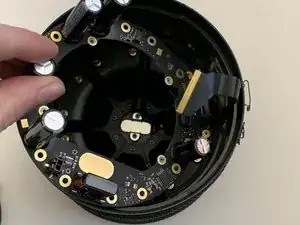
    • Flip the logic board up and using a spudger, carefully pry the retaining lever upwards.

    • Pop the ribbon cable straight upwards and out. This cable has "ears" on each side and doesn't not slide into the connector.

    I accidentally broke the ribbon cable, can you recommend where I could buy a new one?

    Thanks

    Gaceanu Alin-Valentin -

  7. SjtQ6KKQsajHV4OI
    SjtQ6KKQsajHV4OI
    URchjeaFGBOfumPC
    mkdcVjbTUuE66JGB
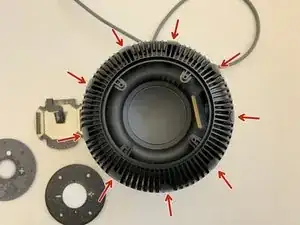
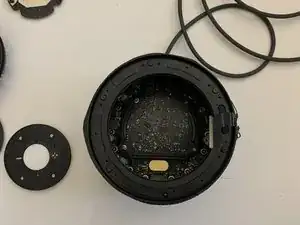
    • Using a spudger, remove the nine rubber screw caps.

    • Using a Torx T6 screwdriver, remove the nine T6 screws securing the top to the main housing.

  8. PWBy2UwHbfeehx5L
    PWBy2UwHbfeehx5L
    LTBsMfIxwtritOxl
    lIJ3AIJAhehJBplu
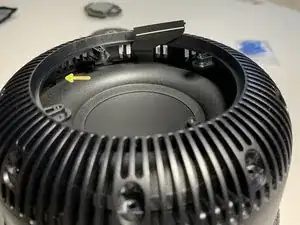
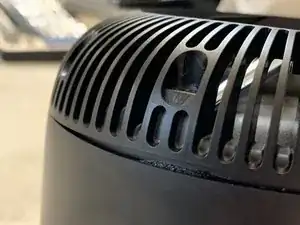
    • Using a hairdryer on high heat, aim the hairdryer as shown and heat the perimeter just below the seam where the top meets the main housing.

    • This step is critical. If you have trouble with the next step, repeat the heating process in the trouble area.

  9. VvuOf1qioe1ccBDe
    VvuOf1qioe1ccBDe
    lsHcqaDVUQCODVj1
    w2JDN2UJSbAqEbjW
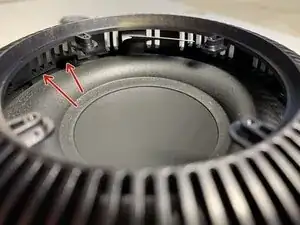
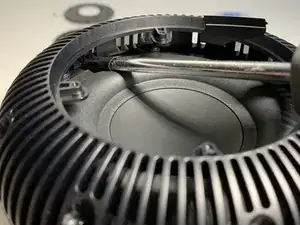
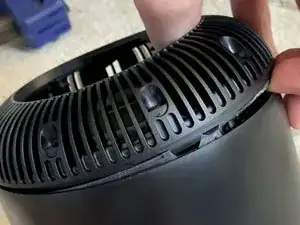
    • This step requires significant force even with plenty of heat applied in the previous step.

    • Insert a wide flat blade screwdriver wrapped in 1-2 layers of electrical tape.

    • You will need to apply a fair amount of pressure to wedge the screwdriver head in the small gap.

    • Pull the top cover straight up. This will need to be done in four sections.

    having disassembled more than a few now, I strongly advise softening the ribbon cable glue and detach it before seperating the top

    geolab -

  10. vJU4AAQvZVmemvdU
    vJU4AAQvZVmemvdU
    wIKCVXmMiHkQPZMp
    XnOWQNM1fwOBhUuq
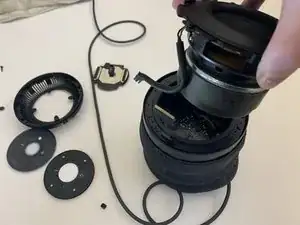
    • Be careful when freeing the top from the glue. The ribbon cable we disconnected in Step 7 is adhered to the top and can easily become torn.

    I accidentally broke the flexible cable, can you recommend where I could buy a new one?

    Gaceanu Alin-Valentin -

  11. cE2DgomrSQmYST22
    cE2DgomrSQmYST22
    TPgew6yhmTLUByLQ
    • Careful peel the ribbon cable from the top.

    • Take your time as you don't want to tear this cable.

    The moment you have the upper basket accessible I’d recommend the first thing you do is; release the logic board flex cable that is secured with high bond adhesive with either heat/99% ISOPROPYL or both.

    It’s sooooo easy to forget it’s attached while attempting to release the silicone sealant. I personally find the sealant the most time consuming part of the repair. After that it’s smooth sailing 😎

    Dwight HPR -

  12. sdBZbRLQHCALBXBU
    sdBZbRLQHCALBXBU
    2OMOIqM1KSdYxUdm
    T6xgww4sAUESapBW
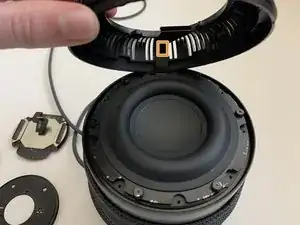
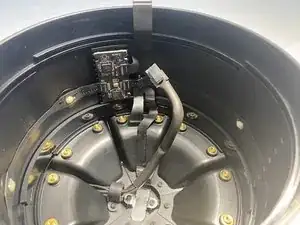
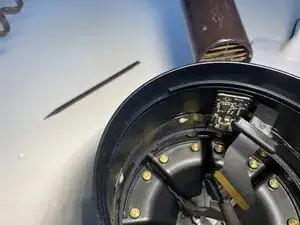
    • Remove the six Torx T6 screws securing the woofer.

    • Carefully lift the woofer out by it's edges and slip the logic board ribbon cable through.

  13. SwPDCcDlIfmFGKlF
    SwPDCcDlIfmFGKlF
    ZEmJJFWoctrbahVh
    WdANmKHbh4YUw2KM
    • Support the woofer on the top edge of the HomePod with your hand.

    • With your other hand, reach inside and squeeze the tab on the connector and pull strait up to disconnect the woofer from the amplifier board.

    • Remove the woofer from the HomePod.

  14. YWXuetCJdOhXSSmC
    YWXuetCJdOhXSSmC
    B334IqOp5P6pDjDq
    Dfv5qAY5l12jIpWq
    • Remove the woofer's gasket.

    • This is a simple, yet critical part and sealing the enclosure with the driver installed. Failure to replace this gasket will result in degradation of sound and excessive air noise.

  15. RpAwr3GlUHwbRqSu
    RpAwr3GlUHwbRqSu
    JJNGitWO5iv1TwU2
    bSP2H5oUVOO4YRy2
    • Remove the six Torx T6 screws.

    • Note the small delicate rubber O rings that go with each screw. Replace any damaged or missing O rings.

  16. YLDUKexs1gtyaZKi
    YLDUKexs1gtyaZKi
    JvegiPLOE115hxJc
    MtuWGyPDSvnGJd3o
    • Using a spudger, push the silicone grommet through the upper ring.

    • Remove the upper ring from the HomePod.

  17. uZjklNfctHoL2d5p
    uZjklNfctHoL2d5p
    6iBlKSZNjKXidZDS
    oLJ2lwLLUtlvZaCw
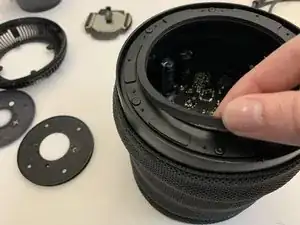
    • With the upper ring removed, remove the grommet from the ribbon cable.

    • Rotate the middle ring counter clockwise to unscrew it from the HomePod.

    A warning: if you intend to reassemble the homepod, pay attention to the exact amount you have to rotate this middle ring to unscrew it. When you go to put it back on, only rotate it that far and do not try to tighten it any further or it will scrape components off the mic board with very little resistance. It should be loose; the upper ring will hold it in place after tightening the screws.

    daprice -

  18. gSt4UgJKacUdXUuE
    gSt4UgJKacUdXUuE
    R6AYKbNr2OrqRZu6
    bHTyFat4YgJx4JLq
    • Push down on the locking tab and pull in the direction of the arrow.

    • Remove the four Torx T6 screws securing the power supply to the amplifier board.

  19. JlcERHYtWLd6CwSC
    JlcERHYtWLd6CwSC
    MMVjEgE31CkCjjEt
    axOy5kLlCI1SGsIX
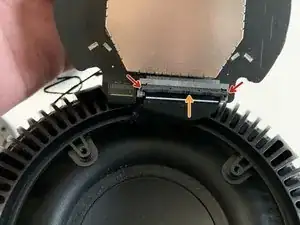
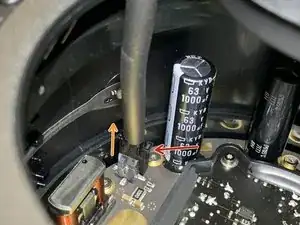
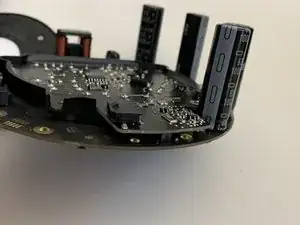
    • Be sure to pull straight up (orange arrow) when removing the power supply (after removing the screws). This connector is fragile and easily damaged during removal and installation!

    • The third photo shows how the power supply board properly mates with the amplifier board.

  20. YnVfJQMrMDRXrqfN
    YnVfJQMrMDRXrqfN
    I1523rXLSnTwkxlC
    rahCVi4tWvFXwYmZ
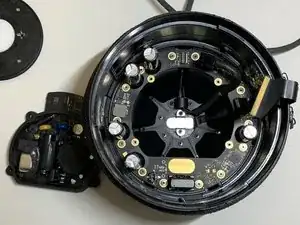
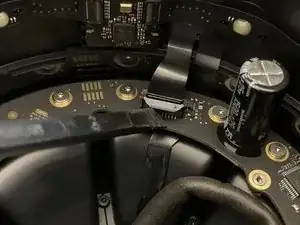
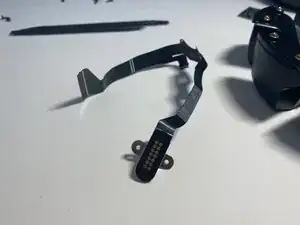
    • Disconnect the ribbon cable connecting the amplifier board to the logic board.

    • Remove the 14 Torx T6 screws securing the amplifier board to the 7 tweeters.

    • Carefully lift out and remove the amplifier board from the HomePod.

    Be very carefull with this ribbon cable , slight pressure and it will break the connector.

    Very peculiar connector, Contrary to logic, when it is closed, it is in the release position. (as in picture)

    When mounting back, close the connector, both sides close together, slide the ribbon connector inside, and spread the connector sides, to lock the ribbon cable

    geolab -

  21. e5ellukM6ll6vvDi
    e5ellukM6ll6vvDi
    4CWPVGMqb2IH1Qxv
    raUqRkshiEnTpHG4
    • Disconnect the 3 ribbon cables from the Microphone board.

    • Using a hair dryer, heat the microphone board from the back side.

    • Using a plastic spudger, remove the PCB from the housing.

  22. FDIlIA1EYCfv1vNR
    FDIlIA1EYCfv1vNR
    wMbZm4FUEHEjbMeF
    MLNswIdIRDOBtXdO
    • This is difficult to do, but with two spudgers and a finger nail, it's possible.

    • Using one hand to depress the 2 spiders and a finger nail to depress the 3rd clip, use your free hand to unscrew (counter clockwise) the tweeter retaining ring.

    • It is only necessary to rotate the tweeter retention ring several turns. It is not necessary to remove it entirely.

  23. KkX6C3nKsQJf2ELV
    KkX6C3nKsQJf2ELV
    R1PhAqPaiRydNdPn
    • Remove the three screws that secure the tweeter in place.

  24. AlLOZjKmlim1Zup5
    AlLOZjKmlim1Zup5
    FvUDsenNMTPGgZkC
    UFZjLZevWtEN6ILW
    • Remove the two T6 screws securing the diagnostic port to the bottom housing

    • Careful peel the ribbon cable from the wall of the HomePod. Take care not to tear this cable.

    • Remember it helps to heat the outside of the housing near the ribbon cable with a hair dryer to soften the adhesive securing this ribbon cable in place.

Conclusion

To reassemble your device, follow these instructions in reverse order.

Nicholas Ouimet

Member since: 17/10/09

3539 Reputation

6 comments

Probably one of the hardest Apple product I've disassembled, took me almost an hour to remove the top.

Thank you for your guide!

Lulucmy -

My homepod was knocked off a table during a party and started buzzing like crazy with any bass. I was able to follow this, and remove the woofer with no problems. turns out the woofer cage had bent unsealing the woofer, i was able to hammer it straight, reassemble, and it works perfectly again. THANK YOU.

mn mongo -

What's the best way to test the PSU? My HomePod bricked, I disassembled it using this guide (Thank you!), the cable checks out, the next suspect is the PSU.

yarikos -
Thank you for the information, it is really very useful.

A family member gave me his first generation Homepod which is not working after a fall from a table. Due to its age it is out of warranty and was not repaired or replaced by the official Apple service. He tried unsuccessfully to repair it.

Today I opened it up and the flat cable that connects the motherboard to other components on the bottom of the device is broken very close to its connection to this motherboard.

I really don't think this is the original fault of the device but I would like to know if there is a possibility to repair or replace this cable.

Thank you very much.

Guiseppe -
Someone in Mexico that repairs Homepod First version/Alguien en mexico que repare homepod primera version

Homero Amaro Lira -
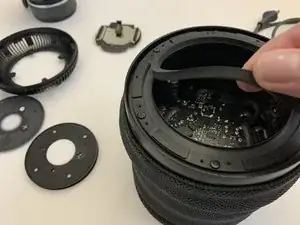
I would also strongly recommend to use an iFixit Jimmy device opener (metal blade) for separating the top control surface from the control board underneath. It is notably better than using a plastic pryer of any kind. Also, while removing it, make sure to not scrape off the perimeter of the plastic surface at the bottom, as you'd scrape off the paint underneath (the white or space gray color) and you'll end up with a transparent surface. There are a few DIY videos in Youtube. If you would rather have someone else to professionally repair these units, you also have a few options such as Nics Fix and Minn-Tech.com in the US.

Fuat Aktan -