Introduction
-
-
Remove the top and bottom rubber pads (the middle one can stay on)
-
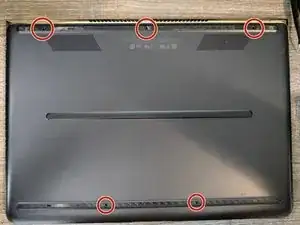
Remove the 5 screws in the locations shown
-
-
-
Use a combination of opening picks, spudgers, jimmy, etc. to pry up the several plastic tabs, working your way around the case. I found the easiest place to start was near the trackpad.
-
This is the inside of the back cover, tabs are in the locations shown
-
-
-
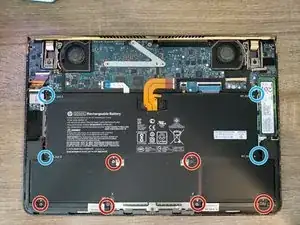
Many things are now accessible, including the battery, SSD, and Wi-Fi card
-
Detach all the accessible ribbon cables, and unscrew the 6 small and 4 really small screws holding the battery in place (locations shown)
-
The cables running along the left and right sides of the battery will need to be pulled out of the clips holding them in place
-
NOTE: The battery does not need to be removed to access the SSD or Wi-Fi card
-
-
-
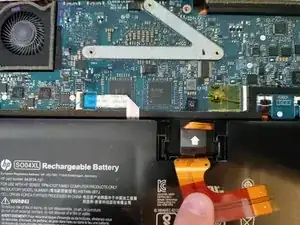
There is a tab under the battery ribbon cable that helps in removing the battery. It is attached to a strip of adhesive under the battery.
-
Pull the tab up away from the laptop to lift the battery. You will have to pull pretty hard, but don't pull quickly. Slowly increase the force until the battery becomes easy to remove.
-
You can also lift the battery on the backside between the tab and the ribbon cable
-
-
-
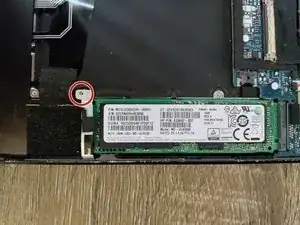
The SSD can be accessed by removing this screw
-
Again, the battery does not need to be removed to access this screw
-
-
-
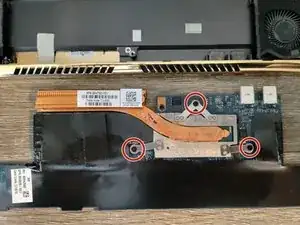
Detach the rest of the ribbon cables from the motherboard
-
It may be easiest to detach both sides of the ribbon cable to the Wi-Fi card
-
Unscrew the three screws holding the motherboard in place, and lift up and toward you (the bottom of the picture) to pull it out
-
The touchpad is also accessible before or after removing the motherboard via three screws
-
-
-
To remove the keyboard, separate the black plastic from the metal using a spudger
-
The entirety of the black plastic will need to be removed, and there are many screws underneath
-


To reassemble your device, follow these instructions in reverse order.
