Introduction
Is your HP Pavilion dv2913cl running slower than usual or freezing frequently? These common issues may be due to faulty or insufficient RAM. By replacing or upgrading the RAM, you can potentially restore your laptop's performance to an optimal or improved state.
Random Access memory (RAM) is an important part of the computer and contributes to how smoothly it can run. If the RAM is faulty, the computer will have issues such as becoming slow or crashing when running complex or intensive programs.
This step-by-step guide is designed to help you access and replace the RAM modules in your HP Pavilion dv2913cl. The process is simple and beginner-friendly, requiring no advanced technical skills.
Before You Begin:
- Safety First: Power off your laptop and unplug it from any power source to avoid electrical hazards.
- Preparation: Gather the necessary tools and ensure you’re working in a clean, static-free environment to prevent accidental damage to components.
- Check RAM is connected: Before beginning, check the BIOS and any other relevant software to ensure the problem is a broken RAM and not an issue with the RAM connection.
Follow this guide carefully, and you'll have your HP Pavilion dv2913cl running smoothly in no time!
Tools
-
-
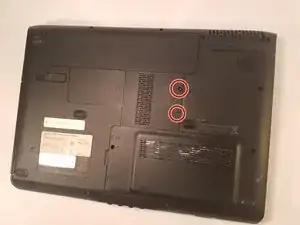
Unscrew the two screws on the center panel of the device .
-
Then gently remove the center panel.
-
-
-
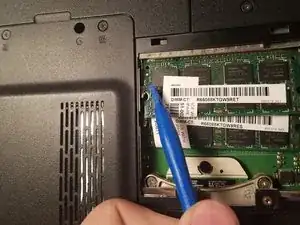
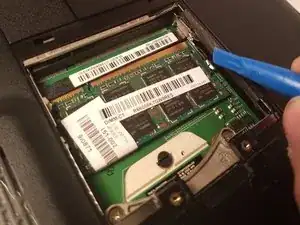
Gently push the silver clamps on both sides of the RAM stick on top.
-
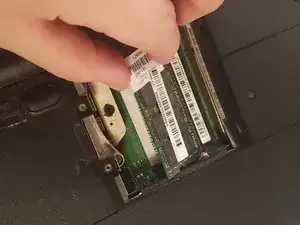
Now remove the RAM stick on top from the device.
-
-
-
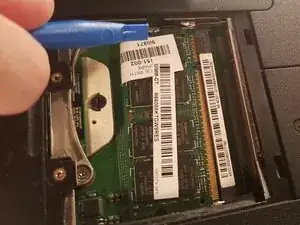
Gently push the silver clamps on both sides of the bottom RAM stick.
-
Now remove the bottom RAM stick from the device.
-


To reassemble your device, follow these instructions in reverse order.