
Introduction
If your HP Pavilion DV2160BR keyboard has become unresponsive, inaccurate, or faulty, this guide will walk you through the steps to replace it. The process is straightforward and requires only basic tools, such as a Phillips screwdriver and a plastic opening tool.
Before starting, ensure the laptop is powered off, unplugged, and the battery is removed to avoid any electrical hazards.
Please take care while handling the ribbon cable, as it is delicate and can be easily damaged during removal or reinstallation.
-
-
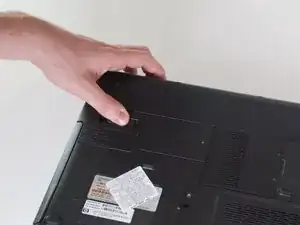
Locate the battery compartment at the rear of the device.
-
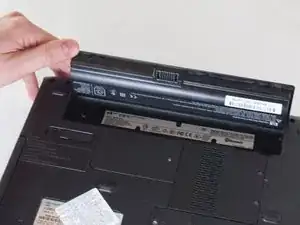
There is a slider button located under the left side of the battery compartment. It is indicated by a battery symbol. Move the slider to the left and lift the battery out.
-
-
-
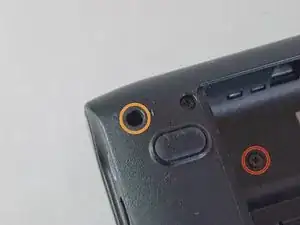
Unscrew the 5 screws along the top edge of the laptop’s back panel and inside the battery compartment.
-
The two screws inside the battery compartment are 5 mm Phillips #1.
-
The three screws outside the battery compartment are 9 mm Phillips #1.
-
-
-
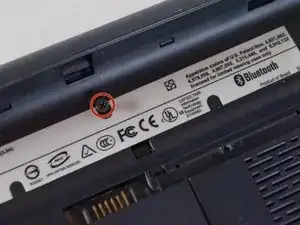
Remove the three 6 mm Phillips #1 screws that are marked by a keyboard symbol. These screws are holding in the keyboard itself.
-
-
-
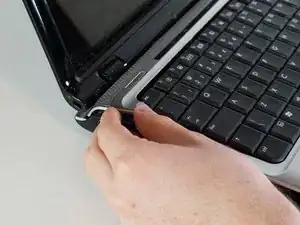
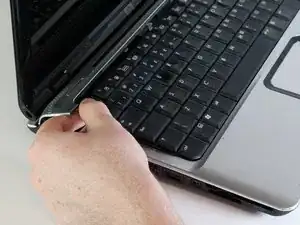
Using a blue plastic opening tool, remove the bezel by sliding the tool along the edges.
-
The bezel is held in place by plastic tabs, which you will hear snapping out of place as you slide the plastic opener tool.
-
-
-
Lift the keyboard from the device, starting from the top sides and pulling it away from the bottom end gently.
-
-
-
Remove the old keyboard by gently unplugging the ribbon cable
-
Prepare the new keyboard and connect it to the laptop via the ribbon cable
-
Carefully reassemble the keyboard into its housing, making sure all tabs are aligned. Reattach the back panel and screws, then power on the laptop to test the new keyboard.
-


To reassemble your device, follow these instructions in reverse order.