
Introduction
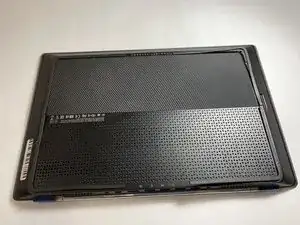
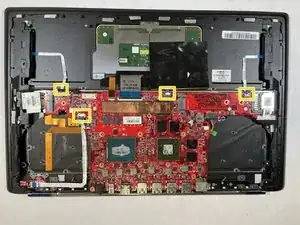
This guide will explain the process of replacing the motherboard in a HP Omen 15-5002xx gaming laptop. This process will likely take anywhere between 45 minutes to an hour. Before removing any components from the laptop, it is suggested that you take a reference photo to ensure you will be able to put everything back in the right place. The reference photo should be taken as soon as you remove the back cover. This replacement process will require removing several components from the laptop besides the motherboard. Ensure you have a safe space to store these components, including screws, for reinstallation later.
Tools you will need include a 1.5mm flathead screwdriver, a Philips screwdriver, a J00 JIS screwdriver, a spudger (prying tool), and a replacement motherboard for this specific laptop model. Some other equipment that may be helpful would include a tray to store screws in, along with a flashlight to help with seeing smaller parts. Be sure not to lose any screws or parts, or your laptop may not work properly or stay together following this replacement. There are multiple types of screws, so storing like screws together is suggested.
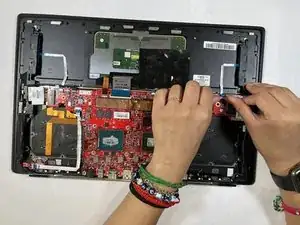
Before beginning this repair, be sure to fully power off your device and unplug it from external power. Wait 5-10 minutes for the laptop to cool if it performed any demanding tasks before shutdown. For good measure, ensure the motherboard is the source of any issues you have before dissecting the laptop. Be careful when handling sensitive components, including the new motherboard, to ensure they don't get damaged in the repair process. Likewise, be very careful when disconnecting and reconnecting ribbon cables to avoid damaging those as well.
-
-
Flip the laptop upside down so the backside is facing up.
-
Use a spudger or your fingers to remove the thin rubber strips that are attached from the edges of the laptop.
-
Unscrew all 14 screw with the J00 JIS Screwdriver.
-
-
-
Open the case slowly from opposite sides of the laptop.
-
Use the J00 JIS screwdriver to remove eight screws securing the battery.
-
-
-
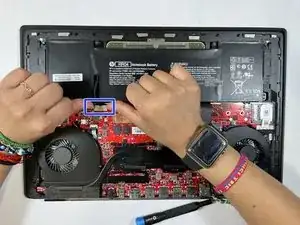
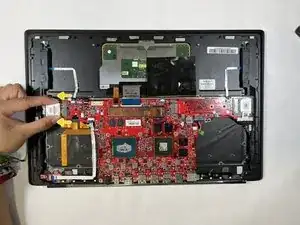
Carefully remove the battery connector that is attached to the motherboard by slowly sliding it towards the battery with two fingers.
-
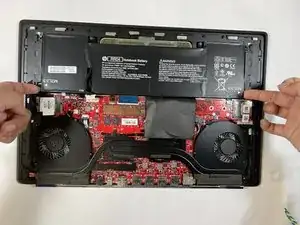
Remove the battery by lifting it up and out.
-
-
-
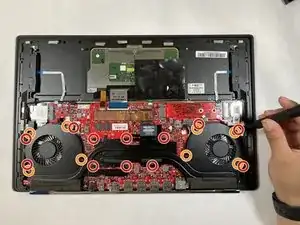
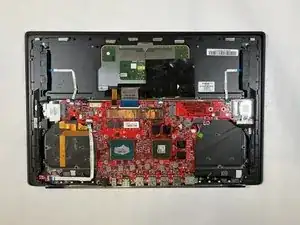
Remove the twelve big screws with the J00 JIS screwdriver.
-
Remove all eight small screws with the 1.5 flathead screwdriver.
-
-
-
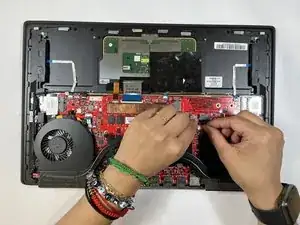
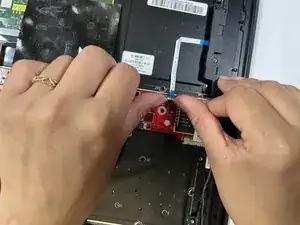
Carefully detach the fan connector that is attached to the motherboard by slowly sliding the connector out with two fingers.
-
Remove the battery carefully.
-
-
-
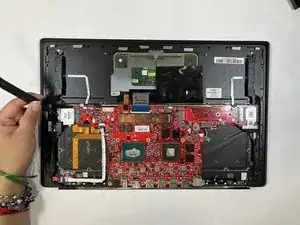
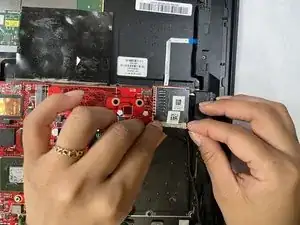
Carefully remove the Wi-Fi Card by slowly sliding the card sideways away from the motherboard.
-


To reassemble your device, follow these instructions in reverse order.
