Introduction

When displays get old they may have groups of pixels that die or have all of them die making it impossible to see anything. Replace the display using our guide.

  1. 3L4okIIvaEdYZtXU
    3L4okIIvaEdYZtXU
    wN3mFkWrSYvqIYcI
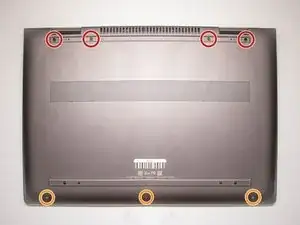
    • On the back panel of the device, remove the four (4) M2.5xL6 screws at the top of the photo using a Phillips #0 screwdriver.

    • Unscrew the three (3) screws at the bottom of the photo using a T5 Torx screwdriver.

    In the second step the photo looks like the laptop is still in the same position as the first step, which means, according to the first image, the second image shows someone removing the four screws at the top of the laptop. To be accurate to the text in Step 2, the barcode would appear at the top of the image.

    lkmemphis -

  2. wdFJWvkvJPKNdJ5K
    wdFJWvkvJPKNdJ5K
    mIvVylGYCULFnmFK
    FImPr1PXccnwnCFL
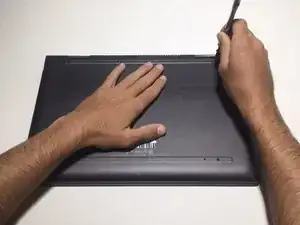
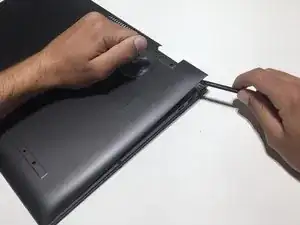
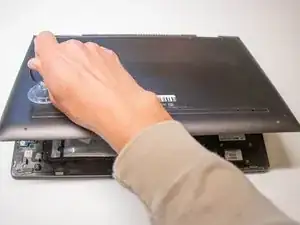
    • To remove the back cover, use the black spudger to lift up on the edges of the cover.

    • Use a suction cup to assist in lifting the back cover

  3. lMr3WCPrBtNvYtps
    • Use the Philips #0 screwdriver to remove six (6) M2.0x3.2 screws from battery.

    There are 7 red highlight circles showing on the image.

    lkmemphis -

    Okay, I see the seventh screw is addressed in the next step, #4. Shouldn’t the image in Step 3 show just the six screws the instructions is referring to>

    lkmemphis -

  4. Arc65xmBcTbJvNR3
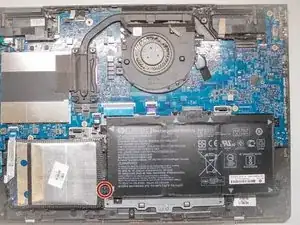
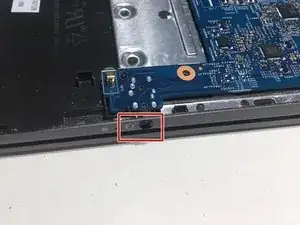
    • Using the Philips #0 screwdriver, remove the final screw from the battery connected to the SSD storage unit.

    Why is this seventh screw separate from the other six in the prior step?

    lkmemphis -

  5. 51tWCua61UB5YSOI
    • Lift and pull the front of the battery up and out (away from the connector) to remove.

  6. DJbe2aixmhWoNenY
    DJbe2aixmhWoNenY
    OmHS1lsTaKfAFX3N
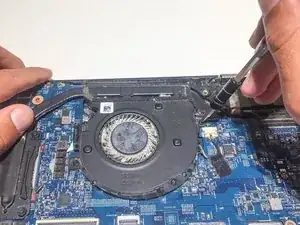
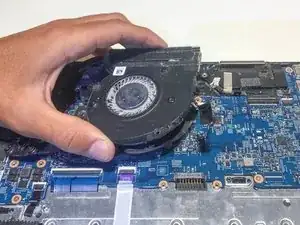
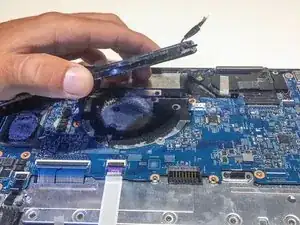
    • Using a Philips #0 screwdriver, remove the three M2x4 screws located around the cooling fan as shown in this picture.

    • Be careful as the fan might be sharp in some places when removing it.

  7. cbkHgS5ybmwyfoCW
    cbkHgS5ybmwyfoCW
    hmoufFbmUeRU5AvI
    • Remove the connector clip with the tweezers.

    The fan connector on the one I was working on was in a different location, below the fan near the battery connector

    maccentric -

  8. iVSGcu3mGcKjTI2s
    • Remove the four spring loaded screws with a Philips #1 screwdriver.

  9. JUNulcr1J4mHklHe
    JUNulcr1J4mHklHe
    lHpA1jrU3n4JBQHK
    • Remove the cooling fan.

  10. Z4mdY1UKqIj5HmUb
    Z4mdY1UKqIj5HmUb
    VTFCOGbKQrgBOIWd
    qgegwEnJPedgOTcP
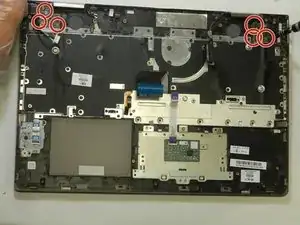
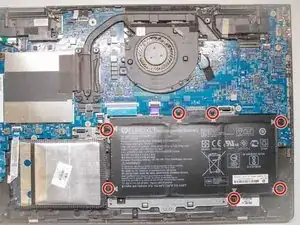
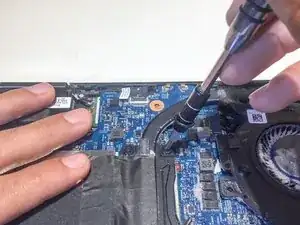
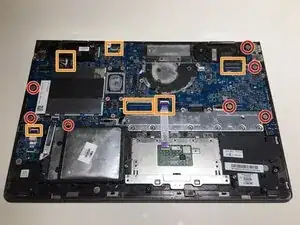
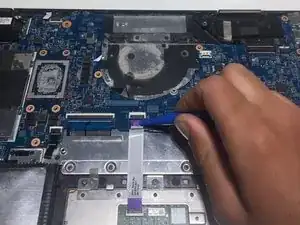
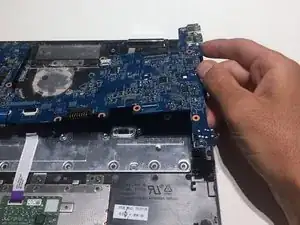
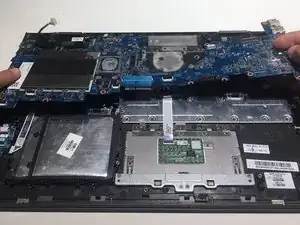
    • Using a Phillips #1, remove the seven M2.0x3.2 screws.

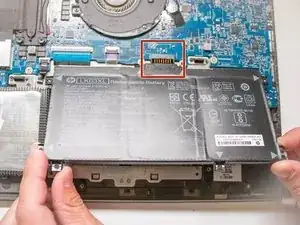
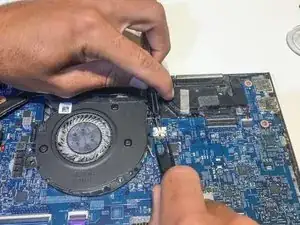
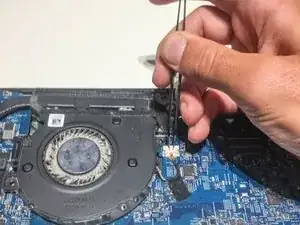
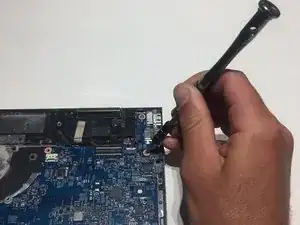
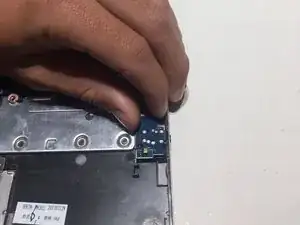
    • Undo the six connections using the blue opening tool.

    There’s a few errors/omissions here. There is no screw where the red circle notes on the bottom right, it is actually top left and not circled in red. There is also a connector on the top right that needs to be disconnected just to the right of the LCD connector highlighted in the orange box. Finally, I needed to disconnect the wifi cables and remove the screw affixing the card to the case in order to remove the board (the wifi card connects to a slot beneath the board, rather stupidly).

    maccentric -

    The connector on the top right mentioned in my previous post is for the speakers

    maccentric -

  11. pQ5breXH6ZxHRfgP
    pQ5breXH6ZxHRfgP
    HsykVOQLIx2GaIQW
    qNWBnlSu3OAOGLTw
    • Carefully remove the aux port from the frame of the computer as shown.

    Don’t do this, just lift the board from the left side and lift it away to the left

    maccentric -

  12. WvHLxMfl5yIGZV5K
    WvHLxMfl5yIGZV5K
    F14wGAWXWRB3Lnkc
    • Pull the mother board up and away from frame of the computer.

  13. KYKr5OvwGVGKoPPB
    • Use the tweezers to remove the cords from their restraints.

    • Lift the speakers out of the laptop.

  14. wQTplC3s3TZsvmgf
    • Remove the three 4.4 mm screws from each hinge using a Phillips #0 screwdriver.

  15. xHUMnD2QdRoWaytA
    • Lift the hinges with the spudger.

    The hinges cannot be lifted without them bending the plastic of the case (the part with the keyboard). You must lift the top case along with the hinges, then once they’re nearly perpendicular you can separate the two pieces, though you’ll want to have de-routed the wifi cables and the one next to it (camera, I believe) first.

    maccentric -

  16. Qu5WWulHiIAiKUcf
    • Use the spudger to detach the the screen from the display.

    The screen snaps into place, go around the edges to pop it loose

    maccentric -

  17. UgSJysAJnRAHkAoT
    • Slowly remove the tape.

  18. ysOiYoJiH1CvHcEB
    • Disconnect the wire from the ports and take out the white sheet.

Conclusion

To reassemble your device, follow these instructions in reverse order.
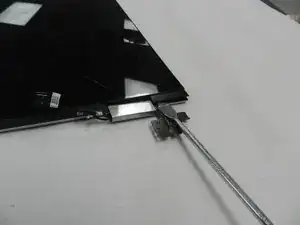
Richard Donald Battel

Member since: 21/09/21

306 Reputation

0 comments