Introduction

Use this guide to replace the speakers for the HP Envy x360 15m-bp112dx. Speakers are used to emit sound or songs from a laptop. These should be replaced if there are issues with the audio, the sound is distorted, or no audio comes out.

  1. iYk3hlAmyPkWwkuK
    • Power off the laptop before starting the disassembly.

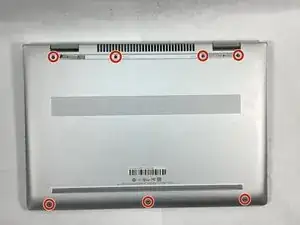
    • Start by facing the device upside down with the hinge facing away from you.

    • Remove the seven 1 mm Phillips screws.

  2. URyFrJMrHEvoIECB
    URyFrJMrHEvoIECB
    RyCTAVBPfOJNqGJj
    gf5agM1ldCglrCFA
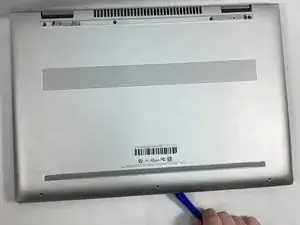
    • Use an opening tool to pry the back panel by pushing the bottom cover upwards.

    • Place the bottom cover away from the laptop.

  3. RLFdAYGX1YVCXmkv
    RLFdAYGX1YVCXmkv
    aMfmHC6rdYCccqor
    XL2uRBnpxvSqbL2X
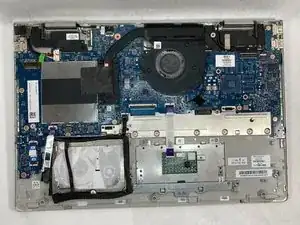
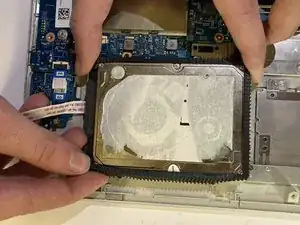
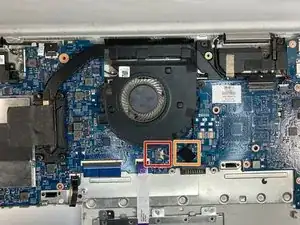
    • Carefully remove the sata ribbon cable from the hard drive, pulling it out horizontally.

    • To avoid injury, ensure that you disconnect the battery prior to removing any of the cables in the laptop.

  4. krbw6VihFyOwtbQq
    krbw6VihFyOwtbQq
    bYnUfGSY2ooBVoJR
    ulPCkBJAf2nxhRPA
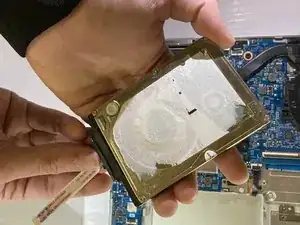
    • Remove the hard drive by pulling it out vertically.

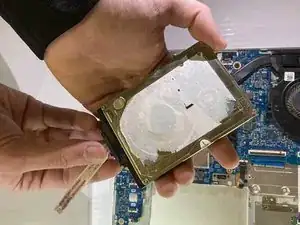
    • Remove the plastic casing around the hard drive by peeling it back.

  5. XPdEQ5j2EWjdpBSY
    XPdEQ5j2EWjdpBSY
    oGqZQbKHeo1XAiHk
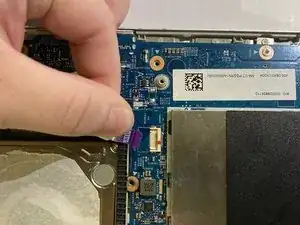
    • Disconnect the ribbon cable by pulling it away horizontally from the hard drive.

  6. 3jFBahwgSTsqXDOy
    3jFBahwgSTsqXDOy
    IogGIc2oZnkfZrU6
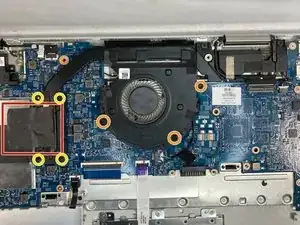
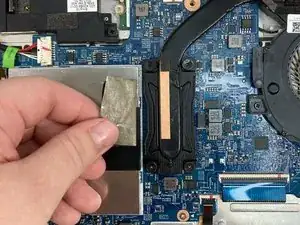
    • Carefully peel back the tape connecting the heat sink to the fan assembly.

    • Loosen the four 1 mm Phillips screws retaining the fan assembly.

    • Remove the three 2 mm Phillips screws.

  7. aS6GZsZGvbTUxG3Y
    aS6GZsZGvbTUxG3Y
    IeBKYyiPPwBSQhtT
    KnRIttAICQAi5oHL
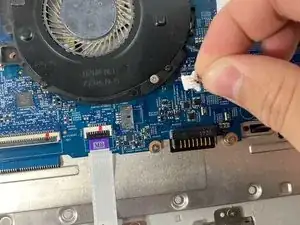
    • Unplug the thin cable connected to the fan, pulling horizontally.

    • Carefully peel back the connected tape.

  8. dQCaGfROP6ZTYKav
    dQCaGfROP6ZTYKav
    sKCsxEtqOqUXafIZ
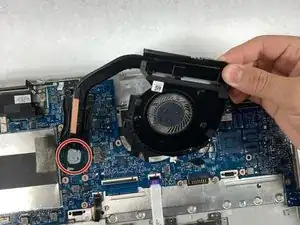
    • Carefully remove the fan assembly by pulling on it upwards.

    • When reassembling, ensure that you clean off and replace the thermal paste on the fan assembly.

  9. 13peJQmCVKr5u4KA
    13peJQmCVKr5u4KA
    PRPpAeHHorc5Jcty
    RpobKeZQKBQSy3po
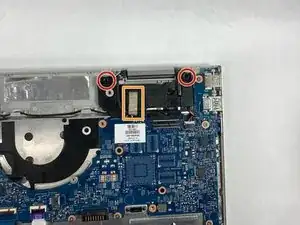
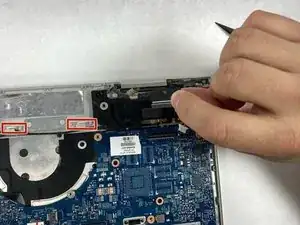
    • Remove the two 5 mm Phillips screws from the first speaker.

    • Carefully peel back the tape.

  10. pHEPRUCRcHZeX2Jn
    pHEPRUCRcHZeX2Jn
    SyXL65d2UvulYc6E
    pRIXQWtA3rUVEDVS
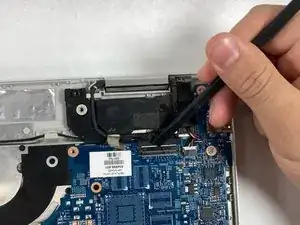
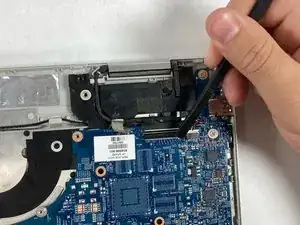
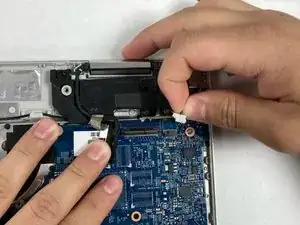
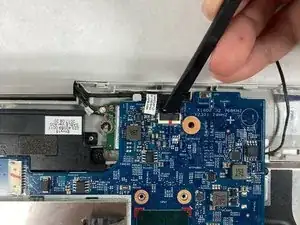
    • Open the tab connected to the right speaker cord, prying it with a plastic opening tool upwards.

    • Pull out the speaker cord horizontally.

  11. bxKYnqKWnWHmBcvq
    bxKYnqKWnWHmBcvq
    BvJ4gPJ5TvSfEQPW
    c1GYXJZSJSXYiBEI
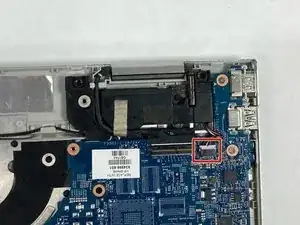
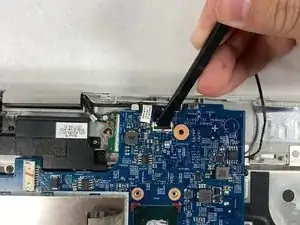
    • Remove the thin cable from the speaker, pulling it out horizontally.

  12. S1YpStwJQurYOGic
    S1YpStwJQurYOGic
    fVJAQfjsZavbvrUb
    XGboLJFyiOJGInGI
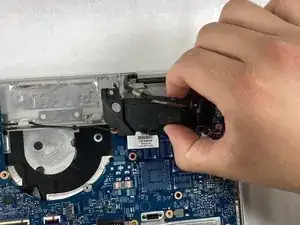
    • Remove the right speaker, pulling upward carefully.

    • While pulling on the speaker, unwind the cord around the plastic clips to free the speaker and place it to the side.

  13. Y4VcmmAVNWLGgY1A
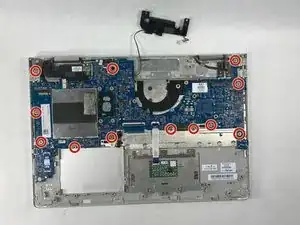
    • Remove the twelve 2.5 mm Phillips screws.

  14. tIoLAlWRFGlbtAkr
    tIoLAlWRFGlbtAkr
    p2PSoUONW4nuWRDE
    OKFhYIySImAVGbOZ
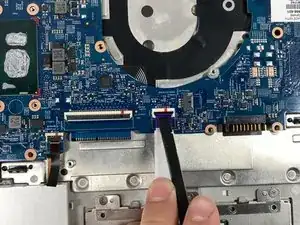
    • Unclip the ribbon cable using a plastic opening tool to flip up the black ZIF connector locking flap.

    • Remove the ribbon cable by pulling it out horizontally.

  15. JOVHkQZU3Zfoql53
    JOVHkQZU3Zfoql53
    pqHJ1v3QrkjQaLvU
    yaVGEuKW2ZnYX3Nm
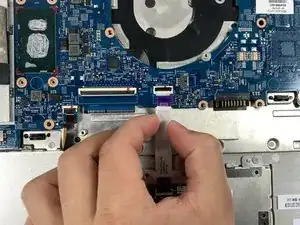
    • Unclip the second ribbon cable using a plastic opening tool to flip the black ZIF connector locking flap up.

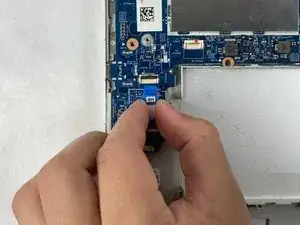
    • Remove the ribbon cable by pulling it out horizontally.

  16. MsPWGjFyawLR2LBZ
    MsPWGjFyawLR2LBZ
    BtwTqie3Vs6qyHqM
    4NY2sWBKIR2PWaXA
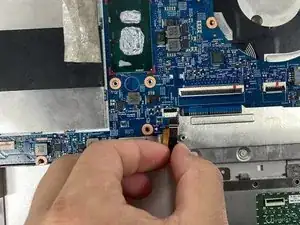
    • Unclip the third ribbon cable using a plastic opening tool to flip up the black ZIF connector locking flap.

    • Remove the ribbon cable by pulling it out horizontally.

  17. yIspEOtVfq4lQ4GW
    yIspEOtVfq4lQ4GW
    eRAHjpipbaXZb1BV
    • Remove the thin cable carefully by pulling out horizontally in line with its slot.

  18. mREbvylmVJqxALia
    mREbvylmVJqxALia
    hNPFUIkujfLdiVmC
    WEPgtZ3vt2ErD6Fr
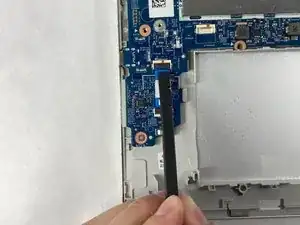
    • Unclip the fourth ribbon cable using a plastic opening tool to flip up the black ZIF connector.

    • Remove the ribbon cable by pulling it out horizontally.

  19. YfnGFPeE2XwbdMIh
    YfnGFPeE2XwbdMIh
    VrH4idwFUIDaJTnP
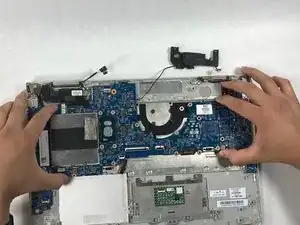
    • Carefully remove the motherboard by pulling upwards on it.

  20. qEjfPqohFHgiPCZ5
    qEjfPqohFHgiPCZ5
    GSk3GJfPQLBKOkwO
    KeQKn1QKmrKWDsSb
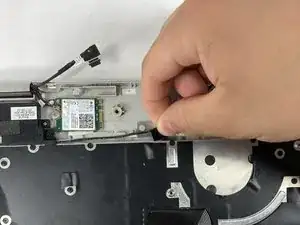
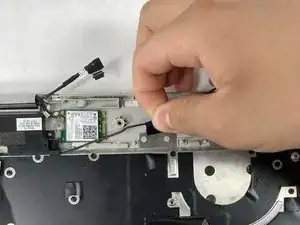
    • The removal of the right speaker is located in the motherboard guide during steps 1-4.

    • Remove the two 1.5 mm Phillips screws.

    • Carefully peel the tape back.

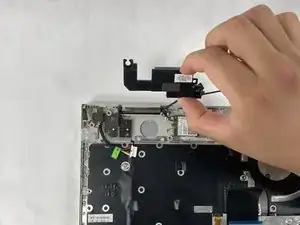
    • Pull the left speaker cord around the plastic clips.

  21. KLqPJIJihvnuTuVM
    KLqPJIJihvnuTuVM
    WVYkUVvndkWe54Hg
    • Carefully remove the left speaker by pulling up vertically.

Conclusion

To reassemble your device, follow these instructions in reverse order.
James Bonnell

Member since: 20/03/23

355 Reputation

0 comments