Introduction

Use this guide to replace the fan for the HP Envy x360 15m-bp112dx. The fan is used to cool down the computer components, as overheating causes major issues. Some reasons to remove or replace the fan include the fan not working, the fan is unable to cool down the system due to to reduced speed from particles lodged in the fan, and the fan is making noise.

  1. iYk3hlAmyPkWwkuK
    • Power off the laptop before starting the disassembly.

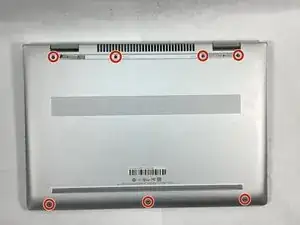
    • Start by facing the device upside down with the hinge facing away from you.

    • Remove the seven 1 mm Phillips screws.

  2. URyFrJMrHEvoIECB
    URyFrJMrHEvoIECB
    RyCTAVBPfOJNqGJj
    gf5agM1ldCglrCFA
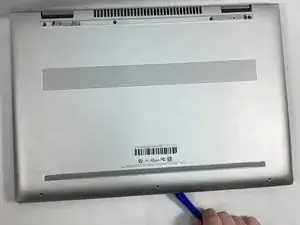
    • Use an opening tool to pry the back panel by pushing the bottom cover upwards.

    • Place the bottom cover away from the laptop.

  3. RLFdAYGX1YVCXmkv
    RLFdAYGX1YVCXmkv
    aMfmHC6rdYCccqor
    XL2uRBnpxvSqbL2X
    • Carefully remove the sata ribbon cable from the hard drive, pulling it out horizontally.

    • To avoid injury, ensure that you disconnect the battery prior to removing any of the cables in the laptop.

  4. krbw6VihFyOwtbQq
    krbw6VihFyOwtbQq
    bYnUfGSY2ooBVoJR
    ulPCkBJAf2nxhRPA
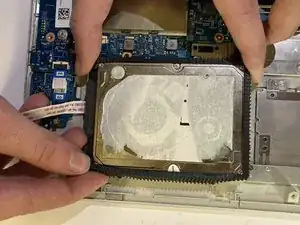
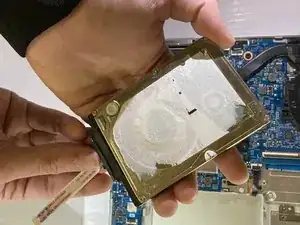
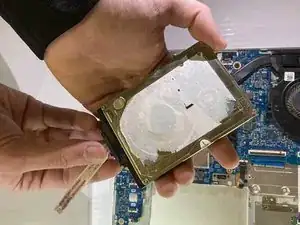
    • Remove the hard drive by pulling it out vertically.

    • Remove the plastic casing around the hard drive by peeling it back.

  5. XPdEQ5j2EWjdpBSY
    XPdEQ5j2EWjdpBSY
    oGqZQbKHeo1XAiHk
    • Disconnect the ribbon cable by pulling it away horizontally from the hard drive.

  6. 3jFBahwgSTsqXDOy
    3jFBahwgSTsqXDOy
    IogGIc2oZnkfZrU6
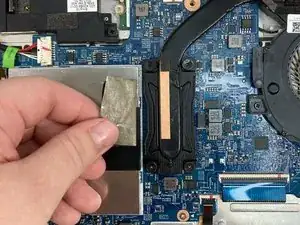
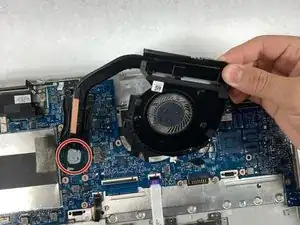
    • Carefully peel back the tape connecting the heat sink to the fan assembly.

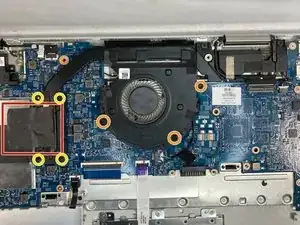
    • Loosen the four 1 mm Phillips screws retaining the fan assembly.

    • Remove the three 2 mm Phillips screws.

  7. aS6GZsZGvbTUxG3Y
    aS6GZsZGvbTUxG3Y
    IeBKYyiPPwBSQhtT
    KnRIttAICQAi5oHL
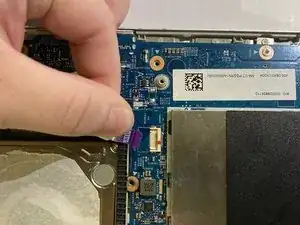
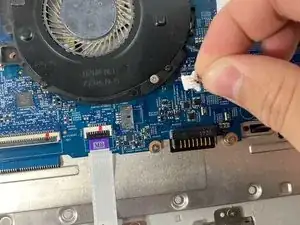
    • Unplug the thin cable connected to the fan, pulling horizontally.

    • Carefully peel back the connected tape.

  8. dQCaGfROP6ZTYKav
    dQCaGfROP6ZTYKav
    sKCsxEtqOqUXafIZ
    • Carefully remove the fan assembly by pulling on it upwards.

    • When reassembling, ensure that you clean off and replace the thermal paste on the fan assembly.

Conclusion

To reassemble your device, follow these instructions in reverse order.

Cameron Anderson

Member since: 20/03/23

292 Reputation

0 comments