Introduction

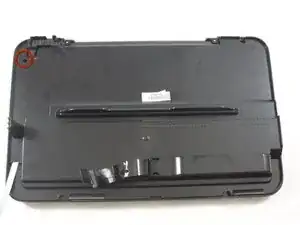
If the scans or copies made are not matching the desired document, replacing the scanner glass is a solution to consider. There could be a crack or scratch in the glass affecting the quality of the scanned or copied document. Follow this guide if you need to replace the scanner glass of your HP Deskjet GT-5821.

  1. fbOSJ2SUWeoVnT6f
    • Open the front access panel by placing your finger in the front slot and pulling gently.

  2. 2uY1BMZnTFJ5lLdy
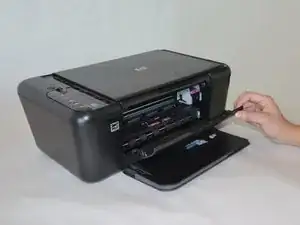
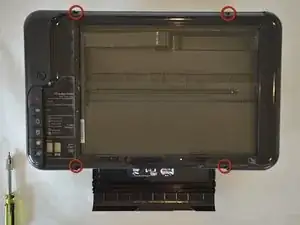
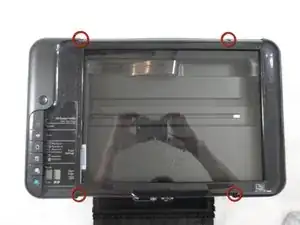
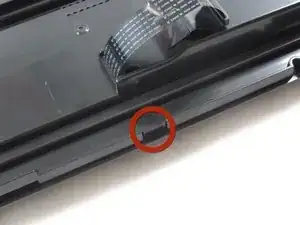
    • Open the protective lid that is covering the glass. Press gently against the base of the panel to remove the lid from the rest of the printer.

  3. YSFVJM5TsLMJSdta
    YSFVJM5TsLMJSdta
    Fh2UoPWksLMVYT2o
    1JeKDq4CuNswU6Zh
    • Remove the four 9mm T10 Torx screws on the top.

  4. wwDIt4qrEkXESmFe
    wwDIt4qrEkXESmFe
    YNJYpZSOA3T2uBOq
    • Carefully lift the top panel off of the printer.

    • Do not tear or damage the two cables that connect the top lid to the motherboard.

  5. FS1GKIRPc3sIZKbq
    FS1GKIRPc3sIZKbq
    lDXBAjQYOgETHdBV
    BPJLixHDOQSU53tM
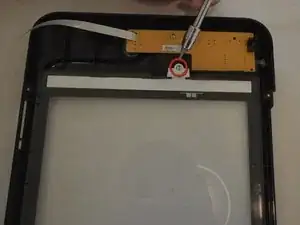
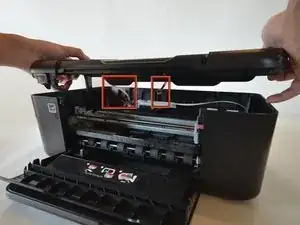
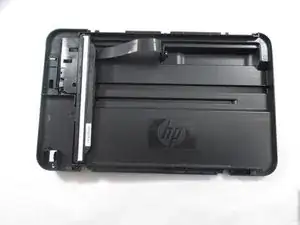
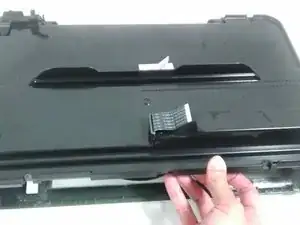
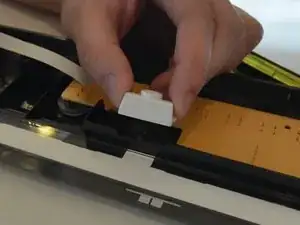
    • Remove the two cables by gripping each one close to their connection ports on the motherboard and gently disconnecting them.

  6. GKvxHiyLRjaKOiku
    • Remove one 9mm T10 Torx screw from the back of the printer lid.

  7. HZL1RqMjhXE3Tf1b
    HZL1RqMjhXE3Tf1b
    AhNDHusBa15oOSaX
    • Press outward on the plastic tab holding the back panel in place.

  8. SWg6cPwIcnpfRNZA
    SWg6cPwIcnpfRNZA
    PACL3HSoJioDRXCP
    • Pull the back panel towards you and lift it away from the rest of the printer cover.

    • Some ribbon cables may still be inserted through the back panel. Be careful not to damage these and they should slide out easily.

  9. n6D3dci2QiuLnruM
    • Remove one 9mm T10 Torx screw from the white retaining tab.

  10. mkfSNALA1CuVxYVa
    • Remove the white retaining tab.

  11. WIxkKjVAxApVcQ1T
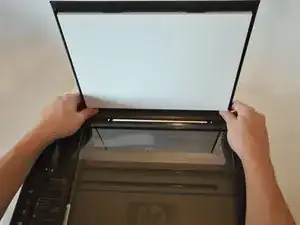
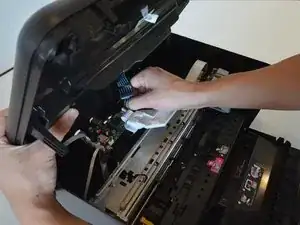
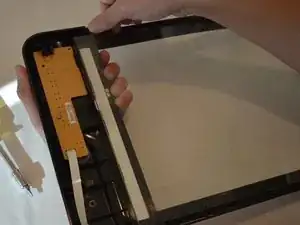
    • To remove the scanner glass, gently push it towards you.

    • Slide glass panel until it is completely removed from printer.

    • Use caution when removing glass and be aware of any sharp edges.

Conclusion

To reassemble your device, follow these instructions in reverse order.

Kevin Raives

Member since: 15/01/13

93 Reputation

0 comments