Introduction

This guide will show you how to replace the trackpad on the HP 15-dy2024nr. A trackpad detects the motion and position of a user's fingers, and translates them to a position on the screen.

To indicate whether your trackpad needs replacing, it will show signs of:

  • Touch not being registered.
  • Unable to click.
  • Lag.
  • Dents and/or scratches.
  • If liquid is spilled on it.
  • Heating up.
  1. ANQ2tBtq5L16noAt
    ANQ2tBtq5L16noAt
    ot4D5TnWuYZfjf2E
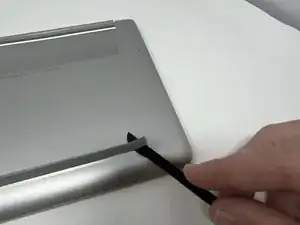
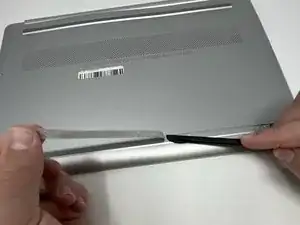
    • Use a spudger to peel one corner of each of the rubber feet from the bottom of the laptop.

    • Gently peel the feet from the laptop using the spudger revealing the screws underneath.

    • If the rubber foot peels away but leaves adhesive behind you must peel the adhesive away before removing the screws.

  2. evJvbP1NdEXQ22TY
    evJvbP1NdEXQ22TY
    hF6q4CihNgZPJM1H
    fPNlY1HQsUrnDfZX
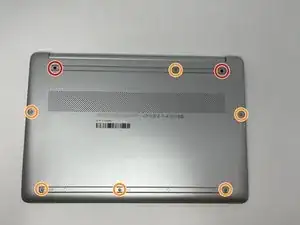
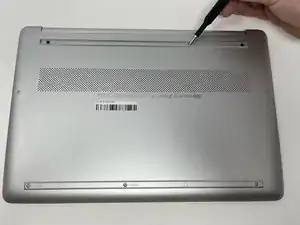
    • Use a Phillips #1 screwdriver to remove:

    • Two 2.5mm x 6mm screws

    • Six 2mm x 6mm screws

    • Be sure to keep different screw sizes separated.

  3. Zph4BmunnKNFEjgQ
    Zph4BmunnKNFEjgQ
    UOADtpNLfnrBOW3W
    mIkiPnRovqSLe4oQ
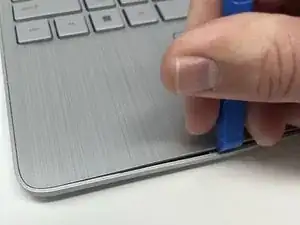
    • Insert an iFixit opening tool into the seam between the keyboard area and bottom cover.

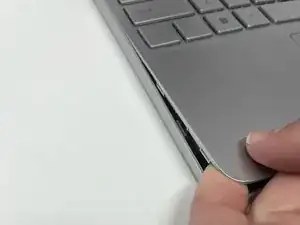
    • Using another iFixit opening tool, slide along the seam to unhook the clips.

    • There are clips all the way around the seam. You may hear a popping sound as the clips come loose. This step may require some force to separate the back cover from the laptop.

    • When the front of the laptop is open, you can use your finger to hold a corner open then slide an iFixit opening tool along the seam toward the back corner.

    • After the clips have been released, flip the laptop over and lift the cover.

  4. PHfZY5ppya5b5M46
    PHfZY5ppya5b5M46
    pZOZGbLXhsVspwVf
    1qbpRSVCJURGQcC2
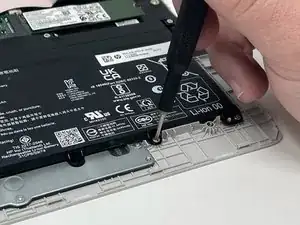
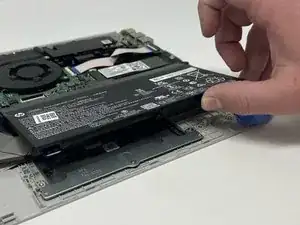
    • Remove five 2.0mm x 3.0mm screws using a Phillips #00 screwdriver.

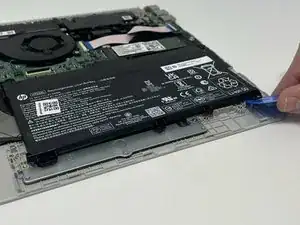
    • Use the iFixit opening picks to lift the battery away from the laptop.

  5. ckpkktPTElQiJAck
    ckpkktPTElQiJAck
    xPZhQN32wGWKQCPe
    6yWnOVHNlyI3weY3
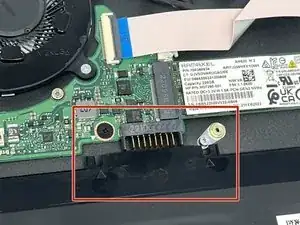
    • Be aware that the battery is plugged into the motherboard.

    • Unplug the battery from the motherboard.

    • Lift the battery away from the laptop and remove.

  6. QNJ5EUYX6DVHeYqw
    QNJ5EUYX6DVHeYqw
    BDAQKwIVOjdl5ZxC
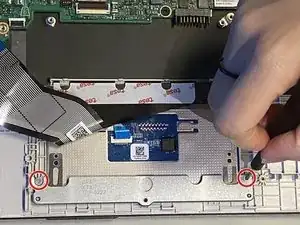
    • Remove two 3.0 mm screws using a Phillips #1 screwdriver.

    • Lift the metal bracket away from the laptop and remove it with your hands.

  7. EdZUWnHVbpJ5stii
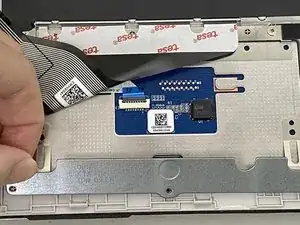
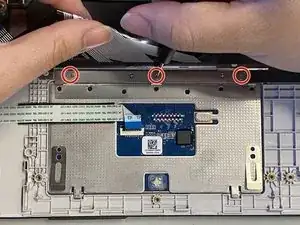
    • Remove three 2.0 mm screws using a Phillips #0 screwdriver.

  8. wEVH6AgRg1RWJBUF
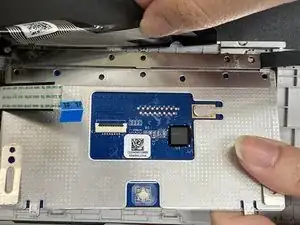
    • Lift the track pad away from the laptop and remove with your hands.

Conclusion

To reassemble your device, follow these instructions in reverse order.

Eylandra

Member since: 08/02/24

97 Reputation

0 comments