Introduction

Use this guide to replace a cracked or damaged back cover on your HMD Fusion phone.

  1. IeoZUYvqlZnCUenT
    IeoZUYvqlZnCUenT
    OvUMFE2G5Zmx5GOi
    IWjaZJoBSTjTIPPP
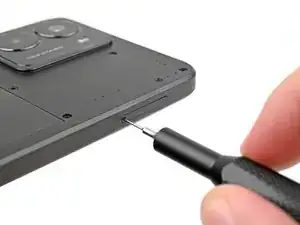
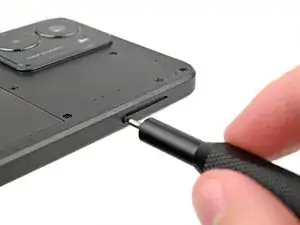
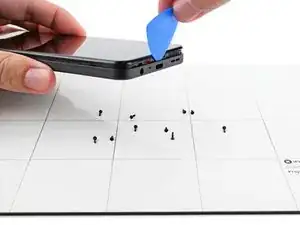
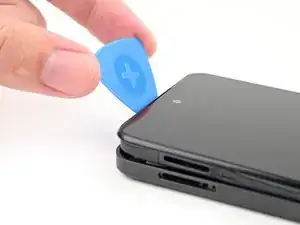
    • Firmly press a SIM eject tool, bit, or straightened paper clip into the SIM card tray hole on the left edge of your phone until the tray ejects.

    • Remove the SIM card tray.

  2. WfSZNgJuNdgv5YuF
    WfSZNgJuNdgv5YuF
    xeX4fGknaAU6EYI6
    jbL25tCYJr1jIRQs
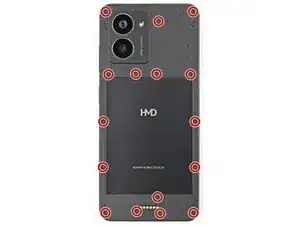
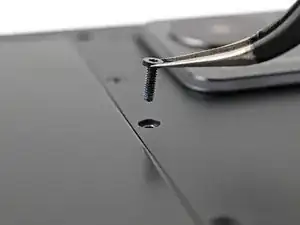
    • Use a T3 Torx screwdriver to remove the sixteen 5.0 mm‑long screws securing the back cover.

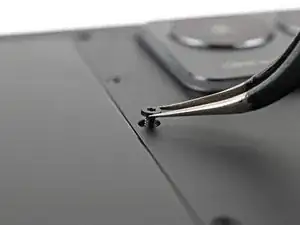
    • Use your fingernails, or angled tweezers, to remove any stuck screws.

    • The screws are secured tightly in the back cover, so you might not be able to remove all of them. If you can't remove a few screws, don't worry! Move to the next step and follow the guide normally.

  3. 5kLbZMElWlN4GcW6
    • During the next four steps, the remaining back cover screws might fall out unexpectedly.

    • To avoid losing screws, you can place a tray, bowl, or Magnetic Project Mat under the phone while you work.

  4. i3sSSOBKOhaCK5US
    i3sSSOBKOhaCK5US
    x2knZUqLfBVKbeMO
    • Flip your phone over so the screen is facing up.

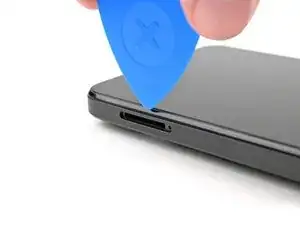
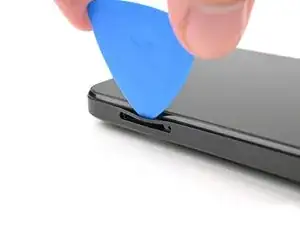
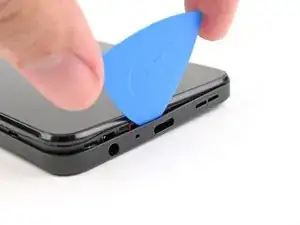
    • Insert the tip of an opening pick between the back cover and frame at the SIM card tray cutout.

  5. AIL3VLwPGWEEVtPO
    AIL3VLwPGWEEVtPO
    yiAXUuuVGaAVPNa6
    o2WmEOSmZbFFLuFb
    • Slide the opening pick along the left edge to begin unclipping the back cover.

  6. OBOAVjReajSurmBV
    OBOAVjReajSurmBV
    jawTxxR5hiCyicRv
    VUETOMNHAKJFK4eY
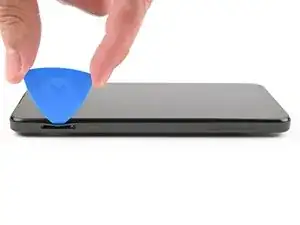
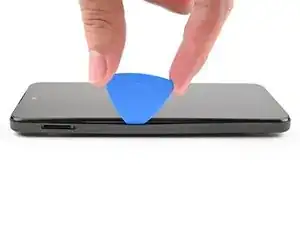
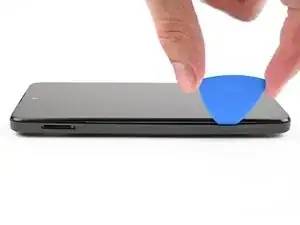
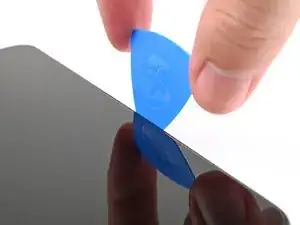
    • Continue sliding the pick around the perimeter of your phone until the back cover is fully unclipped.

    • The corners can be tricky to unclip and may take some force. If you're having trouble, try prying up with the pick.

    • Don't try to fully remove the cover yet, as it's still connected by a delicate cable.

  7. mP2q2X1hHTkvnTLJ
    mP2q2X1hHTkvnTLJ
    MNLkULEhGIrsBaPT
    afAGxRVMpenTmvjq
    • Carefully flip your phone over so the back cover is facing up.

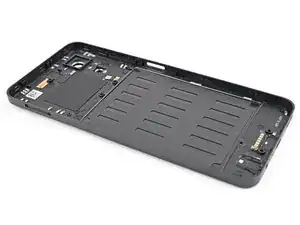
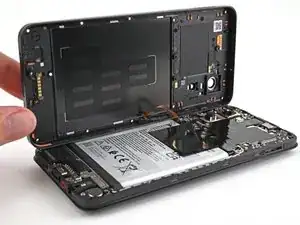
    • Lift the back cover off the frame and flip it over the left edge of your phone, laying the cover flat on your work surface.

    • Be very careful not to strain the back cover's delicate cable.

    • During reassembly, place the back cover onto the frame and firmly press around the perimeter to reengage all the clips.

  8. XCwtQ4dfNpGbxb2k
    XCwtQ4dfNpGbxb2k
    USKBePQUqcuZyQfQ
    tNYJu5eO1rLX2OdO
  9. K35AyWkngrn1TNxL
    K35AyWkngrn1TNxL
    MAHaRLN2KP2IWJqX
    F464cWuK3nwDppjG
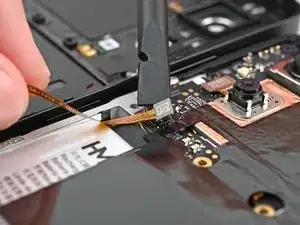
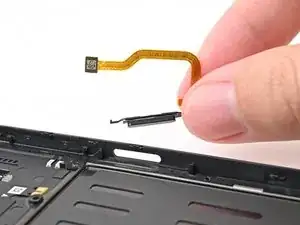
    • Use a spudger to pry up and disconnect the power button press connector.

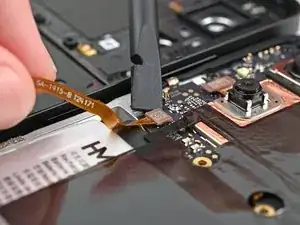
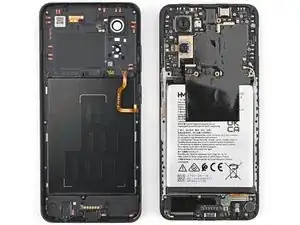
    • Remove the back cover.

  10. Y1KVGhGmrQvwRSIY
    Y1KVGhGmrQvwRSIY
    Nkc5PK5SCYaUUyeQ
    AiMLoNosWLHEdcYp
    • If your replacement back cover doesn't come with a power button pre-installed, follow the next two steps to remove and transfer it.

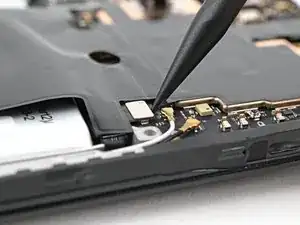
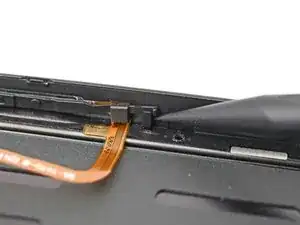
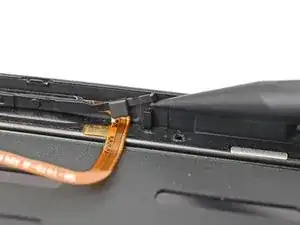
    • Use the tip of a spudger to lift the two rubber arms securing the power button out of their slots in the back cover.

  11. jdn2R5CP6bEASOjb
    • Lift the power button out of the recess in the back cover and remove it.

Conclusion

To reassemble your device, follow these instructions in reverse order.

Take your e-waste to an R2 or e-Stewards certified recycler.

Repair didn’t go as planned? Try some basic troubleshooting, or ask our Answers community for help.

Alex Diaz-Kokaisl

Member since: 16/01/22

151892 Reputation

0 comments