Introduction

If you're unsure how to replace your Google Pixel XL display, follow the steps in this guide to replace your AMOLED display and digitizer assembly.

Replacement display adhesive will need to be used in order to secure your new screen.

If a shattered screen prevents the suction cup from obtaining an air-tight seal, covering the screen with packing tape may help the suction cup stick, and will also help secure glass shards and slivers. Additional heat and prying may be needed to separate the individual glass shards from the frame.

  1. bF6bqXAIVSAugqMV
    • Use an iOpener or heat gun to gently heat the outer edges of the screen.

    • The surfaces near the speaker and microphone (top and bottom respectively) have larger adhesive sections. These areas may require slightly longer heat exposure. Heat will help soften the adhesive securing the display, making it easier to separate. The display should be heated until it's slightly too hot to touch, for roughly two minutes.

  2. VFE2oZUKPRZ6sGAy
    VFE2oZUKPRZ6sGAy
    fn5Lc5mdvOc1PyW3
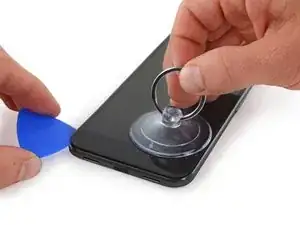
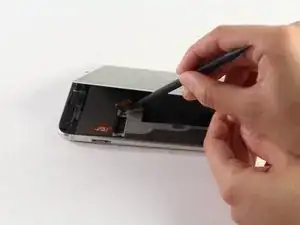
    • Use a suction cup to lift one edge of the screen just slightly, creating a small gap between the display and the frame of the phone.

    • Insert an opening pick into the gap.

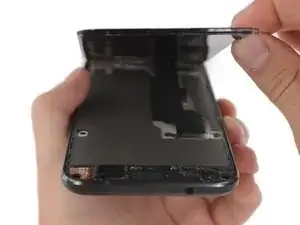
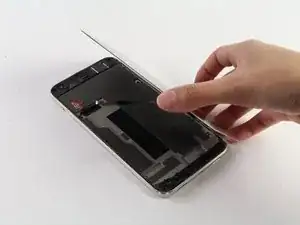
    • Carefully slide the opening pick around the perimeter of the phone to separate the adhesive.

    • If you plan to re-use the display, don't insert the opening pick more than a few millimeters into the phone, or you may damage the OLED panel underneath the glass. Alternatively, use the edges of playing cards to separate the adhesive, rather than a plastic tool—the cards are softer and require more patience, but are less likely to cause damage.

    • You may need to slide your tool around the perimeter multiple times to fully separate the adhesive. Work slowly and carefully until the display begins to come free.

    • Gently lift the display, but don't try to fully detach it yet—it is still connected by a ribbon cable lying underneath.

  3. 3EQNZxb6VhUKnAcB
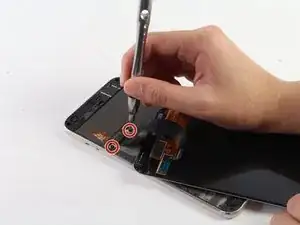
    • Use a T5 Torx screwdriver to remove the two 4mm screws from the screen connector shield.

    • Remove the screen connector shield.

  4. XZC2AZcW6vGrlLNB
    XZC2AZcW6vGrlLNB
    ZRTPydP2RURDXGLN
    • This connector is seated deeply in the frame, so be careful not to damage the connector when performing this step.

    • Put the flat end of a spudger under the lip of the press fit connector and lift up to pop the connector free.

    • Remove the LCD screen and digitizer.

    • Gently scrape any remaining adhesive from your phone. Use a small amount of high concentration isopropyl alcohol (at least 90%) to clean the frame and prep it for the new screen adhesive.

    • The replacement adhesive should only be applied to the edges of the frame, but may come with the center filled in.

    • To remove the unnecessary center section of the adhesive strip, carefully peel away the perforated rectangle in middle of the white backing. At the same time, peel up the black adhesive underneath the white backing.

    • Only adhesive for the edges of the frame should remain.

Conclusion

To reassemble your device, follow these instructions in reverse order.

Richard

Member since: 07/02/17

31790 Reputation

0 comments