Introduction

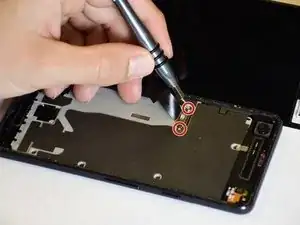
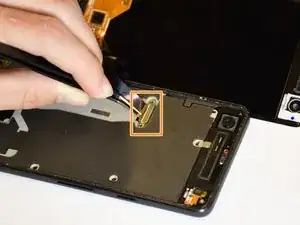
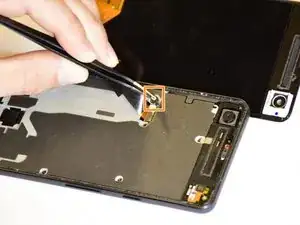
Since the display acts as a barrier to the hardware, it is important to remove it before replacing other components. Due to its simplicity, this guide only requires a few steps and tools to remove the display.

  1. xJIueG6THLDGoTFi
    xJIueG6THLDGoTFi
    DgvMxREIaaotH413
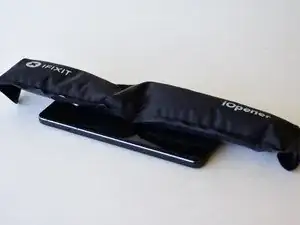
    • Heat up the iOpener in the microwave for 30 seconds.

    • Place the iOpener clear-side down on each edge of the phone for approximately 30 seconds.

    • Place the iOpener on top of the screen for an additional 30 seconds.

    • Be careful with the iOpener as it will get extremely hot.

  2. mIEZ5WtHCrFRfbOA
    mIEZ5WtHCrFRfbOA
    p2DCAj52TOcGmVYg
    uimoskIomZMHIXr5
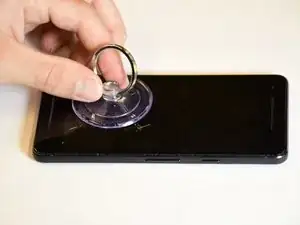
    • Attach the suction cup to the display by placing it on top of the display and pushing down on the top of the cup until it is flat.

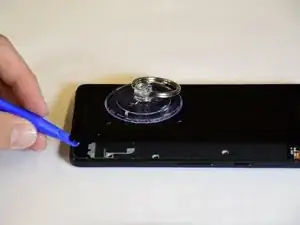
    • Separate the display and the device by inserting the plastic opening tool between them and sliding the plastic opening tool along the perimeter of the display.

    • It is normal to hear popping noises as the plastic opening tool breaks the connection between the display and the device.

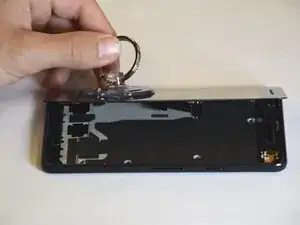
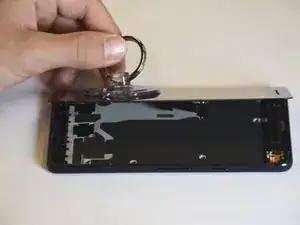
    • Remove the display from the device by grabbing the ring of the suction cup and pulling up.

  3. YFEjHWrrbo4TpTdx
    YFEjHWrrbo4TpTdx
    YeoyoJc33aBofiYq
    VNxHRFSIRjtnAClr
    • Remove the T4 4.0-mm screws from the latch under the display by turning the screwdriver counterclockwise.

    • Pull the latch off of the device by grabbing it with the tweezers and pulling up.

  4. VLBupELvWhVAYmeS
    • Remove the connector underneath the latch by grabbing it with the tweezers and lifting up.

    • It is normal to hear a popping noise during this step.

    • When reassembling, simply use your finger to pop this piece back into place by pushing it down into the device.

Conclusion

To reassemble your device, follow these instructions in reverse order.

Monica Andres

Member since: 24/01/18

289 Reputation

0 comments