Introduction
[THIS GUIDE IS A WORK-IN-PROGRESS! ANY HELP IS APPRECIATED!]
This is a guide to demonstrate the process of removing the back panel and accessing most of the surface internals. It is not covered how to get to the screen, but this is a major stepping stone.
There's a great video by Gadgetools Unlimited that demonstrates the removal of the back panel, and shows how to access the hard drive & motherboard (inherently, the RAM as well).
There's also a decent video that covers how to just remove the back panel by Joel Gulick @ Computer Solutions, Inc (Savannah, GA), it goes straight to the point and has clear steps (aside the fairly poor audio quality).
-
-
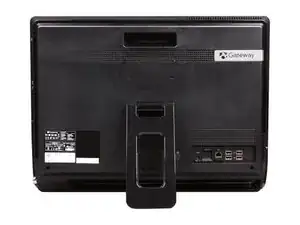
Turn off the computer & unplug all cables and attached peripherals (such as USBs).
-
Lay the computer down flat on its screen and rotate the kickstand flat to the back.
-
-
-
Take a look at the hinge of the kickstand. Squeeze the plastic hinge piece on both sides into itself and wiggle it around a little bit. It should come out fairly easily.
-
Remove the 3 screws holding the stand in place.
-
Remove the kickstand.
-
-
-
At the top left side of the computer, gently pry off the CD-ROM drive bay cover. It should pop out very easily.
-
At the bottom of the case, you'll have to peel off the 2 rubber feet to access & remove the 4 screws total located underneath them.
-
Use picks or an opening tool to get under at the plastic clips that surround the entire crevice of the case.
-
Once the clips are loosened, the back should be able to just come off.
-
-
-
If you're looking to just access the hard drive bay, it would be the metal cage on the bottom right. The cage is being held by only 1 screw.
-
The motherboard is being covered by a large vented metal shroud, you'll see it takes up about 1/3 of the space.
-
Remove the shroud by removing the surrounding screws and it should just lift right off.
-
-
-
You can remove the DDR3 memory sticks by pushing apart the silver levers on both sides and it should pop up, same as most laptops.
-
To access the CPU, you want to carefully peel off the aluminum tape that's stuck onto the end of the heatsink, and then removing the screw securing the heatsink as well.
-
Remove the 4 screws holding down the heatsink to the motherboard, and lift the heatsink.
-
Considering the age of these devices, you'll commonly end up finding a ton of dust & debris if it wasn't recently refurbished. It's a good idea to take some compressed air and give the computer a good cleaning.
To reassemble your device, follow these instructions in reverse order.