Introduction

If your Gateway GWTC116-2BL laptop is having problems with no power, no display, no sound, random crashes, or error messages, you may be experiencing a faulty motherboard. The motherboard is the main circuit board that connects and controls all the components of the computer. This can entail things like RAM and hard drive ports. Replacing a motherboard is simple, and below has step-by-step instructions to help you replace it in an orderly fashion.

  1. AQIXBYHIOnUNpWBC
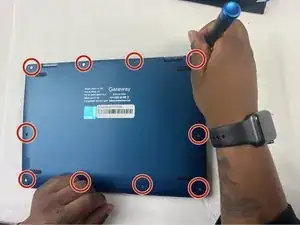
    • Ground yourself before disassembling and handling the computer.

    • Remove the ten 3.0 mm Phillips #00 screws from the back panel of the laptop.

  2. pZTCeef2KgJyRvJN
    pZTCeef2KgJyRvJN
    VRhBpZUjJHLa6l1I
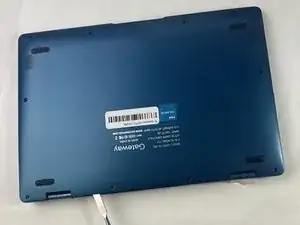
    • Use the spudger to pry the back panel away from the body of the laptop.

  3. BSGKvXlBjAyuPj1c
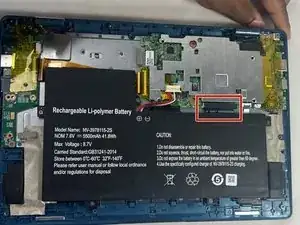
    • Remove the five 3.0 mm Phillips #00 screws.

  4. uLRmr4IYPujB1KJh
    uLRmr4IYPujB1KJh
    sAgRN6sULKlU2ibr
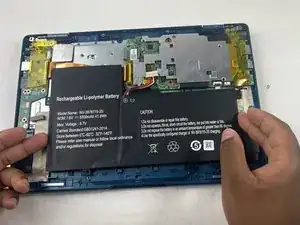
    • Using your fingers, flick open the battery connector bracket.

    • Remove the connector from bracket.

  5. xhZ3fACJWlNexoMe
    • Pull up the battery to remove from the base.

  6. sbCvDYyo2UVDaSp1
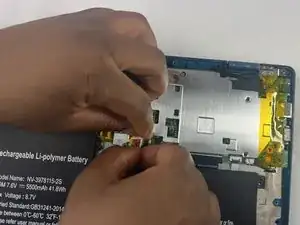
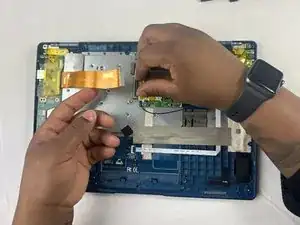
    • Using your fingers, flick the cable connector bracket open.

    • Remove the cable from the connector.

  7. aDbA6GVSR5MoqXPk
    aDbA6GVSR5MoqXPk
    YDQWmjV5Rc1ppMOs
    • Using your fingers, disconnect the black and white connector brackets underneath the gray cable.

  8. rVDwmbJrxmAqWr1c
    rVDwmbJrxmAqWr1c
    wTwJYtFBRBZHQDEh
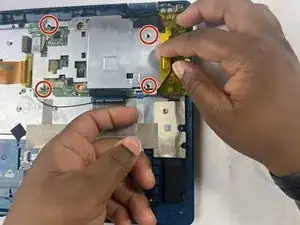
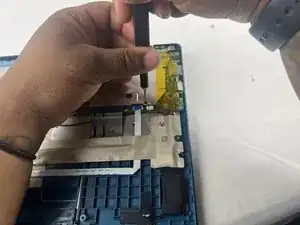
    • Remove the four 3.0 mm Phillips #00 screws located on the motherboard casing.

  9. FEDVXQdgrgxmF6P1
    FEDVXQdgrgxmF6P1
    kyDltKPmIMZcaOAL
    WneWwbxmgSxaHyM3
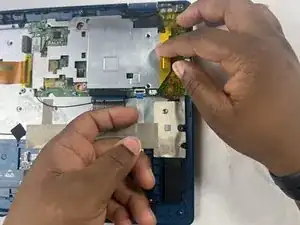
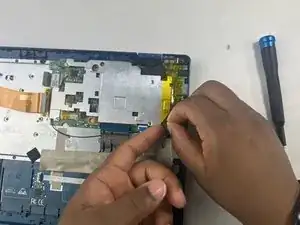
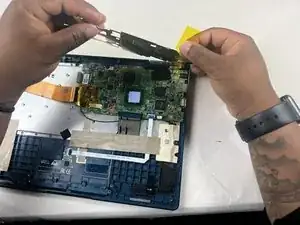
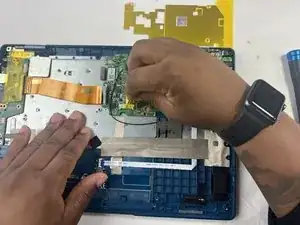
    • Peel the yellow tape off of the casing.

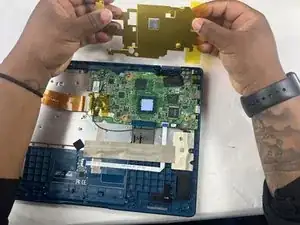
    • Lift the casing off of the motherboard.

  10. BNDxtqwSvPC3KHc1
    BNDxtqwSvPC3KHc1
    xJlQVHa1ADBVKoip
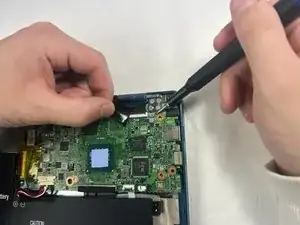
    • Peel off the yellow tape.

    • Remove four 3.0 mm Phillips #00 screws.

  11. Gi3S4RT5tBLBENIP
    Gi3S4RT5tBLBENIP
    dbD11wJdcEXhK3Rd
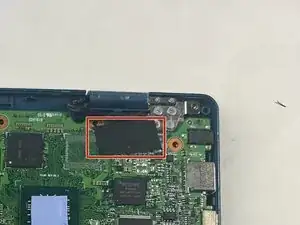
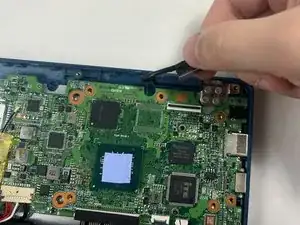
    • Peel off the black piece of tape covering the display cable.

  12. yXdqBJEyrbHQUYpL
    yXdqBJEyrbHQUYpL
    14mAHgAZa6aV4T3H
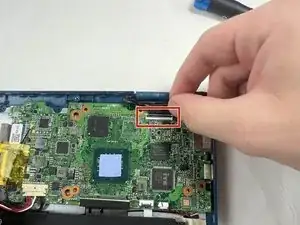
    • Flick open the bracket securing the display cable and disconnect the cable from the motherboard.

  13. HgjPHGK55fPYP3sL
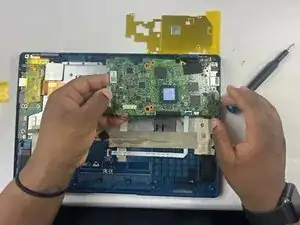
    • Remove the motherboard from the device.

Conclusion

To reassemble your device, follow these instructions in reverse order.

Christian Chapman

Member since: 25/03/24

189 Reputation

0 comments