Introduction
My Gaggia Cubika has served me for a number of years. I noticed it had started to leak from the heater itself. It had also reduced its flowrate when making coffee.
This repair shows you how to replace the “O” ring seal, and how to unclog the water from the heater.
I thought I had descaled the unit regularly. Until I opened it up….
Tools
Parts
-
-
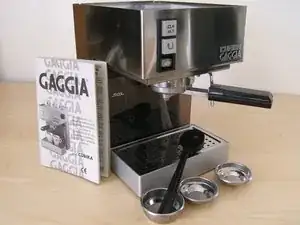
The Gagia Cubika is a reasonable little coffee machine.
-
Mine developed a leak, which manifested itself with drips from the area around the heater, going into the drip tray
-
I also had a probem with the water flow rate being very low
-
UNPLUG THE UNIT. I know its obvious, but you are working in an area which can give you a shock.
-
You have unplugged it, haven't you...?
-
Drain the unit as best as you can. This will be a rather wet repair!
-
-
-
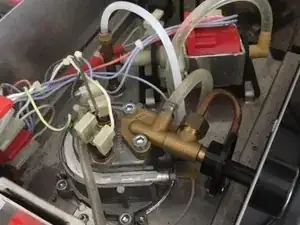
Remove the top cover by undoing the two cross-head screws. With the unit pointing forwards, the layout is as follows:
-
At the rear is the water pump
-
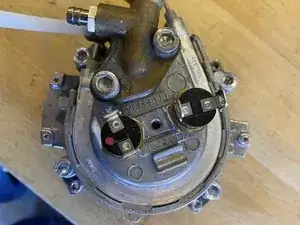
In the centre is the heating chamber, with the steamer wand control to the right. On top of the heater are two thermal cutout switches (safety for if the heater gets too hot) with four connections.
-
On the right is the steam want knob
-
At the front on the left are the control buttons
-
-
-
Remove the steamer knob by pulling it away from the machine. Dont lose the little metal bit which makes it stay on the steamer shaft. Also remove the silicone water supply to the steamer wand
-
Label the heater thermal switch connections (see photo). Then take a photo. THEN take them off.
-
This reveals a small crosshead for the earth to the heater, which is holding another thermal cut-out. Undo and remove the screw, this will release the thermal cutout, and you dont have to remove the earth connection.
-
You have exposed the heater itself. With an H5 Hex bit, losen the four bolts which hold the unit together (dont remove them). NOT the two bolts which hold the brass steamer wand.
-
This reveals a horsehoe shaped heater with two connections, slide these off and all the wiers are disconnected.
-
With a small spanner (Cant remember the size) remove the connector from the pump at the pump end as it is easy to get to.
-
Remove the steamer wand by undoing the bolt which is exposed - it is by the coffee press under the heater, not inside.
-
Finally lie the unit on its back and remove the 4 cross-head bolts to release the whole assembly.
-
-
-
With an H5 hex drive, remove the four large bolts holding the coffee press to the bottom of the heater. It is seen on the left of the photo)
-
Remove the water sieve by undoing the cross-head screw. This exposes the brass exit valve from the heater.
-
Remove this brass exit valve, on top of it is a spring with a bullet shaped seal. In my case it revealed a LOT of calcium build up.
-
Finally split the top from the bottom of the heater. In my case this was easy, you may have to use a blunt tool to help lever this. Remember it is die-cast metal = brittle, so dont use excessive force. This exposed the crud in my heater.
-
Remove the damaged "o" ring
-
-
-
The insides were really covered with calcium carbonate (chalk)
-
I scrubbed out the inside of the unit, then I used an iron descaler product from a DIY store to remove the worst of the chalk
-
Don't submerge the top of the heater as it has electrical components on it
-
(OPTIONAL) With the scale removed, the pitting to the die-cast heater body was clear. I polished this by using a very fine wet-or-dry paper placed on a flat surface . Dampen the wet-or-dry, and using small movements smooth the top half of the heater. See photo 2.
-
Clean the inside of the bottom half of the heater. You can't use the same technique to celan the face of the bottom as it has a central spiggot.
-
Clean the hole which is at the bottom of the spiggot (from outside the heater). This allows hot water to come out of the heater, into the coffee. It should be 2.5mm in diameter (mine was not, hence the poor water flow), so I used a drill to clean this. The bullet shaped piece with the spring fits into this so make sure it is clean.
-
Reassemble this and the brass nut into the bottom of the unit, and reattach the water sieve.
-
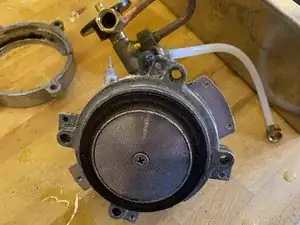
See photo 3 for the completed clean faces.
-
-
-
Install a new "o" ring (available from e.g. eBay).
-
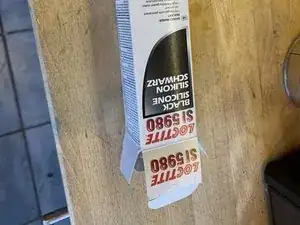
I added liquid gasket to make sure the pitting was not going to cause me problems. In my case I used Loctite SI 5980 which is avaialble from motoring shops. See the key photo.
-
Present the top to the bottom of the heater, there are keys so make sure it is the right way around. Gently push together, and adding the coffee press body to the bottom of the heater, put the four bolts back into the heater.
-
Tighten them up on the opposite corners. e.g. there are four bolts, say one is North, one South, East and West. Tighten the North until it grips. Then tighten South until it grips, followed by East and West. Then Tighten them up a little more. You should see a little liquid gasket come out of the joint all the way around. (photo 2)
-
-
-
Here is the finished heater repaired and ready to refit.
-
Reverse the order to re-assemble. So bolt the heater back into the chassis, reconnect the steamer wand, replace the steamer knob. Reconnect the pump, and the water supply. Reconnect the horsehoe shaped heater power, clamp the heater cut out resister (in its tube) back under the earth clamp, finally reattach the four thermostat connections.
-
Replace the cover, and reattach with the 2 cross-head screws.
-
Fill the water tank. Power the machine back up and turn it on. Wait for it to warm up, and purge the heater with a few runs of water, until it runs clean.
-
Make yourself a cup of coffee, you deserve it.
-
To reassemble your device, follow these instructions in reverse order.
