Introduction

This guide explains how to replace the old broken LCD screen.

  1. V11CkWYR3HUROEhG
    • Unscrew the four 4mm screws on the left-hand side of the camera with the JIS #1 screwdriver.

  2. TMsLQEvHtpTmFiYl
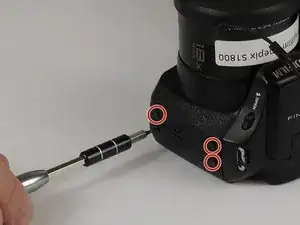
    • Unscrew the four 4mm screws on the right-hand side of the camera with the JIS #1 screwdriver.

  3. m2qRLxeKBsYSXVFe
    • Unscrew the three 4mm screws on the bottom of the camera with the JIS #1 screwdriver.

  4. TjkM3xTrySaQxV1S
    TjkM3xTrySaQxV1S
    cBlZUjiRreZnHfGL
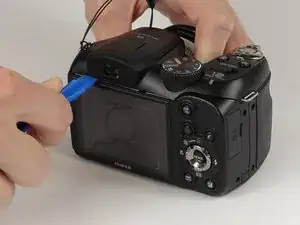
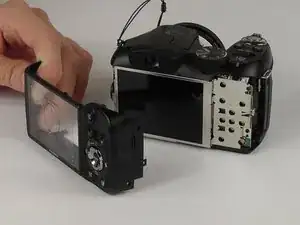
    • Take the plastic opening tool and place it in the space between the top of the screen and the top of the camera.

    • The cover will pop out.

    • You may have to work the back cover from different sides to get it to pop off.

  5. FvJFRBjZ26mRQg1O
    FvJFRBjZ26mRQg1O
    dhhO2lNcIpSrqa3T
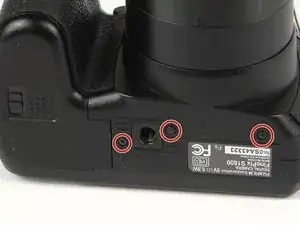
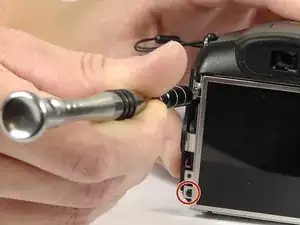
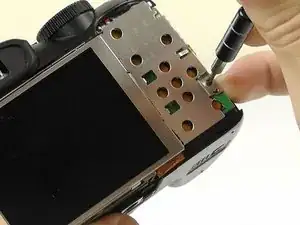
    • Remove the three 2 mm screws from the back cover plate with the Phillips #000 screwdriver.

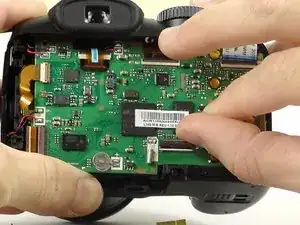
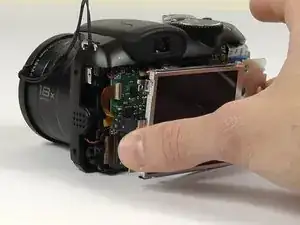
    • Gently lift the back cover away from the device.

    • Do not pull or yank free. The LCD screen is connected to the motherboard via a small ribbon cable.

  6. NUDSiRJF6KX5dJuI
    • Move the lever to disconnect the ribbon cable from the circuit board.

    • Do not rip the fragile micro ribbon cable.

  7. 5QqNCCRsttHjsaKM
    • Gently remove the LCD screen.

    • Do not touch the screen directly.

Conclusion

To reassemble your device, follow these instructions in reverse order.

Ryan Rockford

Member since: 15/02/17

618 Reputation

0 comments