Introduction

This guide demonstrates how to remove the fan from the Drobo, be careful this guide does involve unplugging and plugging in very small connectors in some hard to reach places.

  1. MVnUaRLQNGHCTwHL
    • To start getting the case off remove the front panel so it's out of the way.

  2. s1ieRNFMAjvwSwT6
    s1ieRNFMAjvwSwT6
    JDOsXwGHO4AAiTxl
    • Next remove the screws from the feet of the case with a phillips head screwdriver.

  3. eCFbfAxdZMPoEJ2l
    • To remove the case, place the Drobo on its back and slide the case off.

  4. gUICOgn3FksOvRwR
    gUICOgn3FksOvRwR
    Rl2HU46xYEX6grkS
    4eiFmNSDHREhVK1C
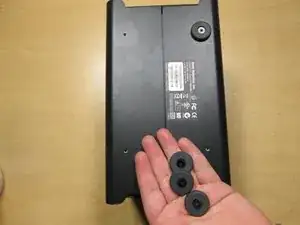
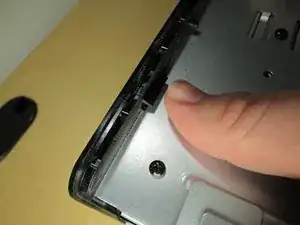
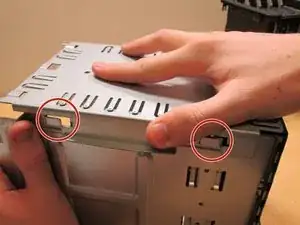
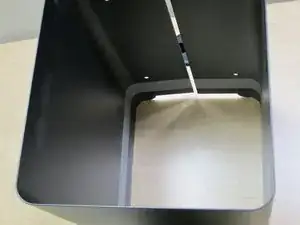
    • With case removed push tabs on back cover to remove the back cover. You can do this with your fingers or a tool such as a spudger.

  5. MXwQwWLFnBPI4ukY
    MXwQwWLFnBPI4ukY
    4kWMpW2VwBYskIJ6
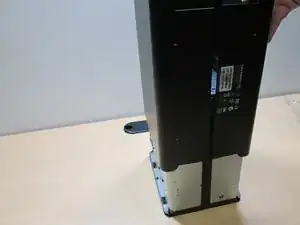
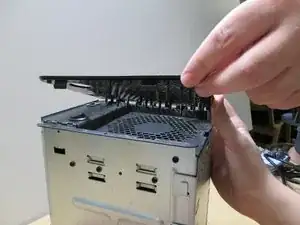
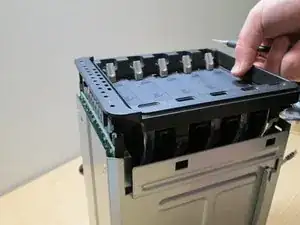
    • Then do the same to the other side, pushing the pins down. Then slide the hard drive docks out.

  6. qefRbskNI5SEjPRx
    qefRbskNI5SEjPRx
    aurRgKOHkxAvyfBT
    HXlLKsOkFIdc2FOb
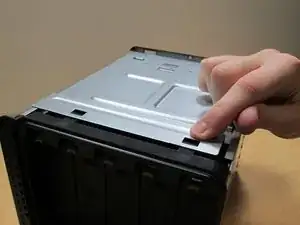
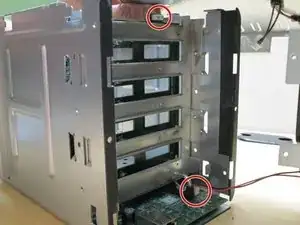
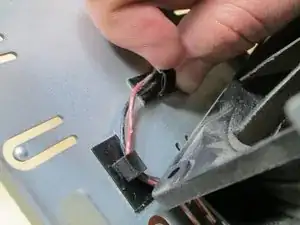
    • Now slide the metal pieces away from each other to move past the hooks and then off carefully. As the two pieces separate be sure to carefully unplug the two wires to not cause any damage to the device.

    • For Drobo 5D (and possibly others), you need only remove 2 screws (of the 4) on each side before sliding the back plate off.

    Additional note, for Drobo FS NAS, you need to remove all 4 screws (2 on each side) before being able to slide the back plate off.

    Edward Cavanagh -

  7. 2JExwAdqq3NOsaoX
    2JExwAdqq3NOsaoX
    q3OafGosFFMiktRX
    mr3PLUloKccKFZQM
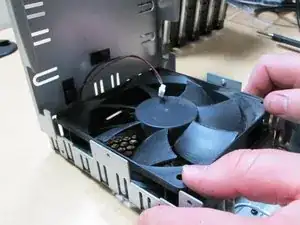
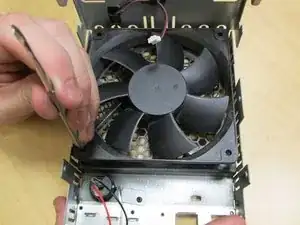
    • Next remove the fan by placing your screwdriver through the holes so that you can push out the small rivets. Then unclasp the wires so that you can finally remove the fan.

  8. NOAAhMeBDfuxxTmq
    • Now replace the fan. Be careful to put it in the same way that it was taken out. Then re-clasp on the wire.

    I would STRONGLY recommend that you vacuum out all the dust. I use a fine brush tool - BUT TAKE CARE - if you touch or brush the PCB there is a risk of staic build up which might / can damage the PCB and kill the unit.

    FYI - I had a unit that would operate for a period of time then report disk faults with a red light and stop working. It was very puzzling but was cured with a good vacuum ! Good luck

    REL -

  9. pccihkvSmJUIIZ3O
    • While reassembling follow the directions in the reverse order, however be sure that when replacing the case the grey stripe on the case is at the back of the device towards the power switch and the fan.

Conclusion

To reassemble your device, follow these instructions in reverse order.

Nicholas Serres

Member since: 25/01/17

472 Reputation

4 comments

What size fan is there in the Drobo FS?

rogerschooneveld -

What are the dimensions of the fan needed? I would like to order the fan before disassembling.

Bill Lumbergh -

120mm 3 pin - I used the Noctua NF-A12x15 FLX. I had to use the screws that came with it instead of the original fixings as they didn’t fit the new fan. Also had to cut off the cable and solder the original one on as the connector is different. Red to red, black to black (and slide head shrink tubing over the join and then shrunk it by holding over steam from the kettle.

Jon -

On my 5D I had to replace the rivets with 1 1/4 inch machine screws with loctite nuts. The rivets were so damaged in the removal that they would not hold the fan in place. Also, check after assembling the rear into place that the new cable is clear of the fan. I got the exact replacement fan from DigiKey - Part: 259-1472-ND SUNON FAN MEC0251V3-000U-A99 12VDC. It was like $25 including shipping.

The replacement fan came with bare leads so I had to splice the old connector on with solder and shrink tube. be careful to keep the leads the same length because longer leads will cause a problem in the tight clearance in front of the fan.

James Fancher -