
Introduction
-
-
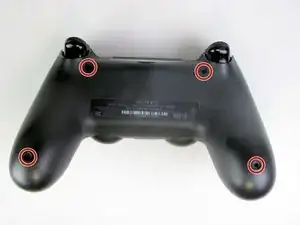
Using the Phillips #00 Screwdriver, remove the four 6.0 mm screws securing the rear cover to the controller.
-
-
-
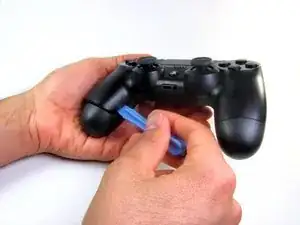
Beginning with the left handle:
-
Pinch the left handle of the controller to introduce an opening.
-
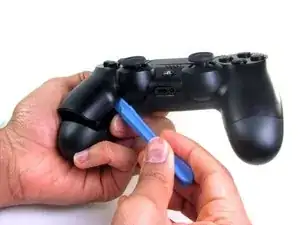
Wedge a plastic opening tool into the opening and slide it up towards the joystick.
-
Pull down on tool to pry open the casing.
-
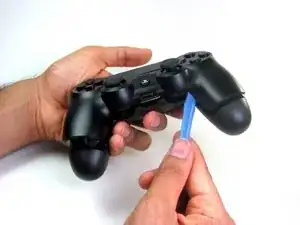
Repeat these steps for the right handle.
-
-
-
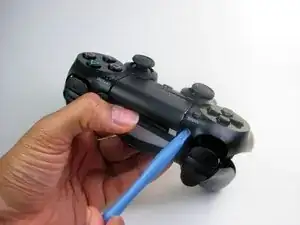
Wedge a plastic opening tool into the case-splittings and pull down to crack open the casing near the following buttons:
-
Share button
-
Options button
-
Split the plastic covers of the controller apart, taking note that they will still be attached by circuit board ribbons.
-
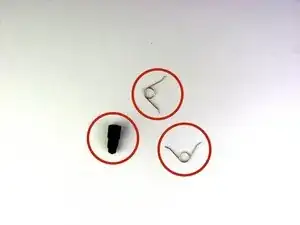
2 Trigger Springs
-
1 Grey Reset Button Extension
-

Conclusion
To reassemble your device, follow these instructions in reverse order.

Yo usé un Phillips #000, ya que el #00 quedaba grande y podía dañar el tornillo.
Adolfo Gomez Toledo -
A plain #0 works way better for me
Jennica Tapia -
I agree with Jennica, it's a #0 screw
Peeter -
to re-torque these PH00 screw... i found 19Ncm to be about the max. (since 27Ncm was too much)
Dreamcat 4 -