Introduction
These videos helped me during the four disassembly that I made for various reason and I advice to watch them as well as the written guide that I wrote based on my experience.
-
-
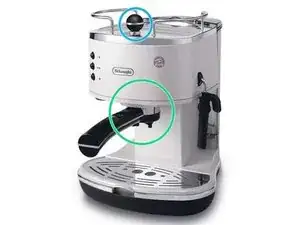
Before proceeding to the disassembly remove the coffee filter(marked in green) and the steam knob( marked in light blue): pulling up with a (lot) of force and confidence.
-
Unplug the machine from the outlet and moving it on a surface with different towels laying on it: the water inside the tubes will be lost during the disassembly.
-
-
-
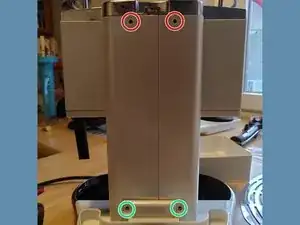
[back view] Once you remove the clear water tank, you can unscrew the two bottom screws (marked in green) and the two upper screws(marked in red) that will allow us to remove the metallic upper lid later on.
-
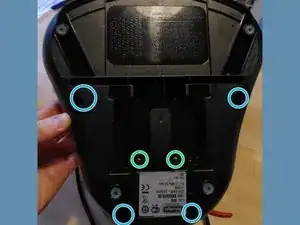
[bottom view] unscrew the 4 hexagonal screaws (marked in light blue) and the two Philips head screws (marked in green) at the base.
-
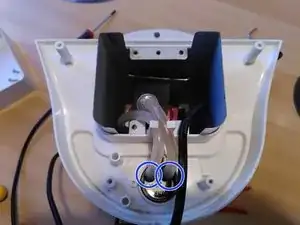
Once you removed the black bottom part, you can now remove the plastic tube that brings water from the tank to the heating element. Pull the tubes with strength and confidence (marked in blue)
-
-
-
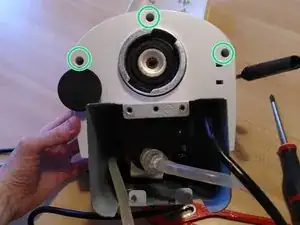
Once you removed the bottom part, you can start to remove the lid. From the bottom unscrew 3 screw (marked in green)
-
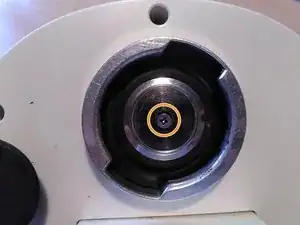
Remove the water metallic filter for the water (marked in orange)
-
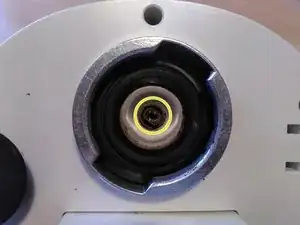
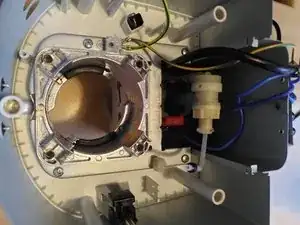
Remove the valve that allow the water to pass from the internal tank, with a flat head screwdriver (marked in yellow) - you can do this step also without removing the bottom part if you need to replace that single part
-
-
-
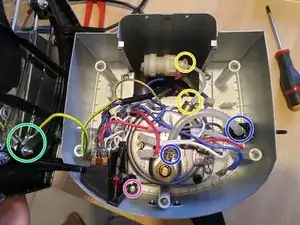
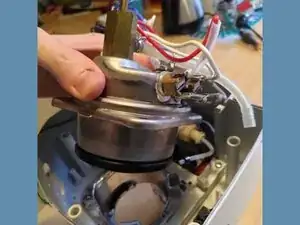
Partially remove the lid and remove the yellow/green cable (ground) from the lid (marked in green) pulling it away
-
Unscrew the screw (marked in purple) to remove the keypad module ( on/off switch, coffee switch, steam switch)
-
Remove the metallic clip (marked in yellow) to free the rigid tube that bring the water from the external tank to the heating element
-
Loosen up the metallic clips (marked in blue) that hold the soft tube that link the heating element ( bottom) to the steam exit hole (right). Slide the clips along side the soft tube and remove the tube
-
-
-
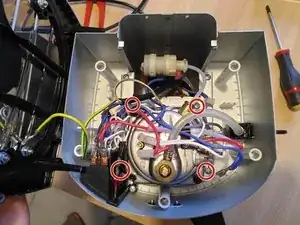
Remove the screws(marked in red) that hold the heating element on the structure
-
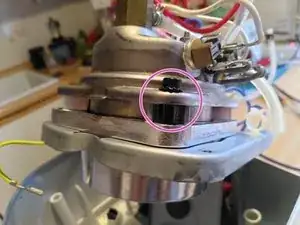
Once you remove the heating element its possible to remove the 4 hexagonal screws on the 4 corner of the element (marked in purple) This step is useful to remove limescale accumulated in the heating element
-
-
-
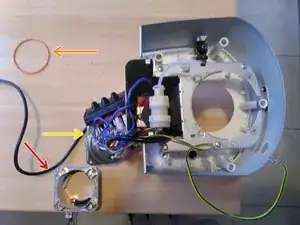
Once you removed the heating element you can replace the necessary pieces : bottom piece(red arrow), O-ring (orange arrow), upper piece (yellow arrow)
-
To assemble back the device, follow the instruction in reverse order
15 comments
Great, clear instructions and easy to follow. I've been looking to into this machine, and tons of scale in the boiler. works fine now! Cheers
Muss man vor dem zerlegen eig den (wenn vorhanden) Boiler oder Erhitzer entleeren, dass kein restwasser entweicht beim auf-den-Kopf-stellen? Wenn ja, wie geht das? Danke schon mal für den obigen, ausführlichen Bericht!
Hi, I think you can empty the boiler (the one depicted in step 6) before disassemblying the coffee machine. Just try to remove the water container (the one on the back of the machine) and try to "make a coffee". The machine should try to empty the residual water in the tubes, but probably some water will remain inside the boiler.
Either way you can open the boiler (step 6) on a sink so that the residual water won't wet your working space.
VooBee -
Guten Tag, wie bekommt man das Ventil aus der Maschine um es auszutauschen? Ich bekomme es einfach nicht hin. Muss dafür der Erhitzer ausgebaut werden?
Hello,
if you are referring to the valve in step 3 - yellow circle - you can remove it with a flat screwdriver but it's not necessary if you don't need to replace that specific valve.
VooBee -
