Introduction

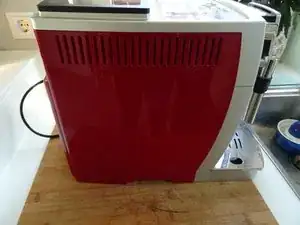
For most repairs, also the left side panel has to be removed. This guide shows how to do that.

  1. gGp2mPtSZjLFUs4E
    • Unplug the power cord!

    • Remove all attachments such as water tank, pulp drawer, brew group.

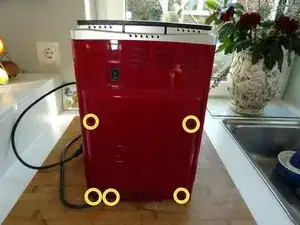
    • Turn the machine with the back facing you.

    • Remove five Torx T20 security screws.

    • A small hurdle: These screws have a pin in the middle, so the screwdriver must have a hole.

    Screwdriver must have a hole? What does that mean? Is it a standard Tx20 bit?

    Kevin -

    No, it is a TR20 Security Bit, which really has a hole (if you look to the star shape) . See TR10 Torx Security Screwdriver

    VauWeh -

    Bits from iFixit are equipped with it.

    VauWeh -

  2. BnoacoHxc6HQr1YS
    BnoacoHxc6HQr1YS
    RiGlr1amJrHguDl2
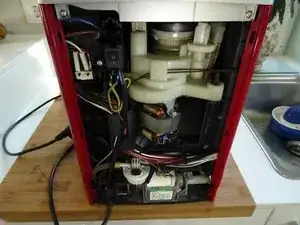
    • Lift out the back.

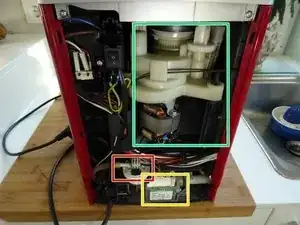
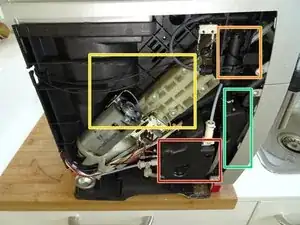
    • The following components are immediately visible:

    • grinder

    • pump

    • flowmeter

    Sehr gute Anleitung. Die Security Schrauben der Rückwand können auch durch normale Kreuzschlitzschrauben ersetzt werden. Natürlich mit gleichen Abmessungen. Es erleichtert bei späteren Reparatur Arbeiten die Werkzeuge Auswahl , da überall Kreuzschlitzschrauben verbaut sind.

    Willi Greubel -

  3. doaso6OgAZbfJyvR
    doaso6OgAZbfJyvR
    aRQBJ5QPfqZdqFUE
    uglIdQiLRWJnAtXN
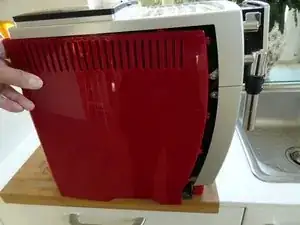
    • Push the side panel back about 1.5 cm.

    • Lift off the panel.

    • The following compononents are exposed:

    • Heater

    • Expansion chamber

    • Gear drive

    • Steam valve

Conclusion

To reassemble your device, follow the above steps in reverse order.
VauWeh

Member since: 19/10/15

234462 Reputation

0 comments