Introduction

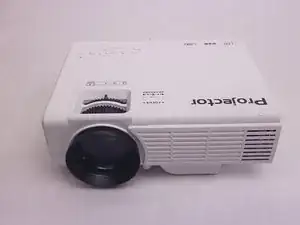
Use this tutorial to replace a faulty fan in your DR.J Professional HI-04 mini projector.

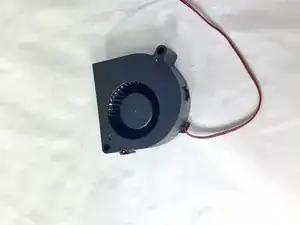
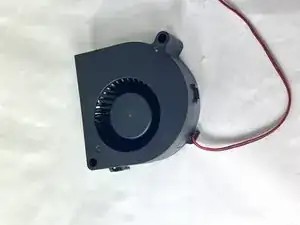
A fan is what keeps the device from overheating. A broken fan can cause the device to overheat, or to not turn on at all.

Before using this guide, be sure to review the troubleshooting page. Sometimes issues with overheating can be caused by overuse, so restart the device and see if the issue persists.

Before you begin, turn off the device. Make sure the device is cool especially if it has been used recently to avoid burns.

  1. nTaGpQVo64cEQWn4
    nTaGpQVo64cEQWn4
    Gq5cJtWyHrpvBdsM
    Q6PWCZpiWuePXXuY
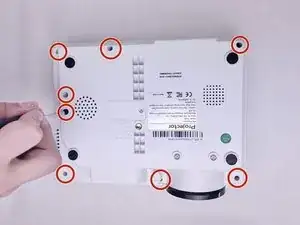
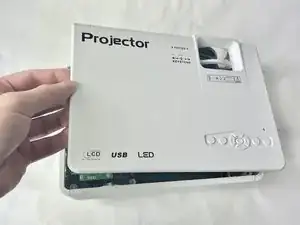
    • Flip the projector so that the bottom is facing up.

    • Remove the eight 10.0 mm screws with a Phillips #0 screwdriver.

    • The screws are set deep in the holes. Be careful not to drop the screws.

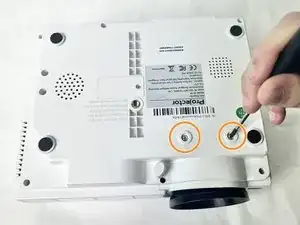
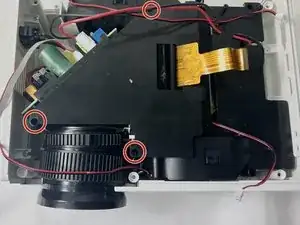
    • Remove the two 20.0 mm screws with a Phillips #0 screwdriver.

  2. lAsZ33nyjLxPx6wc
    lAsZ33nyjLxPx6wc
    YfeZDvTIbbtIbwU4
    ODw1qUVkTQ46LpJy
    • Flip the projector so it is upright.

    • Remove the top case of the projector.

    • The top case should come off fairly easily but be gentle while removing it.

    • Don't yank the top case off as there are cables attached to the motherboard and the top case.

  3. F3RljlsCKFIO2rsi
    F3RljlsCKFIO2rsi
    Fql4MaIT5wXFXiVL
    • Remove the three pieces of tape securing cables.

    • Keep the tape for reassembly.

  4. hgONLlfkGVYJdDBQ
    hgONLlfkGVYJdDBQ
    TkKHQcbbJ5fvmAou
    • Use a Phillips #0 screwdriver to remove the four 15.0 mm screws from the motherboard.

    • Be sure to not drop the screws in the device as they can be difficult to recover.

  5. EVZJOguPtEiWlGoe
    EVZJOguPtEiWlGoe
    GWcpxCLEIUDP4IR2
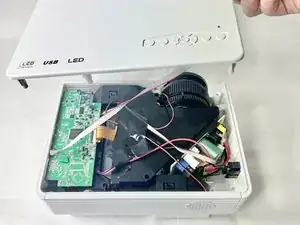
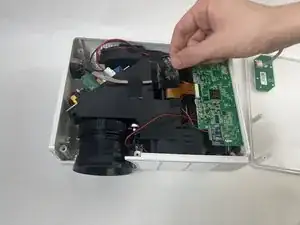
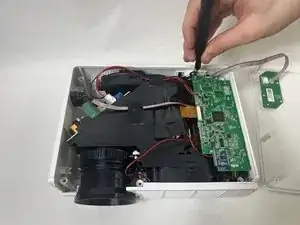
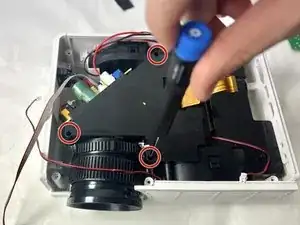
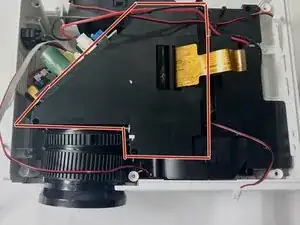
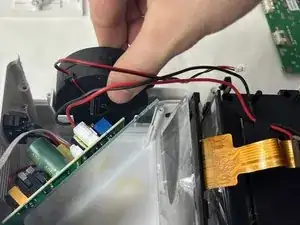
    • Squeeze the tab against the connector, and pull the connector straight from the socket to disconnect the power cable from the port.

    • The cable should come out easily so do not pull too hard.

  6. MGfsxttgVU6OkPsq
    MGfsxttgVU6OkPsq
    JmfQdQDAJ5nbyOCG
    • Use a Phillips #0 screwdriver to remove the three 15.0 mm screws from the black cover.

    • The screws are set deep in the holes, so be careful to not drop the screws, as they can be difficult to recover.

  7. mR6s3GvEhC1BpOvU
    mR6s3GvEhC1BpOvU
    CZhhvsSNJTCIlObP
    • Gently remove the black cover.

  8. mdFw6tbhGVHeJZOT
    mdFw6tbhGVHeJZOT
    B3LHqWVLvZGL5ngN
    PHprHSbCPiSKQPwi
    • Gently remove the fan from the project.

Conclusion

To reassemble your device, follow these instructions in reverse order.

Baron Dutra

Member since: 01/11/23

825 Reputation

0 comments