Introduction
The procedure outlined below is relatively straightforward. This technique is also applicable to the Nikon LS-50 (Coolscan V ED).
Here is a comparison showing the before and after results at 100% zoom in Lightroom.
-
-
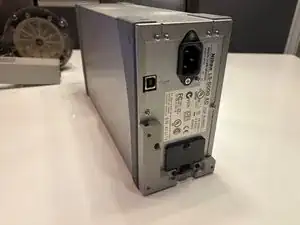
Disconnect Power Sources: Unplug both the power and USB cables from the sacnner.
-
Remove Accessories: Take out any adaptors or additional devices connected to the scanner.
-
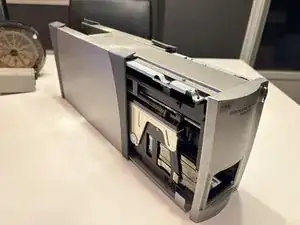
Position the Scanner: Carefully place the scanner upside down on a clean, flat surface, ensuring it is in a secure and stable position.
-
-
-
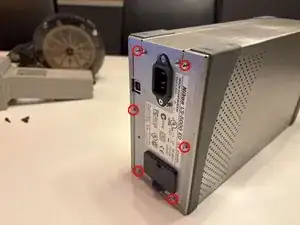
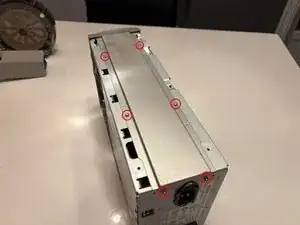
Locate the Screws: Identify the six screws positioned on the back of the unit.
-
Prepare Your Tools: Gather the appropriate screwdriver, ensuring it matches the screw heads to avoid damage.
-
Unscrew Carefully: One by one, remove each of the six screws by turning them counterclockwise. Make sure to keep them in a safe place for reassembly.
-
Inspect the Unit: Once all screws are removed, gently check the back of the unit to ensure it is ready for further steps in the disassembly process.
-
-
-
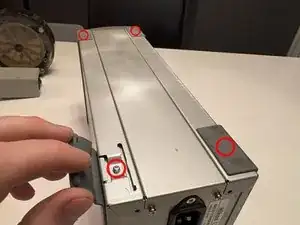
Locate the Rubber Pads: As indicated by the red arrow above, find the four rubber pads positioned at the corners on the bottom of the scanner.
-
Remove the Pads: Gently pull out each rubber pad to expose the screws beneath them.
-
Prepare Your Tools: Ensure you have the appropriate screwdriver for the screws.
-
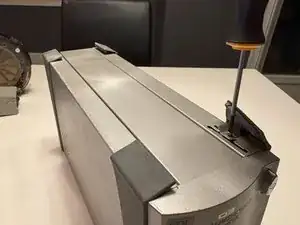
Unscrew: Carefully remove the four screws by turning them counterclockwise. Keep them safe for reassembly.
-
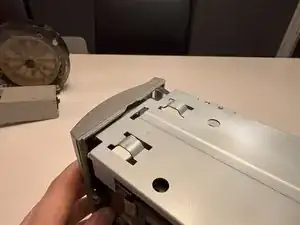
Remove the Shell: Once the screws are removed, gently slide the metal shell off the scanner, revealing the internal components.
-
-
-
Identify the Screws: Locate the six screws marked by red circles in the diagram or image provided.
-
Prepare Your Tools: Ensure you have the correct screwdriver for the screws.
-
Unscrew: Carefully turn each screw counterclockwise until it is fully removed. Keep these screws in a safe place for reassembly.
-
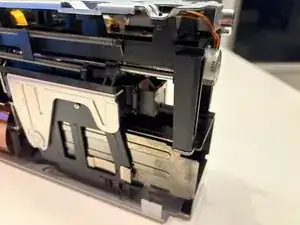
Remove the Bottom Plate: Once all six screws are out, gently lift and remove the bottom metal plate from the unit, exposing the components beneath it.
-
-
-
Identify the Plastic Tab: Locate the plastic tab that needs to be pried.
-
Prepare to Pry: Use a suitable prying tool, such as a plastic spudger or a flathead screwdriver, to avoid causing any damage.
-
Pry Carefully: Gently insert the tool under the plastic tab and apply light pressure to lift it. Take your time and be gentle to avoid breaking the tab.
-
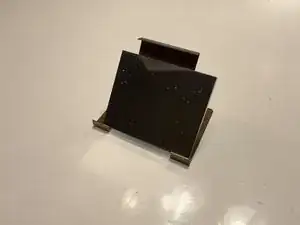
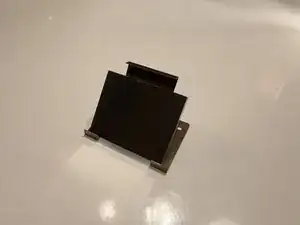
Remove the Front Plate: Once the tab is pried open, slowly take the front plate off the unit.
-
Handle with Care: Keep in mind that the tabs are fragile and can easily break, so proceed with caution throughout the process.
-
Please note that, as shown in the picture, the tabs on my scanner are broken due to the actions of a previous owner. Therefore, exercise caution when removing them to avoid damage
-
This step is optional but greatly simplifies the process of removing the mirror.
-
-
-
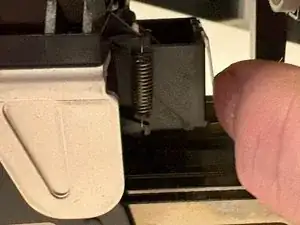
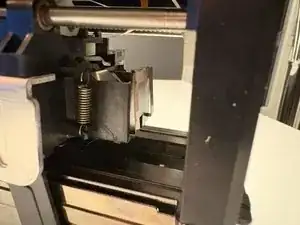
Remove brass clip: After moving the scan head back, you will have a clearer view of the mirror housing and the mirror itself, which is held in place by a brass clip.
-
Use a small flathead screwdriver or your nails to carefully lift the bottom fingers of the brass clip. Gently pull back one finger of the clip at a time, working from one side to the other
-
-
-
Exercise caution while removing the mirror, ensuring that the reflective surface does not come into contact with any objects. I recommend using both hands, reaching from either side of the scanner. To protect the mirror from oils on your hands, consider wearing rubber or latex gloves. It is safe to touch the back side or edges of the mirror
-
-
-
Dust Removal: If it's just dust, use a small rubber bulb to blow it off.
-
Cleaning Solution: If the dust remains, use a glass cleaning solution and a microfiber cloth designed for glasses.
-
Note: It may take several attempts to get the mirror completely clean. Avoid touching the reflective surface with your hands or any hard objects to prevent damage.
-
To reassemble your device, follow these instructions in reverse order.