Introduction
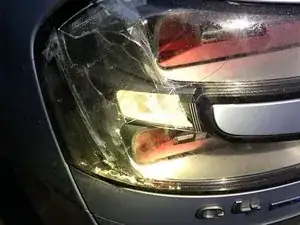
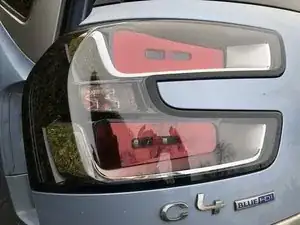
This guide is to help you fix a broken rear light on a Citroen C4 Grand Picasso. The whole light unit is being replaced for this guide as the protective cover is damaged. This car does not have a replacement for just the protective light cover.
Tools
-
-
You've broken your rear light. Unfortunately you can't just replace the transparent cover. The whole unit needs replacement.
-
-
-
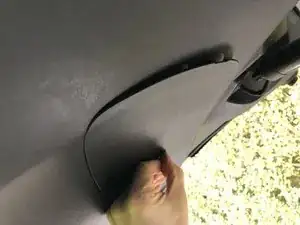
You can lift the cover carefully just by using a flexible plastic card or a flat screwdriver.
-
Locate the internal panel opening. Use the little dent on the top corner of the little cover to open it.
-
-
-
The top most electric connector will need your attention.
-
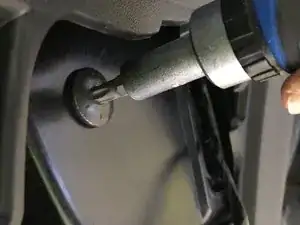
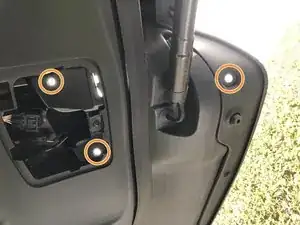
In order to remove the broken light you'll have to remove just 3 screws, two are behind the little panel. One is the one right most visible in the picture.
-
-
-
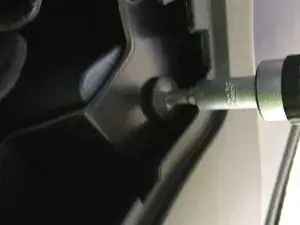
Unscrew the light unit with a 6 points star tip. Of the 3 screws, two are behind the panel and one is outside near the edge of the lid.
-
-
-
Also the cabling connector is now detached.
-
Note the 3 holes left where the screws were removed.
-
-
-
Connect the cable and fit the small cover lid.
-
Put the screws back to fix the light unit firmly.
-
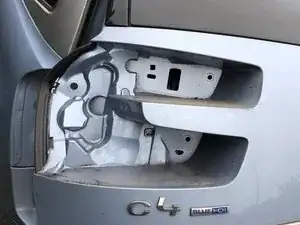
With the new light, slide the cable in through the square hole and push the new unit in place.
-
Remove the broken unit, wipe the edges holding the unit clean. Now repeat these steps in reverse to fit the new light unit.
-
-
-
Unfortunately the unit is tight sealed and it is not possible to change only the transparent cover. In that way the light is water tight and free of finger prints that may be left in tempering with replacing internal bits of the unit.
-
Time and money saved. Job done!
-


Test that all lights display correctly for the appropriate actions before leaving the light to be, and you're done!