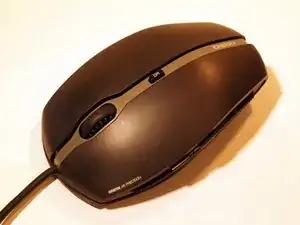
Introduction

  1. PDcXKBlGlI3sEbtA
    PDcXKBlGlI3sEbtA
    YJX4DXOYcXP6a5Nx
    utjV34TDUJi3ETNa
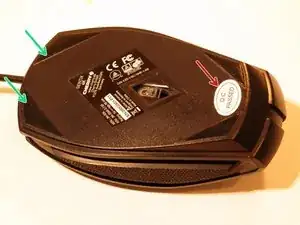
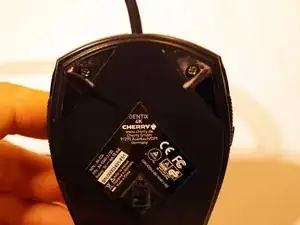
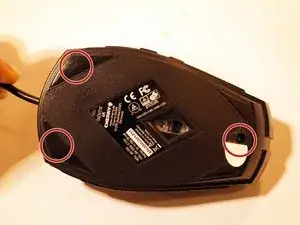
    • Remove the "Q.C. Passed" Sticker to have access to the Phillips screw below.

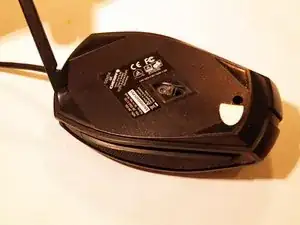
    • Pull of the two upper mouse feet. It's enough to just remove half of the mouse feet to get to the screws.

    • It is useful to pull of the mouse feet with the adhesive film.

  2. pBaWO3IIqVYybSTu
    • Remove the three Phillips screws.

  3. UnDNygA6qILWEAJS
    UnDNygA6qILWEAJS
    SpOgpbTZgYS43bPt
    YSpKJf6YIVGQvhN2
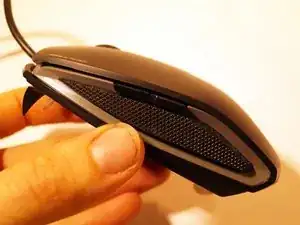
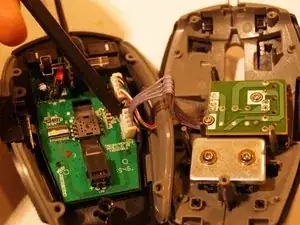
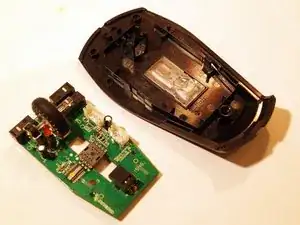
    • Lift the upper part of the mouse.

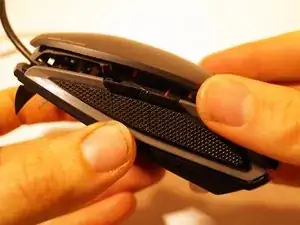
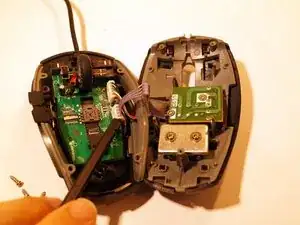
    • Fold the upper and the lower part back like a book and put it aside.

  4. Ca5bipWk6fBVkcXg
    Ca5bipWk6fBVkcXg
    WjWYMlS5ZBBwBaMX
    JpPVOD1KljQiXnXX
    • Loose the plug with the flat end of a spudger.

    • Pull the plug.

  5. ZoKP2ZSZmPwwIhsW
    ZoKP2ZSZmPwwIhsW
    kwXyKOZIHWIePwnK
    CmOQL1M2WgugKQVG
    • Lift the two side parts and put it aside.

  6. mEi1ZXRvwrPVSR5s
    mEi1ZXRvwrPVSR5s
    41Zrp2Y3KrhSNs6L
    • Loose the plug with the flat end of a spudger.

    • Pull the plug.

  7. 43e3wRKBOmmSNSli
    43e3wRKBOmmSNSli
    V5Ch5UUWpmVyJSjI
    Dg2iSZovApQfpG2b
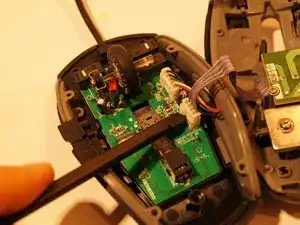
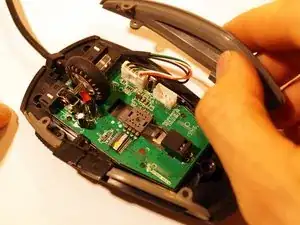
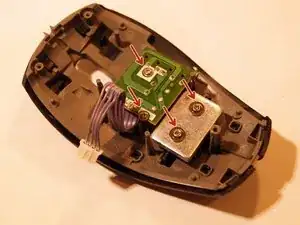
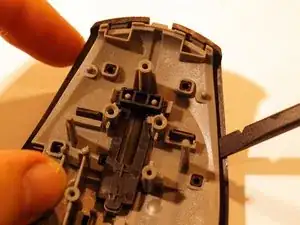
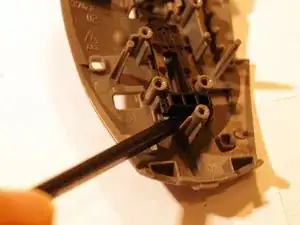
    • There are two plasic clips. Loose the left plastic clip very carefully.

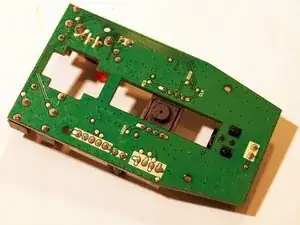
    • Fold the board up from the left side.

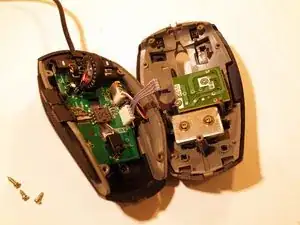
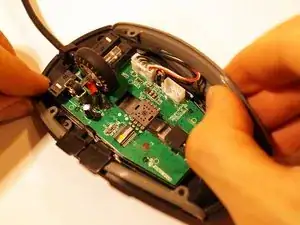
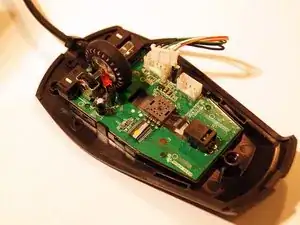
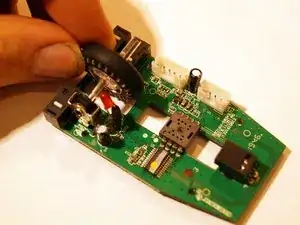
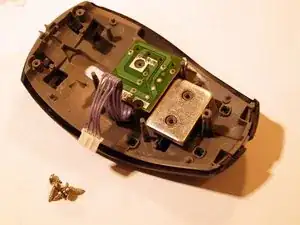
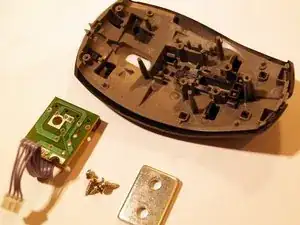
    • Take out the board and put it aside.

  8. 4W36blDYiyA2iaTq
    4W36blDYiyA2iaTq
    eaDyZw2jNuL2PbSW
    • Move the mouse wheel a bit to the right.

    • Take the mouse wheel out of the guide forks.

  9. Cy3aLW5aTH3D2YjU
    Cy3aLW5aTH3D2YjU
    wZicsrTQP6YIf4NM
    • Reference picture of the board.

  10. fH3JVSXfKYbonRvW
    fH3JVSXfKYbonRvW
    kxnfvdUNKLfPlHXt
    rgTWgqHGNSLGjAej
    • Remove the four Phillips Screws.

    • Remove the weight.

    • Remove the board.

  11. 4OCoZJWHmWPsuIZR
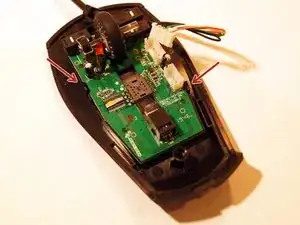
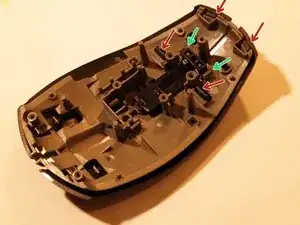
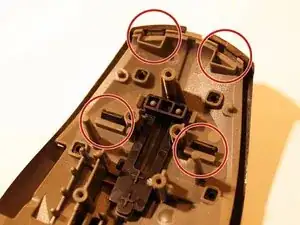
    • Have a look at the plastic clips

    • Plastic clips for the black upper part for clicking.

    • Plastic clips for the DPI button.

  12. C4LklIEpCMwxZT1d
    C4LklIEpCMwxZT1d
    GpgPWUM5RINDWIB5
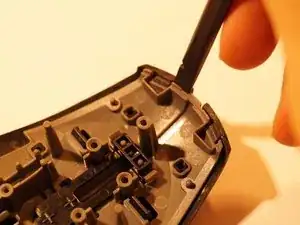
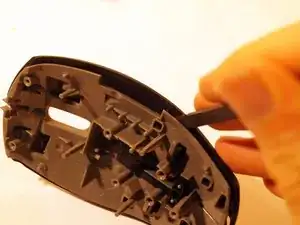
    • Insert the flat end of the spudger into the gap between the two halves on the left and right. The rear plastic clips should then release automatically.

  13. DS3hRSgfNUxxfu5m
    DS3hRSgfNUxxfu5m
    tICdJVb2BLNKNPlZ
    oUYJGGRpejHWBRXA
    • Loose the plastic clips in the middle.

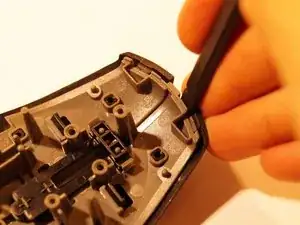
    • Insert the spudger from the left and right side between both parts. The plastic clips should release automatically form their rest postion.

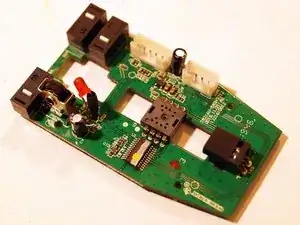
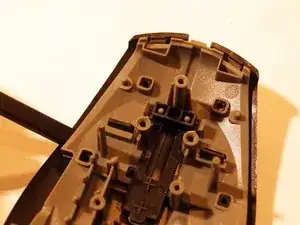
    • Alle plastic clips are now released.

  14. 4f31TCUJPVA6IfYD
    • Insert the flat end of a spudger into the gap between the two parts.

    • Increase the gap all around until the pieces fall apart.

  15. OaRkthmVaUUplh1N
    OaRkthmVaUUplh1N
    SHrigUrMAn5yu1KU
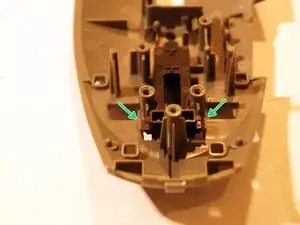
    • Unlock the two plastic clips.

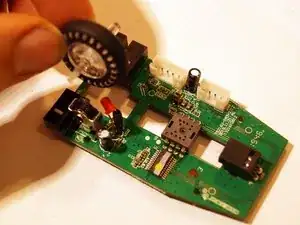
    • Use the flat end of a spudger to lift and remove the DPI button.

  16. tYNraWTNcSPNwYja
    • Overview of all parts.

Conclusion

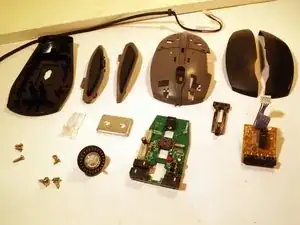
Reverse the steps to reassemble your device.

Xare

Member since: 15/05/24

1340 Reputation

0 comments