Introduction

The radiator on the Bose Soundlink Flex is what allows the speaker to have bass in the music. It works by using sound pressure to create deep pitches in music otherwise known as baselines. If the speaker seems to have little to no bass all of a sudden and the device is clean this may mean that the radiator is damaged and needs replacing. The radiator has two parts: one is attached next to the motherboard and the other is attached to the black back panel. Follow this guide to see how to replace the radiators.

  1. hSMmDFjtW3SIclrc
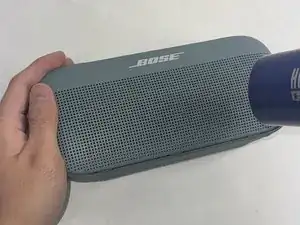
    • Use a heat gun to warm up the device.

    • This will allow for an easier removal of the grille and prevent damage to the device during the replacement. If you do not have access to a heat gun, a hair dryer works as well.

  2. GplQHpGbHQrpL2ai
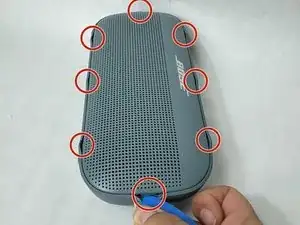
    • Use an iFixit opening tool to pop off the eight clips on the grille.

    • Be patient and do not rush this process as you may otherwise damage the device.

  3. dAbDVIBTiXUSwIQB
    dAbDVIBTiXUSwIQB
    uDA4b4ylC3yN5Zm5
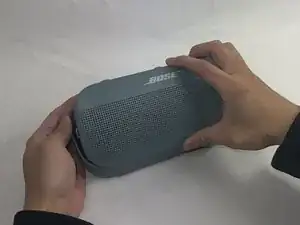
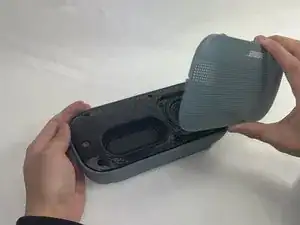
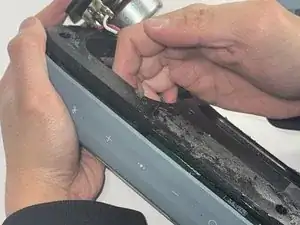
    • Once the clips have been released, the only thing holding the grille on is glue.

    • Apply minimal force and the grille should pop right off the device.

    • Reheat the device to warm up the glue if there is difficulty in removing.

  4. LSCREMRoyK3s3YKN
    LSCREMRoyK3s3YKN
    N2Kh5GPnmQOtyLBM
    yiraIT2b1sK2ElkQ
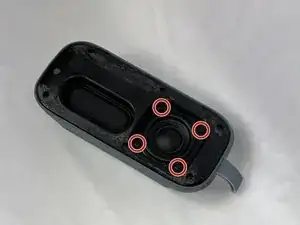
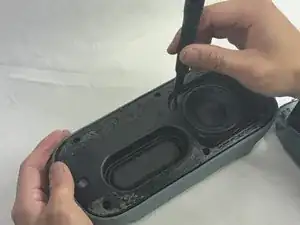
    • Remove the four 2.3 mm screws holding the driver in place using a TR8 Torx screwdriver.

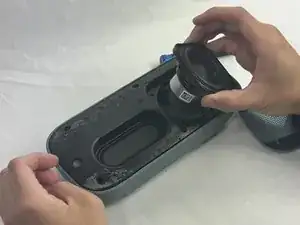
    • Lift the driver out, being cautious of the wires still connected to the device.

  5. VVXTNlPOTROBsA5W
    VVXTNlPOTROBsA5W
    t3WUeyRP43LWXHRP
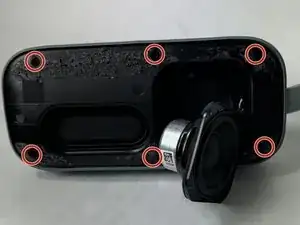
    • Remove the six 2.3 mm screws around the edge with a TR8 Torx screwdriver.

  6. KlgrWVAbjFW6kmPn
    KlgrWVAbjFW6kmPn
    1aShcjGAL6YHPK1q
    NKtN4u1ySOMsbNJr
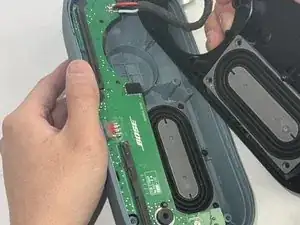
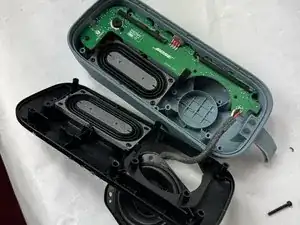
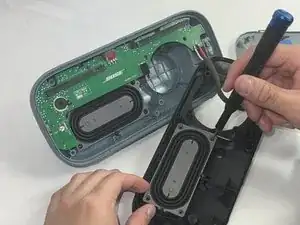
    • Pull the backplate off to expose both sides of the radiator.

  7. Ck6KyaQJWlnyFq2v
    Ck6KyaQJWlnyFq2v
    CyAbEGekNEluELXD
    GUQAj5o1LhhDbouQ
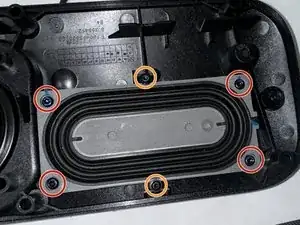
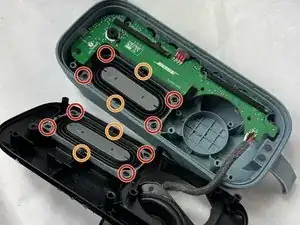
    • Remove the four 2.3 mm corner screws using a TR8 Torx screwdriver.

    • Remove the two 1.7 mm screws using a TR6 Torx screwdriver.

    • Follow this step for both radiators.

  8. tXoKH5UBjYgLQqP5
    tXoKH5UBjYgLQqP5
    TagdiRys3SyDWRJF
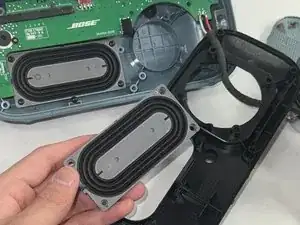
    • Remove the radiator and replace with the new radiator.

Conclusion

To reassemble your device, follow these instructions in reverse order.
Monica Silva

Member since: 19/03/24

124 Reputation

0 comments