Introduction

This guide provides instructions for the replacement of your Black and Decker TR1278B toaster circuit board.

  1. dTHWqqJucnifCVDV
    • Unplug the toaster before disassembly.

    • Remove the carriage lever by pulling it away from the toaster.

    Pulling requires a bit of force as the plastic lever is elastically squeezed over the metal tab and the tab as a little “step” that is visible from below the tab that needs to come out.

    Dan G -

  2. 1LtTffgS2KCVFDiF
    • Toaster will be turned upside down. Clear crumb tray or work over a paper towel.

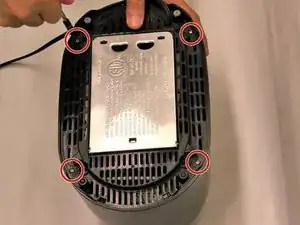
    • Turn the toaster upside down.

    • Unscrew all four 4mm screws on the bottom using a Phillip's head #2 (PH2) screwdriver.

    • Or a slightly different model has six screws that require an allen wrench (hex key). Ones that have a ball end will not work. I had to use one that had more of a Star of David, pointy pattern to it.

    my screws are completely stripped, you can even see it in this image on the left

    loe ;loele -

    Philips screws would be much better so one can apply more controlled pressure. Screws are also made of cheep metal and strip out easily. Be careful.

    Matt Yadlowsky -

    I was able to get the screws out with a Grabit Speed Out bit.

    https://www.thegrabitstore.com/collectio...

    Matt Yadlowsky -

  3. QVwck5HPAj3YYclM
    • Detach the bottom from the front cover using the plastic opening tool.

    Watch out for opposite side (front end) 2 folding metal clamps that hold the front end and must be lifted up at least partially before the next step of lifting the whole cover.

    Note also that opening with plastic tool here requires a bit of “force”. I came at it from the side with a thinner plastic tool to help (not unlike trying to remove a tight bike tire from a wheel rim)

    Dan G -

    Watch for two folding metal clamps holding the front end. They must be at least partially lifted up before the next step of lifting the cover. Note also that inserting the plastic tool requires some “force”. I came at it a bit more from the side with a thinner plastic tool (cafeteria plastic knife) to help lifting and insert the main plastic tool, not unlike trying to remove a tight tire from a bicycle wheel.

    Dan G -

    WEAR GLASSES! For more recent edition (2022 perhaps?) there is a plastic piece that would not budge with the pry-tool: ended up shooting up into my lip as I detached the two halves

    Mark -

  4. LgNgXkwSp4tuIGBw
    • Turn the toaster right side up.

    • Support the bottom. The ribbon cable that connects the toaster to the front cover can be damaged.

    • Lift the front cover.

    • Lift carefully. Again the ribbon cable can be damaged.

  5. nOdjOPYFBY3oCAIN
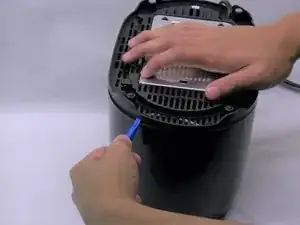
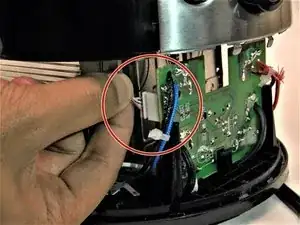
    • Detach the bundled cable connector from the toaster by carefully pulling it away from the circuit board.

    This seems incompete. What next after detachingthe bundled cable connector?

    jonathanlshaw -

  6. pFMLQmZVNjqTHIt5
    • Locate the circuit board inside front cover.

  7. W3dEXpAFZKQYH2KC
    W3dEXpAFZKQYH2KC
    5iks3vdmLZygoYES
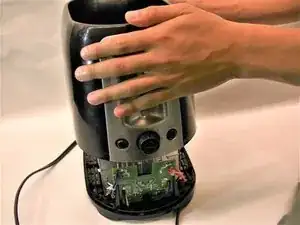
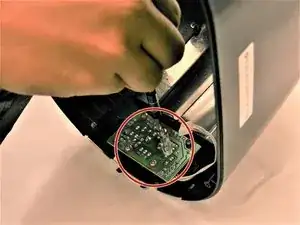
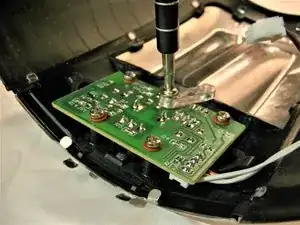
    • Use a Phillips head #2 screwdriver to unscrew all five screws that attach the circuit board to the top cover.

    • Remove the circuit board.

    • Inspect the circuit board for any burnt or otherwise damaged components.

    • Use a soldering kit to unsolder the damaged component.

    • Once the damaged component has been unsoldered from the circuit board, remove (and replace) it.

    • iFixit Soldering Guide.

Conclusion

To reassemble your device, follow these instructions in reverse order.

Brea-Monique

Member since: 15/02/17

399 Reputation

One comment

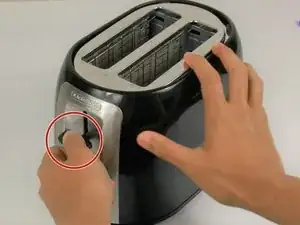
These instructions are wrong. The screw and clear plastic piece seen in step 7 doesn't go there it actually secures the power wire at the base of the toaster and technically isn't needed. The 5th hole is for the plastic catch of the heat selector knob.

Mr. S -