
Introduction
-
-
If you are ok voiding your warranty and want to continue, I recommend reading through this guide, particularly the steps covering the actual keyboard removal and replacement, before you start this process.
-
If in spite of these warnings, you still want to replace your keyboard, begin by removing the bottom of the case.
-
-
-
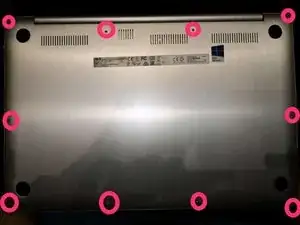
Remove bottom case. Remove 8 torx T4 screws from edge of bottom case as well as 2 phillips screws under the rear rubber feet.
-
-
-
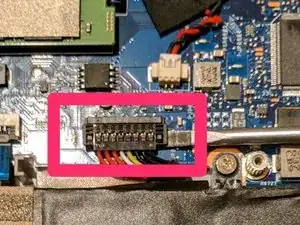
Disconnect battery cable from the motherboard. Carefully pry up each side of the connector to free.
-
Bend cable back from connector on motherboard so it doesn't accidentally reconnect while you are working on it.
-
-
-
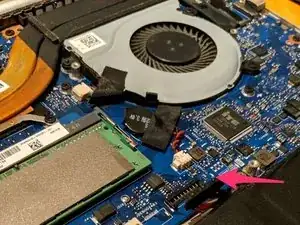
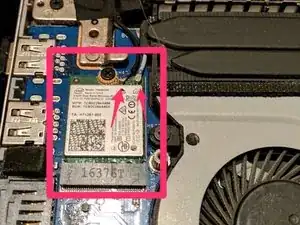
Disconnect antenna cables from wireless card. Carefully pry up each connector. Note black wire connects closest to retaining screw. White is furthest away. Once both are disconnected, move white wire so it is free of the motherboard. Note the routing of the wires around the hinge so you can replace them correctly during reassembly.
-
-
-
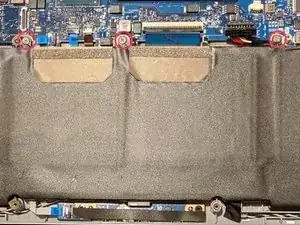
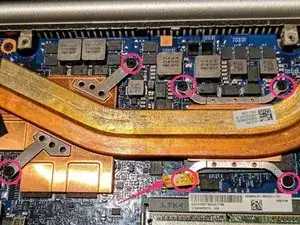
The heat sink is held down by two plates. The right plate, covering the CPU, has 4 screws. The left plate covering 4 smaller chips, has 2 screws.
-
To unscrew the right plate, carefully pull up warranty label to expose screw. remove 4 screws.
-
To unscrew left plate, remove two screws. Carefully detach black cloth tape from heat sink, leaving it attached to the left cooling fan.
-
-
-
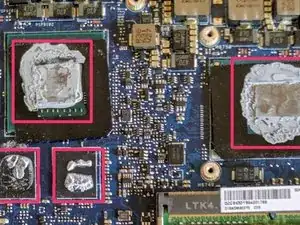
Once all six screws are removed, carefully pry up heat sink. Thermal paste acts like a weak glue, so slowly pull it up off the underlying chips. Note the locations where thermal paste will need to be reapplied on the motherboard.
-
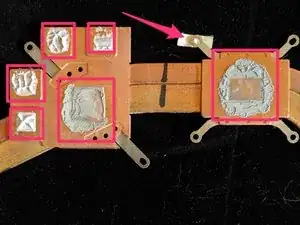
Also note where the thermal paste is, and how much, on the underside of the heat sink.
-
-
-
Once the heat sink is removed, you can remove the cooling fans.
-
To remove the right cooling fan, remove 3 screws holding fan in place. Note placement of black cloth tape on left side.
-
Find the power cable for the fan underneath the black cloth tape. Pull the cloth tape away from the motherboard, leaving it attached to the fan.
-
Gently work the power connector loose. The connector slides back, parallel to the motherboard.
-


To reassemble your device, follow these instructions in reverse order.